Sunday 29 January 2017

The XS Triple Sidecar - Sidecar brake (part 3)

As you may remember from the end of the last post, there wasn't exactly a whole lot of meat left in that swingarm. So a new insert had to be made on the lathe, tapped to M16x2 on the inside, so if I ever bent the axle I could (relatively easy) make a new one on the lathe.


Now this time I played around with some Sandvik inserts I bought a while back and honestly the first attempts to work with them were disastrous. After reading their speed and depth of cut requirements, I was shocked, bearing in mind that my old Matra MDR2A is a plain bearing lathe from the 1950ies and was never meant to be run above 1200rpm for a prolonged time and only shortly above 1500rpm, which is why I decided that 1800rpm should be doable with some good modern oil and a bit of "force feeding" and guess what...


... like a hot knife through butter. The results are amazing: The surface is almost mirror-polished, chip-breaking was nothing to write home about, but I guess that's due to the fact that I was still running on the lower limit of what the inserts are made for. I really have to try one of these inserts on my mate's industrial lathe, which can spin to almost 2000rpm.

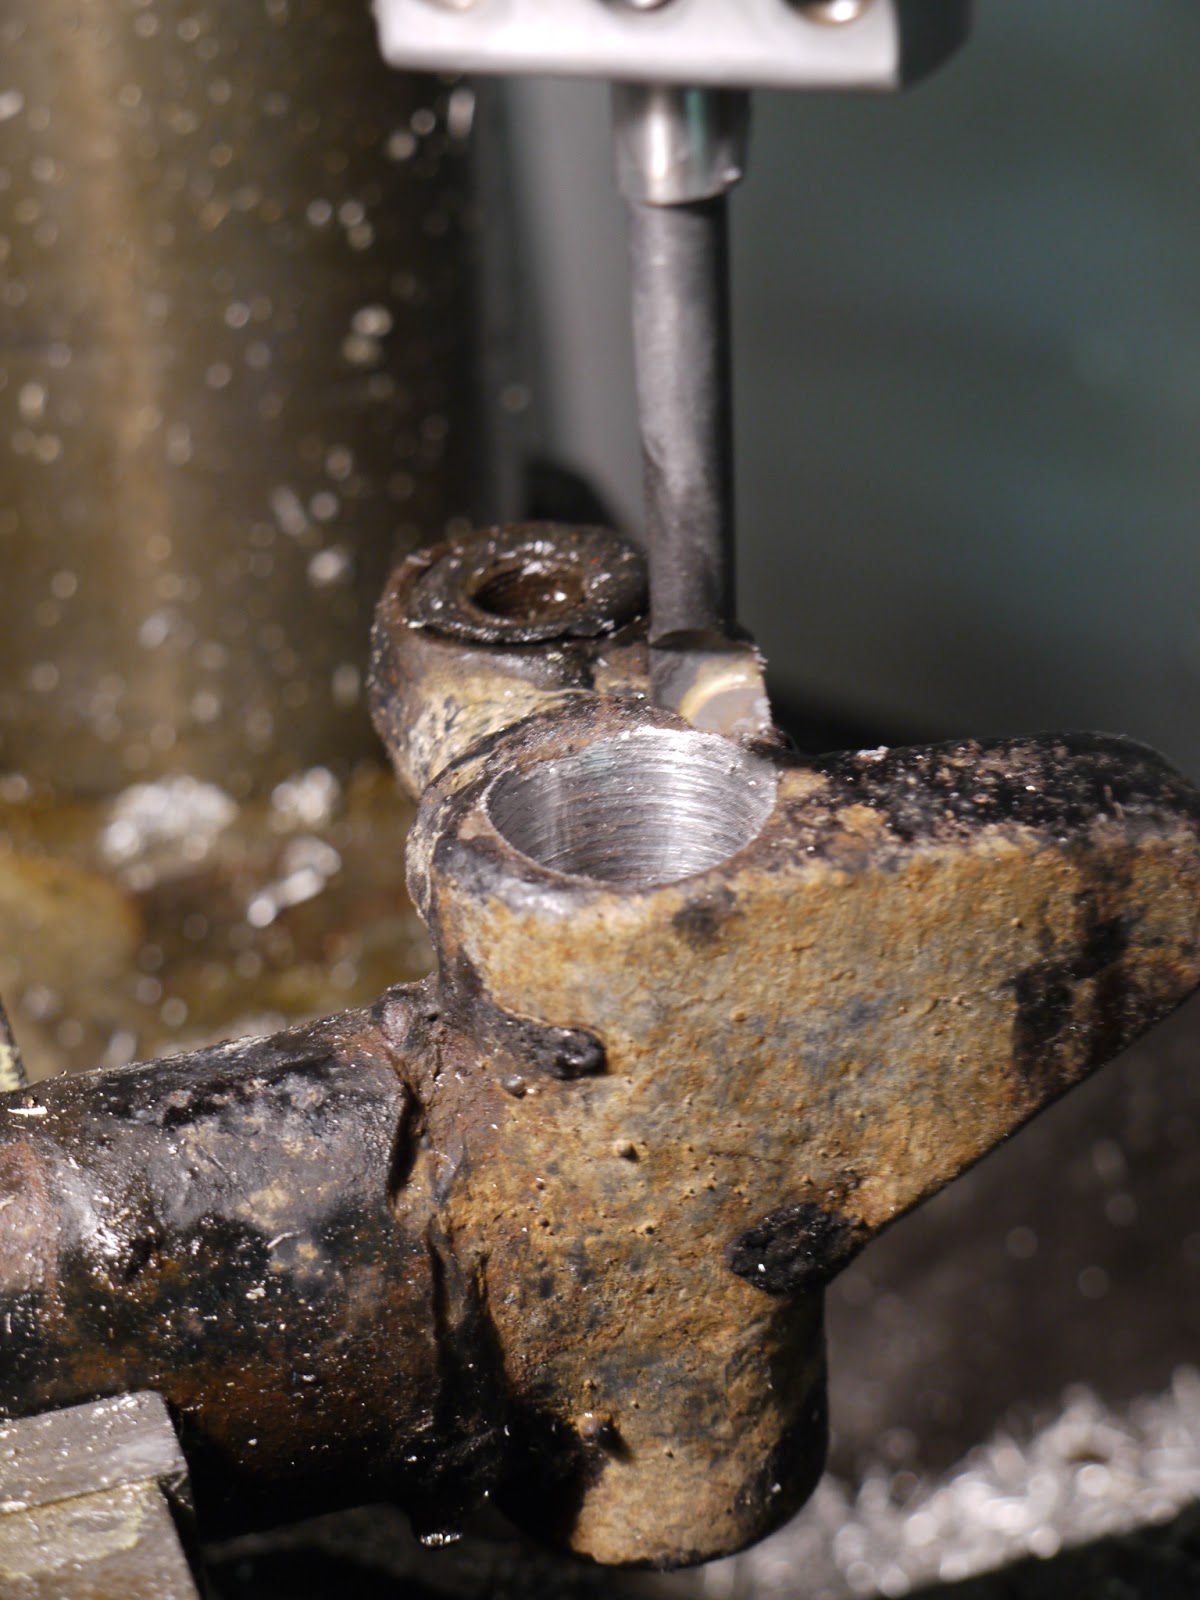
This also reminded me, that I still had a MT3-TPUN-something-something holder for the mill and as I wanted to get the wheel as close to the swingarm as possible some 10mm had to be taken off the old axle mount. Being smarty-squarepants junior, I decided to read up on the specs of the inserts and guess what, full throttle and pretty much 10mm in one go at 1mm feed was (again) the lower limit.


The chips had a beautiful straw colour and it was a matter of seconds. I've had a harder time milling through some tin-can-grade aluminium in the past. 


The only real failure of the day was the moment when I tried to press in the new axle holder into the swingarm and I had to ask round for favours and press it in with a hydraulic press. A bit of will (and a good vice), you can create up to nearly 5T of pressure in a normal vice.


That's the unthreaded axle poking out of the wheel...


... and that's literally 20 minutes of manually tapping a M16x2.00mm thread. (I really have to fix the power-feed and thread cutting facilities on my lathe...)


The finished product: An axle that can be swapped out, whenever you feel like it and pretty much all ready to go back in.


Friday 27 January 2017

The XS Triple Sidecar - Sidecar brake (part 2)

And I should just have stopped there, called it a day and bathed in my own awesomeness. As I might have mentioned a few times before, this is a really old Soviet sidecar. One of the reasons to date it back very far (1960ies or 1970ies at the most recent) amongst welds that actually deserve the name and a hefty gauge steel sidecar (later models use a lot thinner steel), was the short sidecar axle and the lack of mounts for a sidecar brake. As it is black it's rather unlikely that it came off an official sidecar as used by the police, which means this sidecar is probably off a K750 or the like. (Which incidentially also goes along with what Pjotr the seller told me.)

Now on later models, swingarm axles are actually just a simple press-fit. A hefty one nevertheless and it is not unheard off, that the axles are crooked in brand new swingarms, because the combination of Vodka and a 20T-press is a healthy recipe for disaster. Well as I had to find out, older axles are welded in.


But sometimes when brains don't work one has to restort to more apt solution. Out came the angle grinder and then we'll "just" quickly drill out the old axle. (I guess you can see where this is going now...)


As the bore the axle was welded into wasn't perfectly parallel to the swingarm pivot, the boring head came out and I decided to bore the hole slightly undersize and then bore it through in one final go. Unfortunately my last (long enough) boring head shattered its carbide insert and that was the end of it.


So another solution had to be found: It came in the shape of a 25mm and a 28mm drill. Both of horrid Chinese import quality, but after some "tuning" to both ends - no idea what kind of taper that was, but definitely not the advertised MT3.


That's quite a stunning hole I hear you say ... having spent 2 1/2 days with it, I was pretty close to baptising and naming it. But as usual the proof's in the pudding and it was well about time to fill that hole with a bit of awesomeness.

Wednesday 25 January 2017

The XS Triple Sidecar - Sidecar brake (part 1)

Do you remember the stories that start with the phrase: "I'll just quickly..." in this case the sentence went on with: "swap the sidecar's wheel axle out as it is too short."

Well, that was Sunday afternoon. Now it's Wednesday and I didn't take it easy. At all.

But first things first, lift the sidecar.


Remove the mudguard (and find out that it's on the piss, because somebody in the past must have lost the rear spacer) and start pulling out the swingarm.


Pull out the old 5-foot crowbar to "gently" "persuade" the half axle out of the swingarm. Worked a whole lot nicer than anticipated and even the rubbers (aka. swingarm bearings) are still fine. Take that modern crapitalist engineering with your fancy taper roller bearings. ;-) Seriously, riding a solo Dnepr with rubber swingarm mounts is scary...


More about all of that in the next installment, because if you think that was the difficult part...

Sunday 22 January 2017

The Turbo TR1 (part 14) - It's never too late for a happy childhood

It's gone a bit quiet around the ol' Turbo, right? Well let's just say, the legendary fail-possum (RatbikeZone-Readers will understand) has struck in form of that T3-turbo neither being properly balanced and the positive obviously not being the first choice for a draw-through setup.

Dama con l'ermellino - Leonardo da Vinci
(Who said there's no such thing as classic education here, eh?)
Originally my plan was to use a GT1544 from an old Opel Turbodiesel and rebuild the whole lot to a blow-through turbo. This would have been the right way to do it, but also very complex and time-consuming.

Luckily I stumbled over a couple of posts, that a CT20 turbo as found in the old Toyota Hilux "2L-T" engines is actually carbon sealed (at least certain versions) and is quite a bit smaller than the old T3, so spool up should be better.


This is where my friend Mouse comes into play as I found a CT20, which seemed to tick all the right boxes and was being sold at a breakers not too far from him. A matter of hours laters, I was sent this picture:


It'll be a while until the horse-drawn carriage of her her majesty's finest Royal Mail will have the parcel delivered to the old continent, but it will.

Saturday 14 January 2017

The XS Triple Sidecar - sidecar beautification

With the bike tackled for the bigger part it's well about time to turn towards the sidecar and all the mods I want to implement there. Quite honestly the boat was in good shape, nevertheless there were some superfluous holes drilled into it, which needed fixing and I had some glossy black paint plus some rust primer kicking around, so why not get into it right away.


 A little pro-tip: Paint the inside of your sidecar trunk white (or in some other bright colour and you'll be amazed how much easier it is to find stuff inside: (Picture was taken without flash!)

When buying my earle's forks, I made a really good deal (about a third less than originally anticipated), so there was some money left in the budget for an all new seat and tarp.


All the goodies lined up. Not sure whether the next update will be on the forks or the sidecar swingarm/sidecar brake, but now it's all here and I just to do it!


Thursday 12 January 2017

SR500 hack - She's like the wind...

... as in: she's sold. Naturally the stubborn old girl decided NOT to play along and cut out on her last journey to my workshop. So a bit fettling was due the next day. (Because of course you brake down late in the evening, when it's cold and dark!)


My first suspicion was that the central nut on rotor had come loose, even though I was pretty certain, that I used Loctite last time. (Nope all good)


Then I grabbed a bottle of my preferred penetrating oil to lube up some of the plugs on the bike and what did I find: A little sign from my (better) half... Which now brings up the problem: May I ever throw away that bottle or how can it be refilled?


As a matter of fact, the problem turned out not to be electrical, but way more down to Earth: Fuel filter was clogged up from the water in the tank. (One of the downsides of using the bike in every weather!)


An SR500-carb can be taken apart directly on the bike as long as the patented carb-repair-hammer is used. (Please ignore all the tools on the left in the picture.)


And there you have it: Muffs removed and the bike's ready to go again.


Sunday 1 January 2017

The XS Triple Sidecar - cleaning the roundslide carbs, brake rebuild and filling some holes in the tub

Having noticed *duh* that the year is coming to an end and I haven't quite finished the sidecar over the Christmas holidays (not that I thought I would), it was well about time to get my hands dirty and get some more stuff done on it.

First thing was to dive into the Mikuni VM36es, which came off a Polaris snowmobile. The jetting is a bit hefty for a 4-stroke at #50 pilots and #230 mains, but the slide cut out is ok and both needle and needle are just slightly richer than on the 4-stroke VM38-9s I run on my TR1 and won't do harm as the XS will mostly be run part throttle (it's a sidecar not a racebike) and from my first XS-sidecar I am well aware that a bit of extra cooling can't do harm.


So that's what I started with. They were very clean on the inside, but rather filthy on the outside. But more importantly they came with and without a few things, which makes using OEM carbs so annoying at times:
  1. They come with cable chokes.
  2. Except for a slightly weird retainer clip for the throttle cable they are perfectly standard VMs on the inside.
  3. They come with rubberised float needles.
  4. They came with 3-way junction boxes for both throttle and choke. 
Now onto the junction box. This is obviously not meant to be taken apart as I found out and so I ordered a 3-way junction box from Amal (244/2080), which is meant for both Triumph and BSA triples.


Unfortunately the cables are glued into the box and I don't quite see how I can get the center piece out. If you know, please send me a mail or even better drop a comment below this post so other people can benefit as well.

When taking the carbs apart, it can be vital to support  the float-pin-towers, in case said float pin is a bit stubborn. (Funny arrangement by the way, the floats are part of the float-chamber on those VMs!)

Ultra-sonic cleaning of the carbs in order to remove all the schmoo on the outside. 


Before and after. 


I let the (empty) bath set over night, but it's no use. This particular batch of the cleaning solution can't be under no circumstances re-used. 


Result!


If you've read any of my older posts, you know how the (dis-)assembly works. But honestly, I've never seen such a dirty carb. (Not surprised the pump was dead as well. Both came off the same bike!)


... and filled in some holes as I don't plan on running a rack on the back of the tub. Well at least not the stock one. I do have one in storage which is a lot bigger, but doesn't require any visible holes on the outside. Oh and yes, there were some other holes I had to fill in, but those were rather hard to take pictures of, so you simply have to take my word for it. 


 Next steps will be the installation of a new sidecar axle and building the sidecar brake, which I hope to have in place by some time next week.