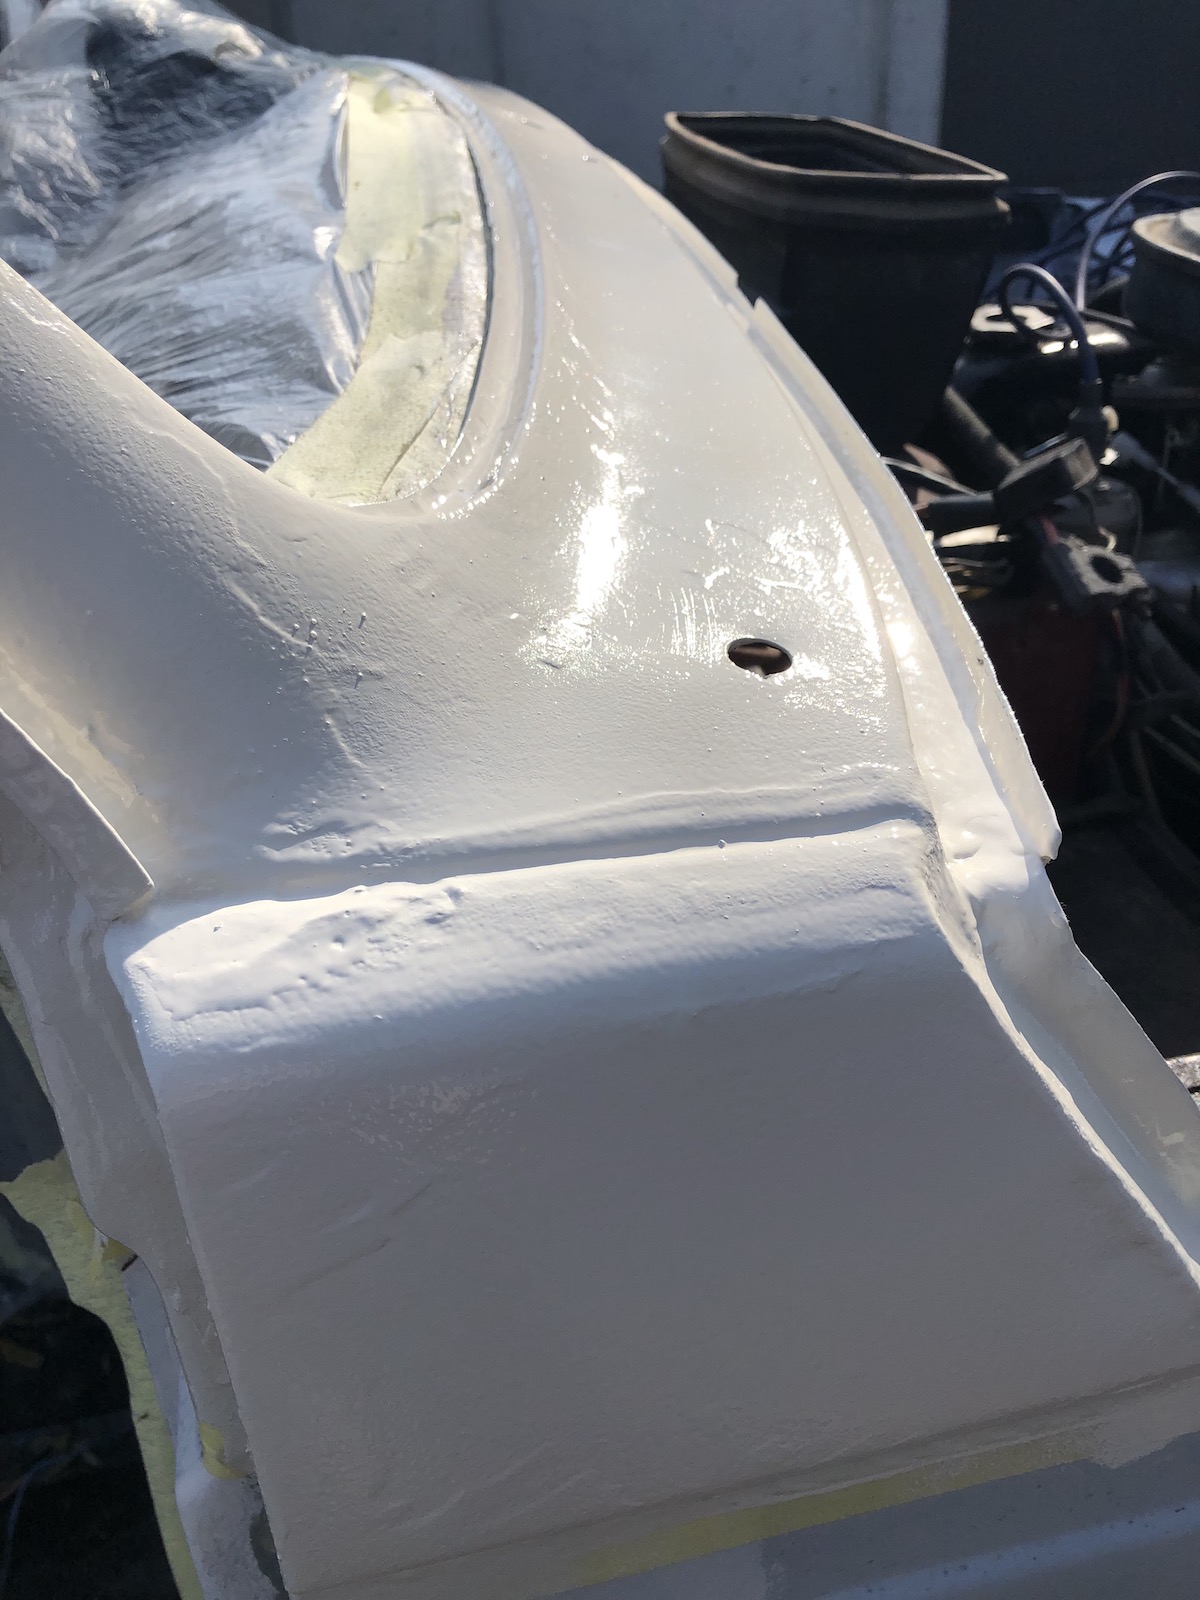
It was one of those beautiful days, the sun settled behind the trees, most of the inside was painted and now to tackle the matter of the outer body shell. Just quickly remove approx. 100kg of filler that were applied more in the way a sculptor would apply it in a baroque church than a bodywork professional would apply to a car, but I am sure they had their best intentions.
Obviously their best intention was to hide a lot of rust holes on the body.

Or what can at best be described as somewhat atrocious attempts in fixing the body work.

As you might say, but hey, what if this was a homegamer just like you, who did his/her best to keep the old comrade on the road? Fair point, except I know for a fact (i.e. receipts) that this was done by a local bodyshop.


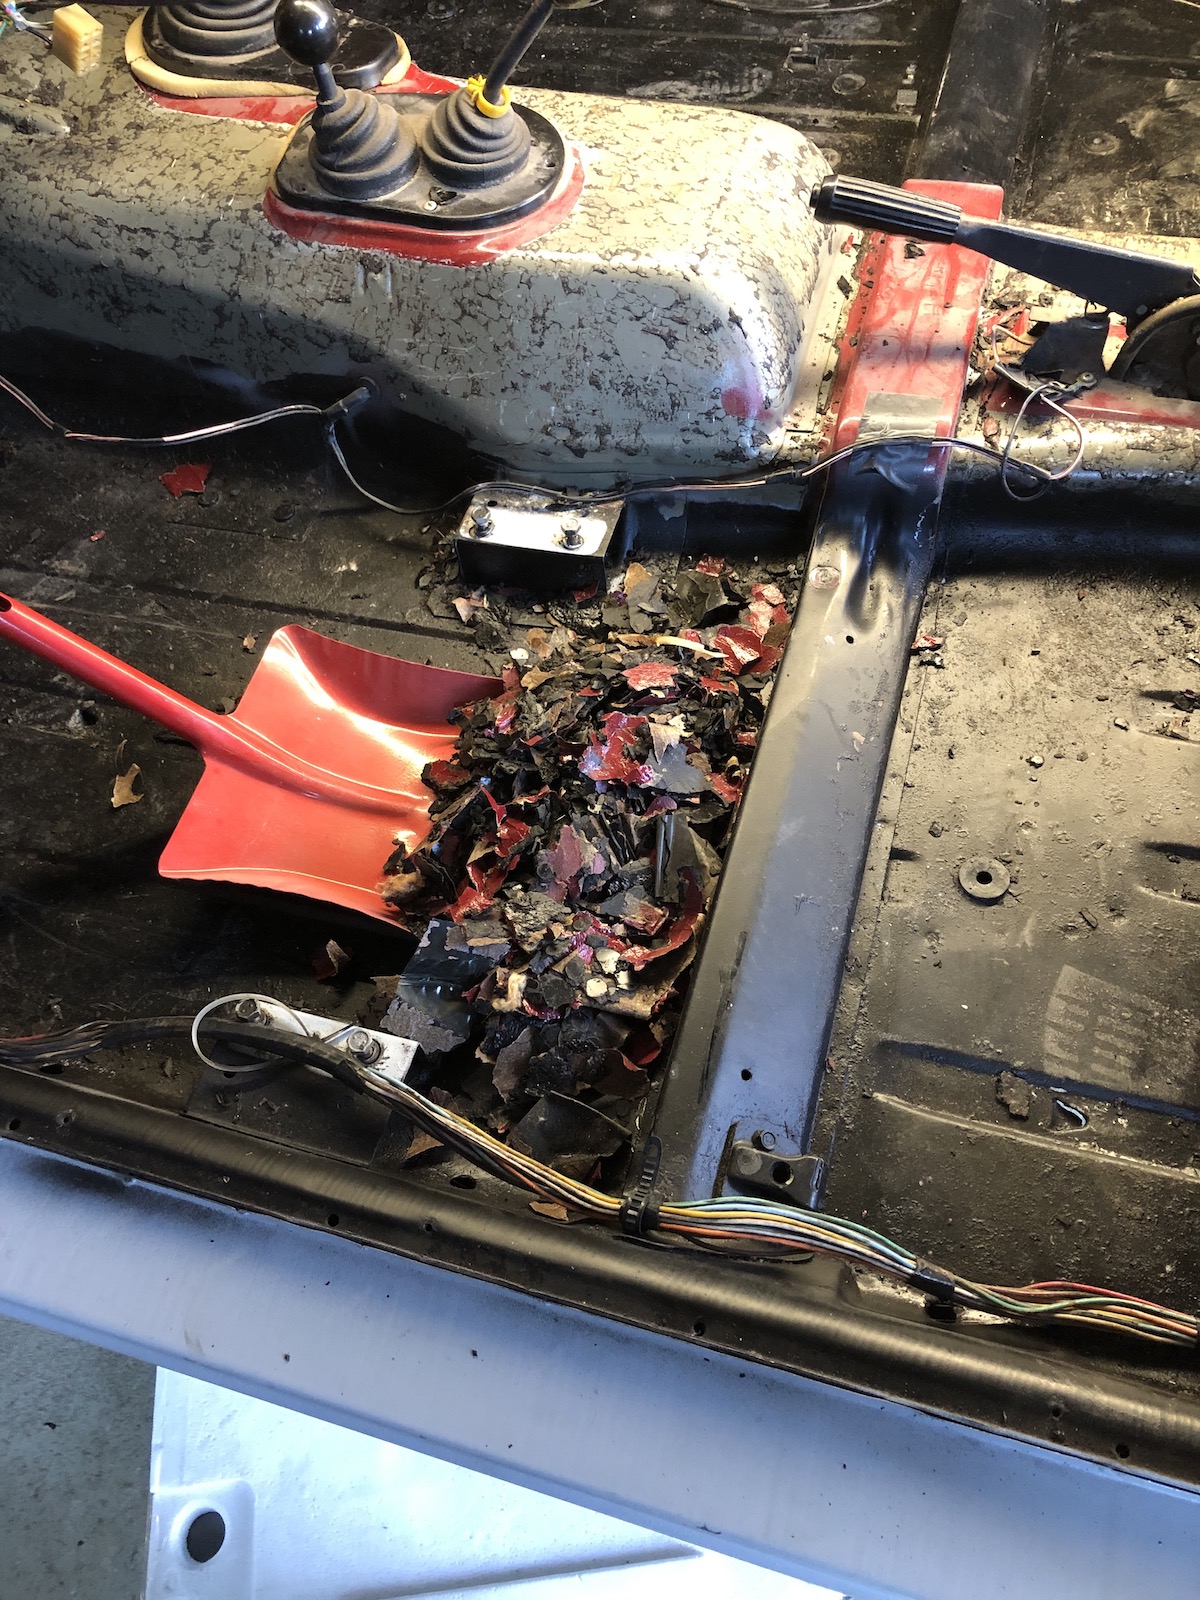
As the right side A-pillar/sill cover was rotten a bit of cleaning was due, also it had to come out in order to be able to fix the newly found rust hole(s).


At least the Comrade, by now, was running half decent and driving back and forth between my workshop and the garage was going swimmingly.

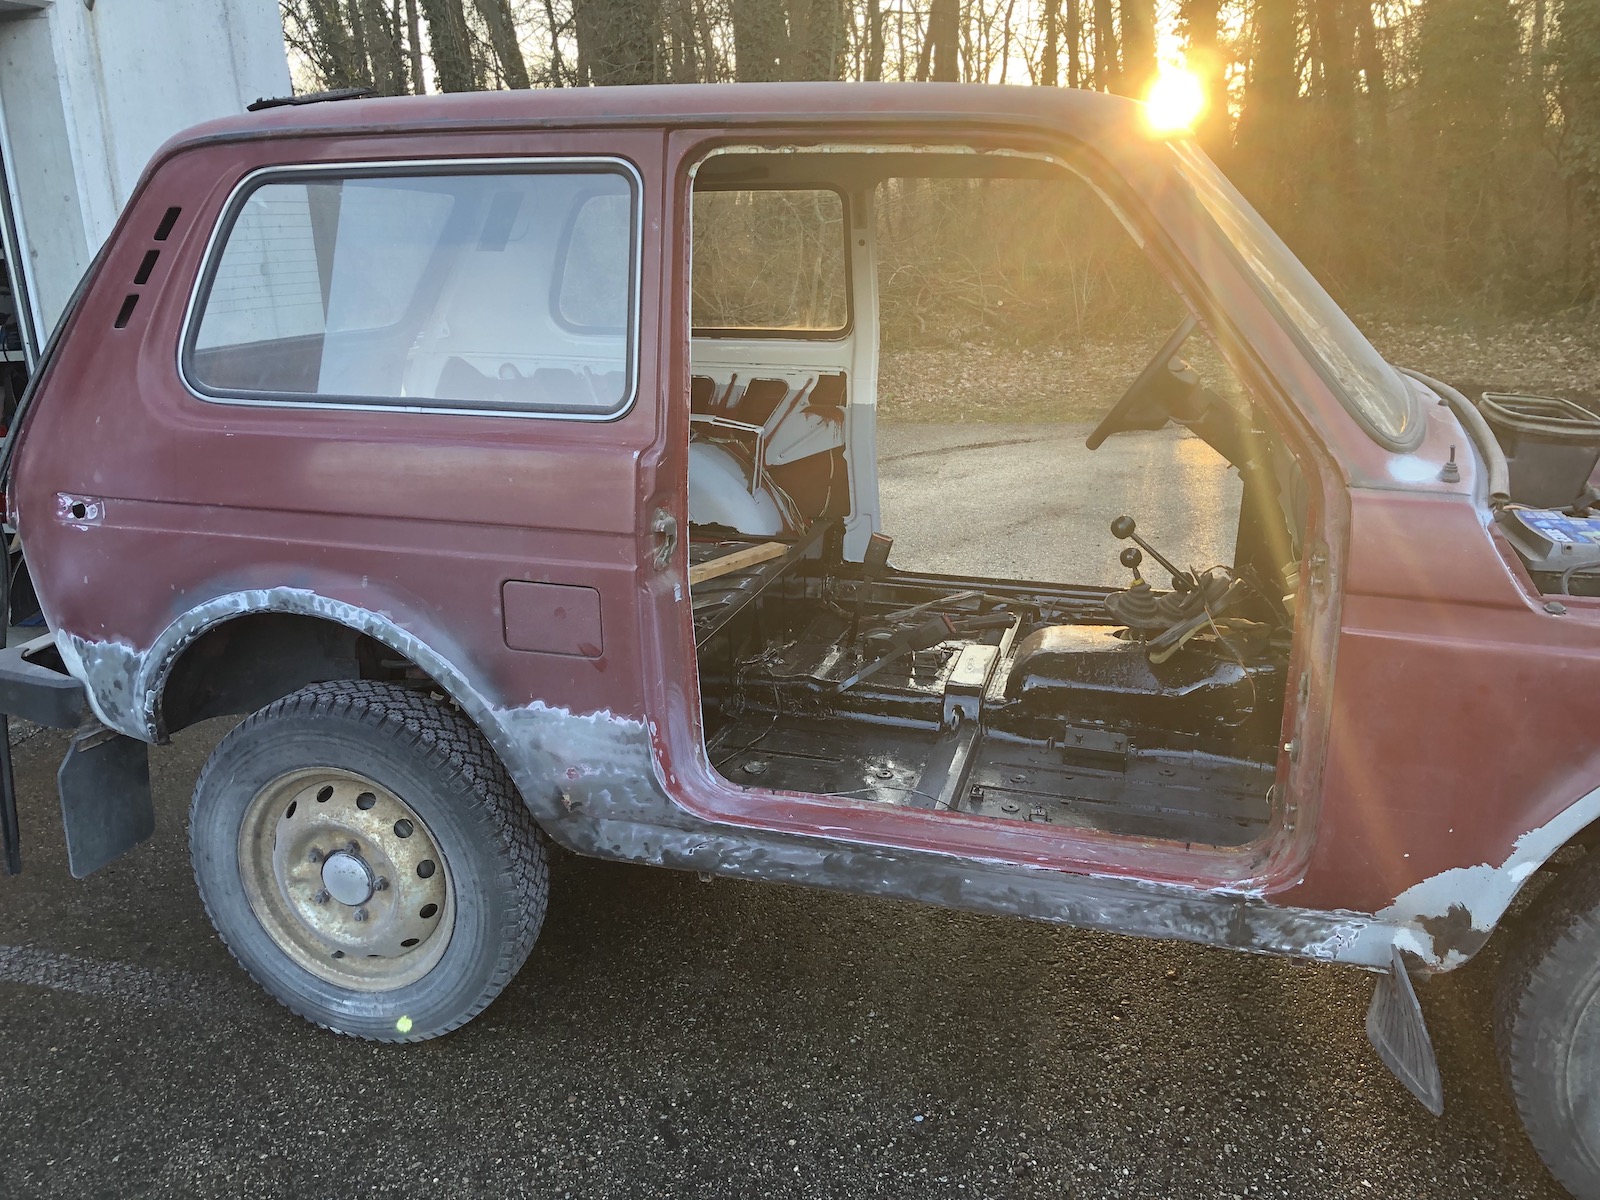
As I wanted to paint the roof anyway, I had to remove the tailgate (or what was still left of it - that's another post) only to find out that the rubber seals underneath the hinges, weren't exactly in a very sealing mood any more.

Which, whilst annoying, wasn't all THAT surprising really. The fact that body was only primered underneath wasn't very surprising either. My eyes got way bigger though, when I found out that part of the reason, why things got a bit wet in the boot-area was down to the fact that most of the drip rail (which also holds the weather strip) was so rotten that water could just pass it by entirely.

It was at this point that I asked my dad for some help and decided to take the windscreen out. Only to find some rather minor surface rust in areas were even new Nivas are known to be completely rotten within three or four years.

Comrade didn't disappoint though and kept me sufficiently entertained.


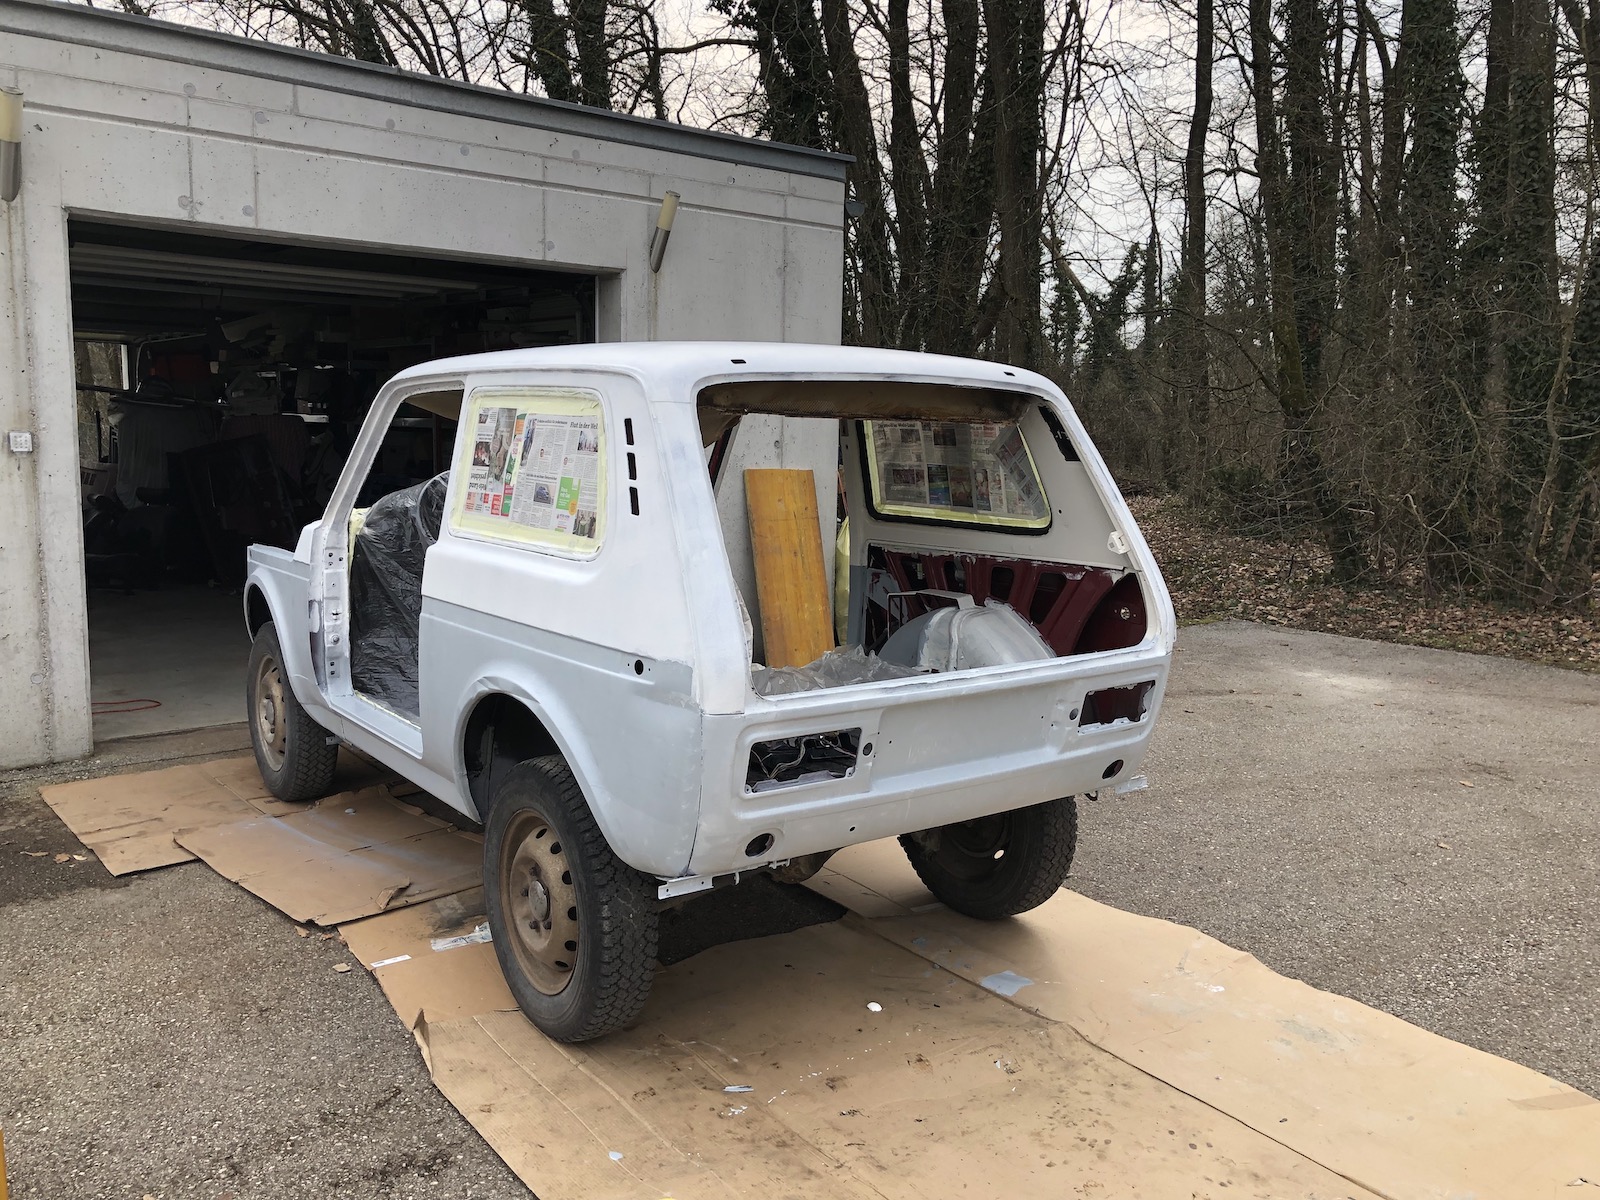
Filled in the missing bits in the rear as well.

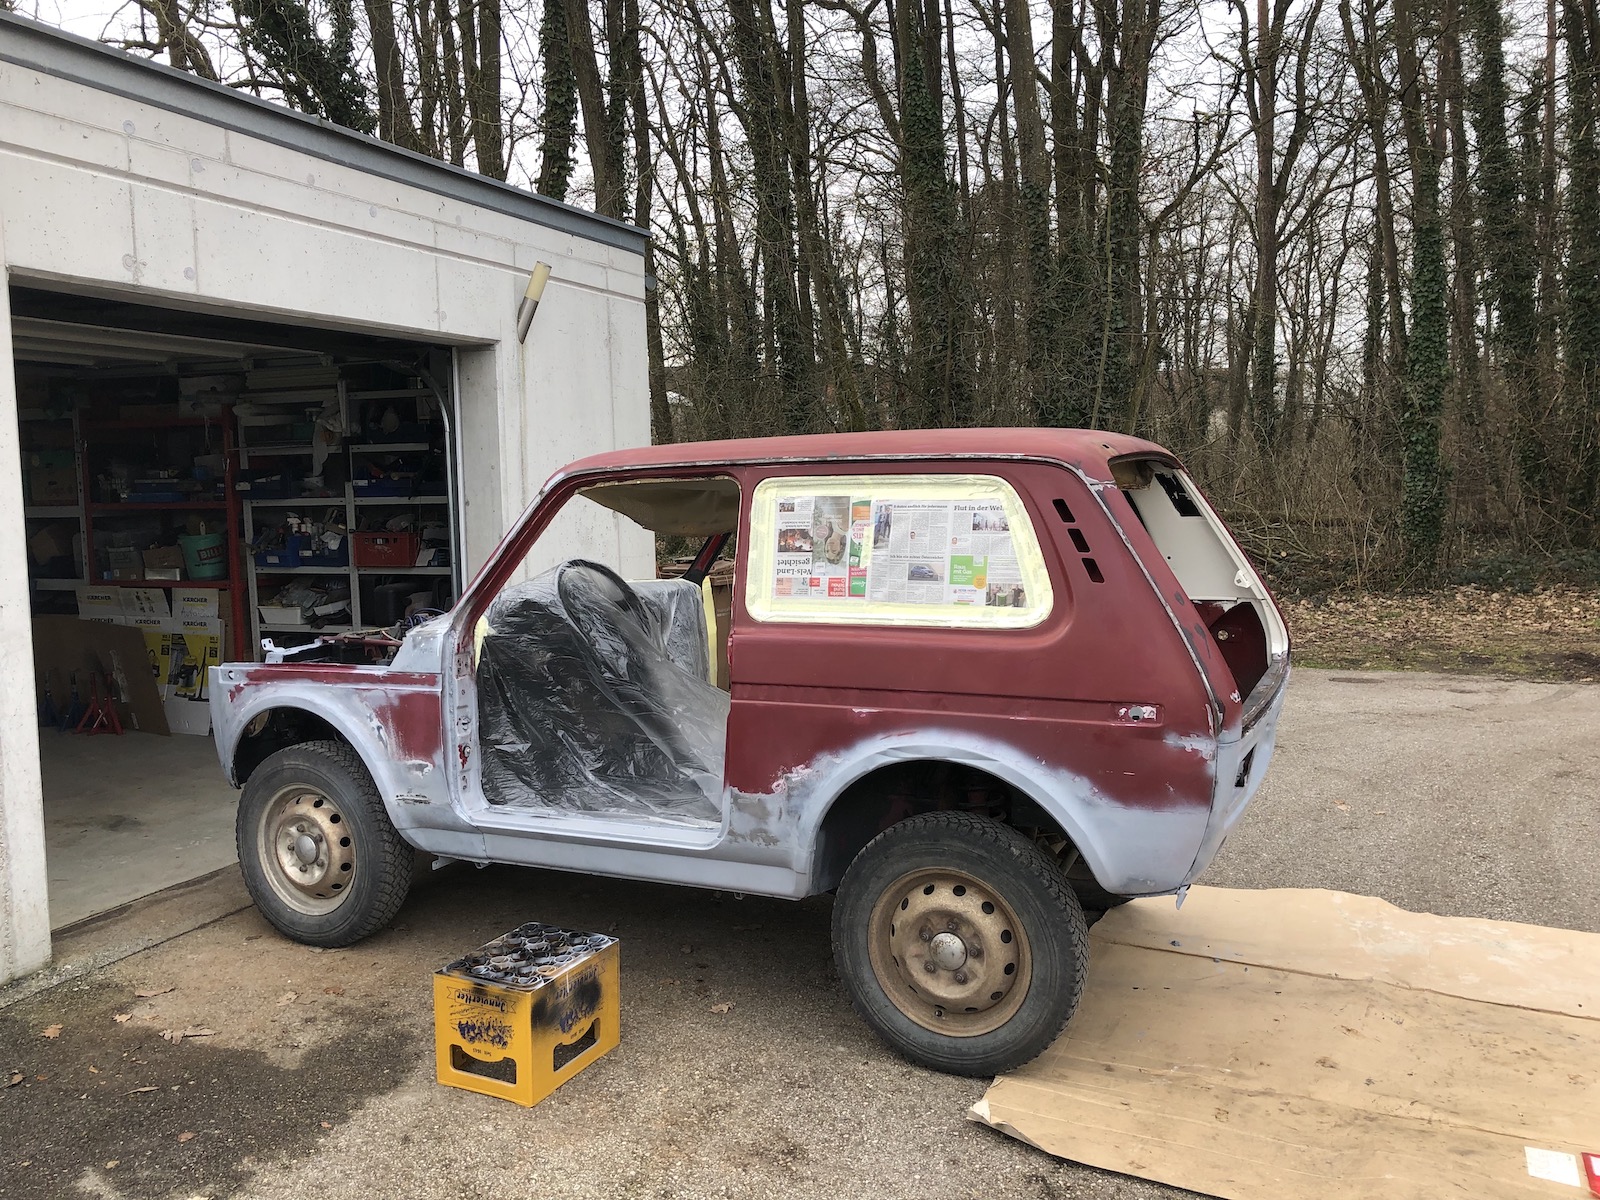
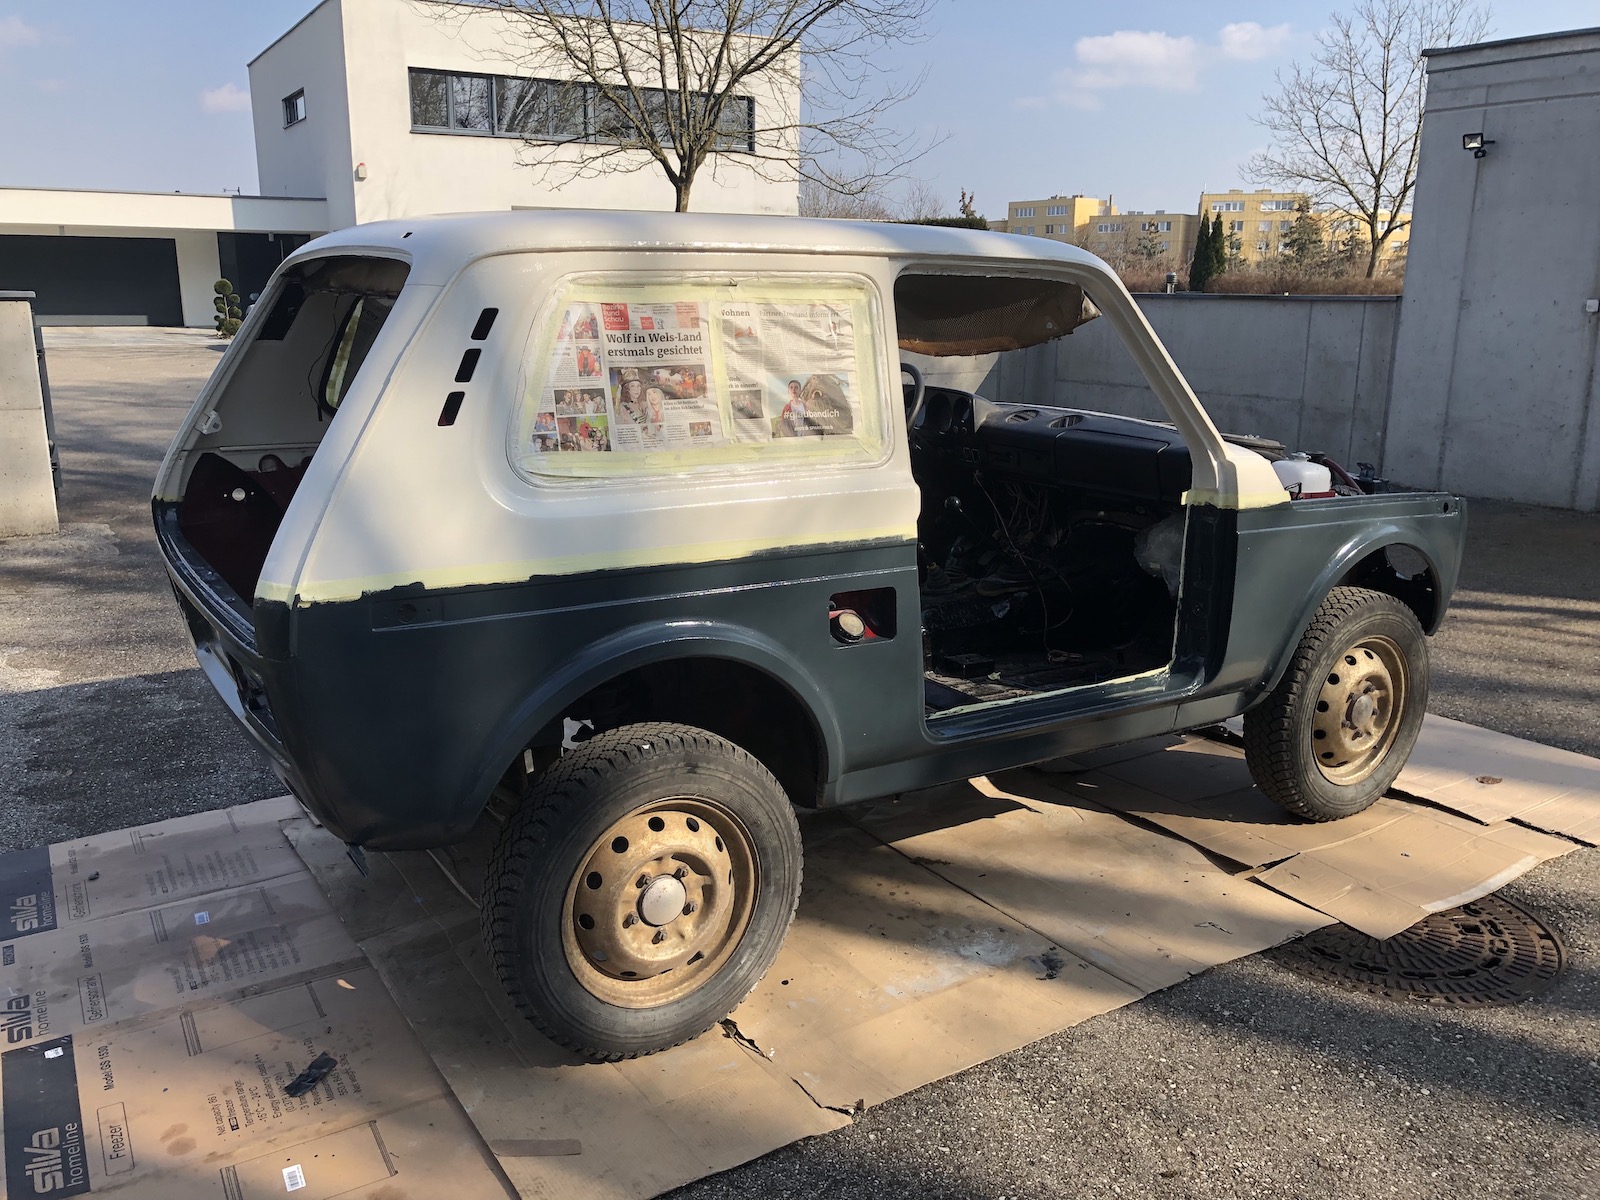
Masked the remaining two side windows (yes, I should have just taken them out as well) and went for it.


To say that the relationship with the Comrade was a bit loaded at the time is a mild understatement.

A day's rest (or maybe a bit more) and actually seeing it in primer helped substantially, but also showed just how much more work making the Comrade look HALF decent would be.


A few friendly people warned me that painting a car with a roller would leave a very different finish to what can be achieved with a paint gun. I personally like it a lot and it fits the agricultural nature of Comrade very, very well in my opinion. After the second coat most of the imperfections of the original paint were nicely covered and didn't show up anymore like in the picture below. The somewhat grainy structure is exactly what one should expect when rolling a car. If you don't like that, rolling a car in paint is probably not for you.

For some weird reason, I am pretty sure that this paint has some almost magical UV-light reflection capabilities, because even when painting the lower half in a darker color, which naturally also heated up more from the sunlight, not even remotely as many bugs were magically attracted to the paint.

And a final one for the "why don't you paint it nicely"-crowd. (Also the weld repair is invisible now, even without using any filler.
That's it - Comrade car in his final livery.


For me the hardest part up to this point was to refit the windscreen, never done it before and with a new gasket it was somewhat stressful to say the least.
A couple of unsolicited recommendations from my side: First and foremost, fit the new gasket to the windscreen a couple of days in advance and get someone to help you with this task. THIS was the most challenging thing so far on the whole car and easily took more than an hour until it was in place and stayed there.

Second (aside from getting a mate who has done this before lend you a hand or two), get a decently sturdy rope and PLENTY of soapy water. Put said rope (washing line appears to be a great size) between the correct pair of lips.

Lastly, install it at the bottom and align it left and right and then one of you two pushes (gently) against the windscreen, whilst the other one SLOWLY pulls out the cord. If the cord snaps, trim removal tools or bicycle tire irons are just the tool to get the job done. Also while the seal is still wet, the windscreen can be moved around a bit until it sits nicely. (Check out the upper corner, a bit of wiggling sorted that right out.)


Just in case you're wondering, all of the above is somewhere around three to four weeks of very intensive labour. It's incredible just how much time goes into masking, sanding taking stuff apart, reassembling, etc.