Saturday 29 May 2021

6x26-mill ... is alive

So first of all I guess, I owe you a picture on how to lower a milling machine's undercarriage WITHOUT taking the mill off it's pedestal.

And then there's the other bit, as the title says, it's alive by now.


Obviously there was a 50:50 chance of doing it wrong and guess what... well the motor came wired up correctly to run CCKW from the factory. I also moved the switch from the knee to the column, because oil had already started dripping onto the switch and the cable routing was terrible from the factory. 

Sorry for the lack of pictures/videos of the machine making some serious swarf, I simply haven't had time yet.

Sunday 23 May 2021

A new mill named Knuth (6x26 mill)

Knuth... sounds German, right? Well, this fine young lady is actually of Taiwanese origin and aside from it's German designation Knuth FF-20, it is generally better known as a 6x26-mill. I had been on the lookout for one of these for quite a while, but as they never were as popular as other models, they came up rather rarely on the second hand market and new they were much to expensive for what they actually are. 


As can be seen, Knuth is fresh from the factory... but she left said factory 16 or 17 years ago and was patiently sitting in a German garage for all those years, waiting for me. The protective wax over the course of time has turned into a sticky gooey substance, which was rather unpleasant to work with, but mostly protected all the metal parts. 

In order to get it onto the stand (and to clean it) it had to be taken apart, which lead to the only (prolonged) head-scratching moment during the whole disassembly and later re-assembly.


This bit of contact rust was pretty much the only bit, where rust had formed and after a bit of scotchbrite-massage, all that was left of it was a slightly darker spot on the ways.

With the table and knee removed, the base casting can be split once more as the column is held on with four M16 bolts and while not exactly "LIGHT", with a willing helper they are totally manageable.

I re-used the stand of my old RF-25 mill as it was about the right size, aside from having to drill 4 new holes it was a rather close fit.

But once the knee was installed, the drama started: about half way down it would start to bind up terribly.

So at first I did what any good engineer would do, I checked the adjustment-gib for straightness and it was closer to a mechanical banana than anything else. Gib: checked.

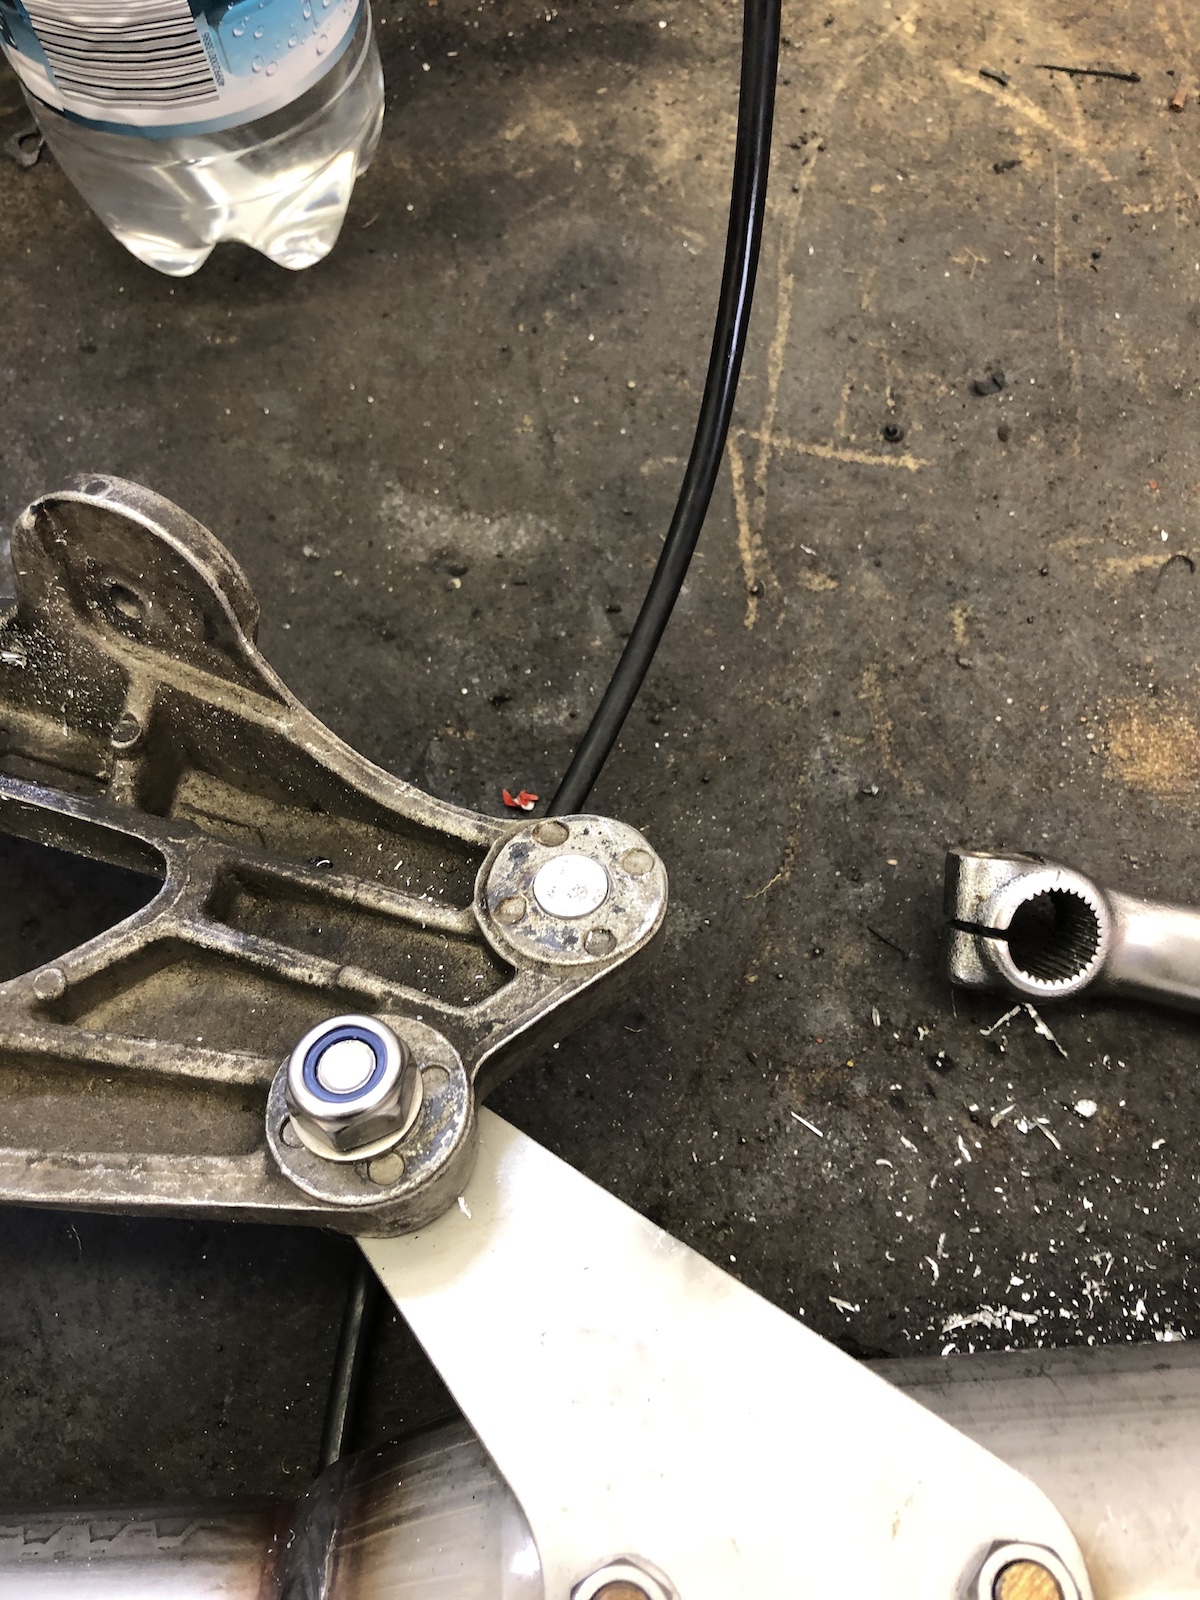
What I did not expect was a spindle nut, which wasn't milled flat and would only work in one position. (Now marked as can be seen below.)

As I am not going with 3-phase, the 0.75kW motor had to swap places with a 1.5kW single-phase motor with a 19mm shaft and a 125x100 bolt pattern. (I have the nagging suspicion that this info will come in handy at some point...)

And there she is in all her glory - and as the diligent obverserver will have noticed, the stand has been lowered to around 60cm from the floor as the RF-25 stand was just too tall for me.

So what she's like to work with? I honestly can't tell you yet, as I haven't wired her up, but I can tell you, she's quite a different beast compared to the old mill. 

Aside from getting her going at all, one of the first modifications will probably be to install a riser block between head and column to get some extra room in the Z-direction and to the great surprise of many, I actually have bought a (very basic) DRO, which at some point I will definitely install. (At least this one has got proper metric dials...)

Friday 14 May 2021

New addition to the stable: Suzuki VX800

So the family of bikes has grown by another member - an early 90ies Suzuki VX800. It came to me for the right price, the condition looked like it was salvageable and in a positive way it totally exceeded my expectations. (And nearly cost me my left eye.)

This is the corpus delicti and it doesn't look half as filthy as it actually was, when we picked it up. It's a very early (American) S501 model with the narrower cylinder bank, but it looks well maintained and the loom isn't butchered, so hey... not complaining.  

Two weeks later, my dad done some proper good cleaning and stripped both airboxes from it. The carb setup on these is pretty unique - a downdraft carb for the front and a normal sidedraft carb for the rear cylinder and as the tank goes down a lot further than the front carb there's a fuel pump under the battery tray.


I am not going to state the obvious by saying the carbs are FILTHY. But... they were filthy to a new level. That's the rear cylinder's float chamber filled with carb cleaner.

Fuel vapours made the slide stick to the carb housing. (It actually ran, when bought... sort of.)

... and that's a new level of crud in a float-chamber for me.

Obviously, some mishaps happened and when tapping the float-pin out, my dear assistant got a bit over-excited and didn't listen to my advise to support the float's post. Some chemical metal and about a week or two of waiting sorted the problem nicely. 


As the tank is full of rusty debris, my trusty little scooter aux-tank had to come to the rescue and feed the carbs - and yes, she's running again. The rear carb will need a bit more cleaning. I think there's some sticky residue left on the slide as it's not really very responsive, but other than that...

... next step will be fork seals and brake pads and fluid (and maybe also a set of braided brake hose, because why wouldn't you) and she should be good enough for inspection again.

Thursday 6 May 2021

The XV sidecar - making stuff fit

What really takes a lot of time with builds like this is the ever-emerging necessity to "make stuff fit". It starts with some rather little jobs like making a new bushing for the rear shock:


Proceeds to clearancing footpeg holders for the the lower sidecar mounting plate.


And goes as far as that mix and match of XV750 footpeg holder plates and a TR1 rear subframe needs some new holes to be drilled (unless you want to end up with a 90ies-style German Streetfighter rear-end, i.e. the arse pointing towards the sky)


And strictly for motivational purposes it was imperative to fit the sidecar on the frame, take a seat on the bike and marvel at my creation. Which, honestly was the first time that I saw in real life what my creation would ultimately look like.

With that moral-booster aside, how's stuff going to proceed? Rather straight forward really: I'll get the front down-tubes done next and then build an exhaust. Then it's time to take it all apart again as I really want to swap one of the crank roller bearings as it gives me sleepless nights and paint the frame's backbone and then assemble the whole lot as a solo-motorcycle, have it inspected and register it. This will allow me to test the basis and also to drive the bike with the sidecar attached to the inspection to legalize it AND not to be forced to use a trailer to get it there.