

Sunday, 31 March 2019
Sunday, 24 March 2019
The new TR1 engine - softer valve springs for longevity (part 32)
The everyday TR1 has to follow two very contradicting goals:

When taking the head off, it became apparent that the liquid gasket used as a base gasket couldn't fill the gap anymore, once the head was lifted as the cylinder is only bolted down on one side to the engine case. So a case of clean and reseal everything.

And then get started on re-installing everything. Admittedly the pistons didn't come this clean out of the running engine. But the carbon deposits were only very minor, meaning that the new piston rings are doing their job alright.


The only tricky bit was to install a cylinder without making a total mess of oneself and leaving sticky marks everywhere.

Timing the engine gave me a night of very bad sleep, as I was pretty convinced I had my timing off by one tooth. It turned out, that marking the timing mark with white paint makes it a lot easier to find the mark when you need to.

The last job on the list was to try out a softer ignition curve, intended to give the internals an easier life. Add that to the fact, that due to the more efficient squish the engine should run a lot nicer, I expect next to no performance loss.

Oh and that's what it sounds like:
At the time of writing this post, everything is assembled and I am playing around with several ideas on how to modify to centerstand to make it work with the new exhaust.The most stunning effect of tightening up the squish in connection with the new needles and the new db-killer-inserts with slightly larger bores has yielded some surprising results. The bike feels faster by an incredible amount, but actual data won't be gathered before the weekend, when I have some time (and hopefully good weather) to actually find out just what she can do.
- be quick as f*ck, i.e. fast
- be reliable and not wear out its components prematurely.

When taking the head off, it became apparent that the liquid gasket used as a base gasket couldn't fill the gap anymore, once the head was lifted as the cylinder is only bolted down on one side to the engine case. So a case of clean and reseal everything.

And then get started on re-installing everything. Admittedly the pistons didn't come this clean out of the running engine. But the carbon deposits were only very minor, meaning that the new piston rings are doing their job alright.


Timing the engine gave me a night of very bad sleep, as I was pretty convinced I had my timing off by one tooth. It turned out, that marking the timing mark with white paint makes it a lot easier to find the mark when you need to.

The last job on the list was to try out a softer ignition curve, intended to give the internals an easier life. Add that to the fact, that due to the more efficient squish the engine should run a lot nicer, I expect next to no performance loss.

Oh and that's what it sounds like:
At the time of writing this post, everything is assembled and I am playing around with several ideas on how to modify to centerstand to make it work with the new exhaust.The most stunning effect of tightening up the squish in connection with the new needles and the new db-killer-inserts with slightly larger bores has yielded some surprising results. The bike feels faster by an incredible amount, but actual data won't be gathered before the weekend, when I have some time (and hopefully good weather) to actually find out just what she can do.
Saturday, 16 March 2019
The next version of the Mk.7 exhaust
This is the third revision of my Mk.7 exhaust design, effectively making it Mk.7.3. Now the original Mk.7 prototype served me very well over the last or maybe even the last two seasons, but despite my best intentions, when building it, it still left some to be desired. First, I knew I could improve on the build quality thanks to a new welder. Second, I knew I could improve on the fit and finish thanks mostly to a much improved welding table, which actually kept the parts flat during welding. And then there was the issue of the old downpipe on the left touching the chain tube and melting it.
So when setting everything up, the clearance between pipe and chain gaitor was deemed essential. (That's about 10-15mm, measured at max. swing of the swingarm.)

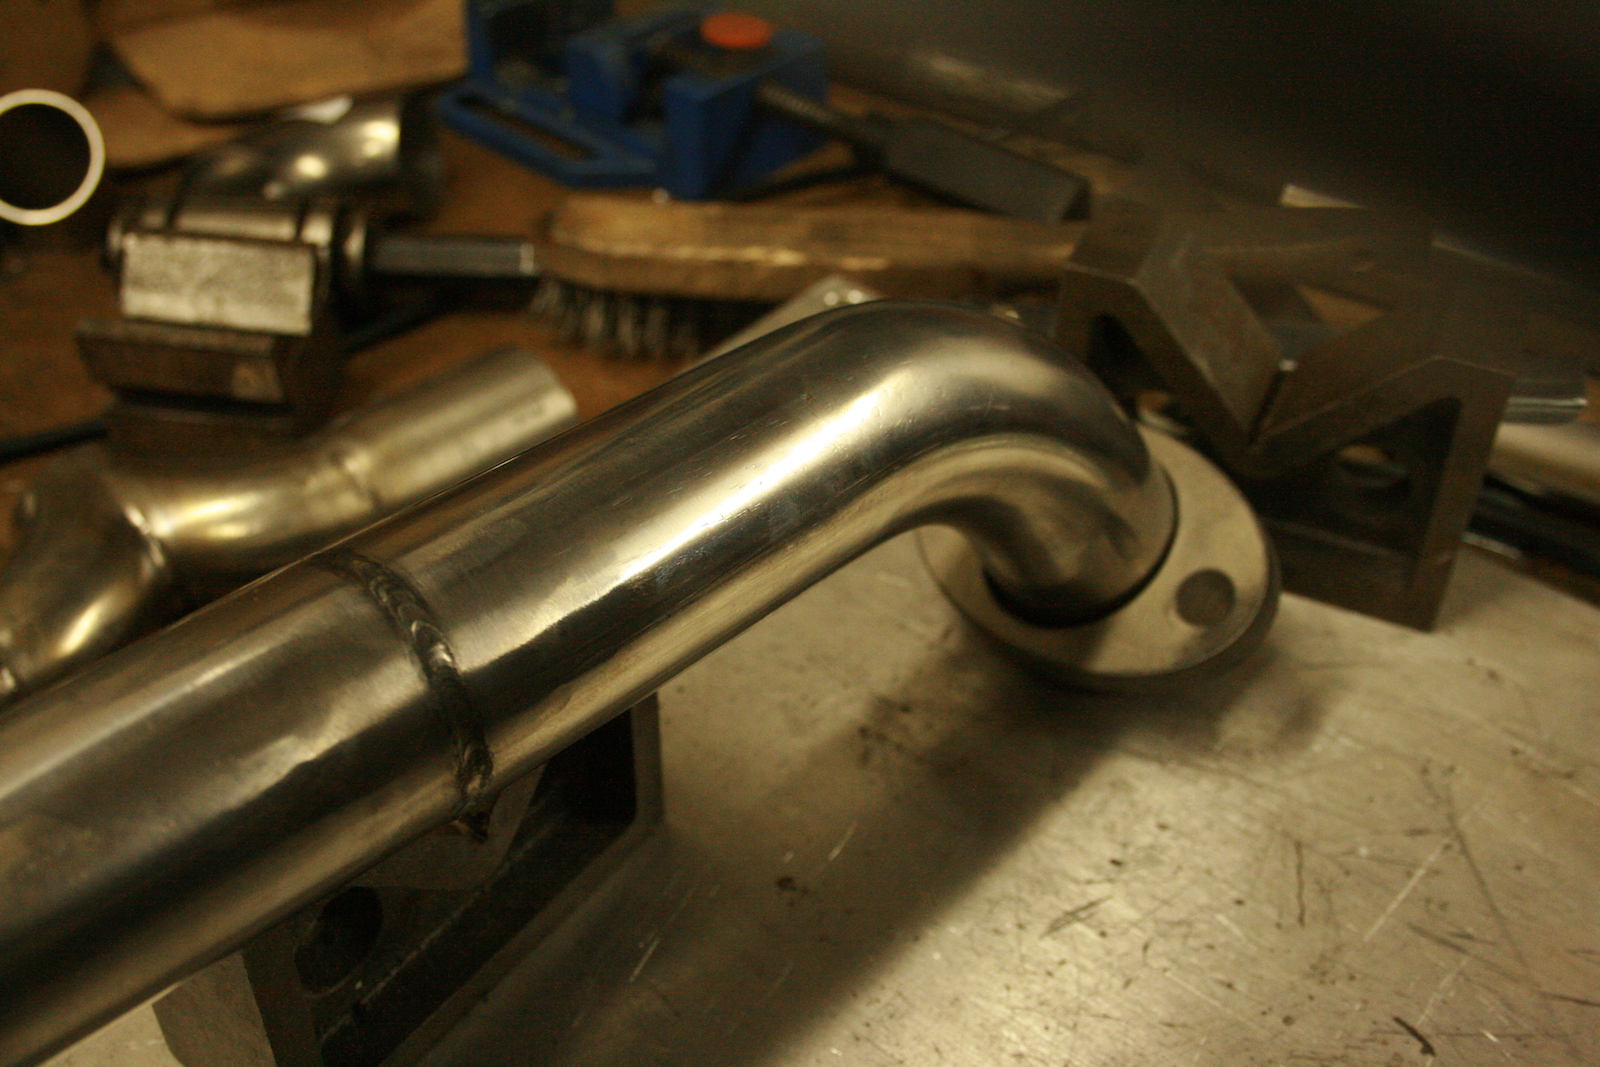
But starting from the front, in this case the cylinder head, I wanted to have nice, meaty flanges and location rings to center the downpipes in the port and ensure good seal, as they wouldn't warp easily. I also turned a step into the rings to make it easier to weld them onto the pipe.


A great deal of time was spent on making these two collectors and unlike in previous versions making sure that all the sleeves are pointing the right way in order to prevent leakages.

As I had started from the silencers towards the collectors, the next logical step was to work back from the front in direction of the collector.

Because the tubes had lots of bending marks, a bit of polishing was due. The thing with polishing is though, once you start with polishing at one end, you have to do the whole lot or it'll look a bit odd.

With the two Y-pieces of the collector already being built, the actual collector almost built itself as it was more a pretty simple case of connecting the dots.


The last part that I had to build was the rear downpipe, going to the collector. Building it imposed two main challenges: 1) clear everything, go through the frame and allow suspension movement and 2) be of as close as possible of the same length as the front downpipe. Which if you have a careful look at the bike is quite the challenge in its own right. Suffice to say, making the rear downpipe almost took as long as all the remaining parts.
This is the go-through-the-frame-without-touching-anything-part.


And once it has come out of the frame it "just" had to clear the collector and other pipework and meet up with the sleeve.


If you look very closely at the last picture, you will notice a section, which in reality is about 25 to 30mm long which looks a lot like an afterthought. This was the hardest part to fit on the whole exhaust as it had to compensate for the total sum of all misalignments of all previous cuts.
The last step was to weld in a bung for an O2-sensor (even though I currently do not have any intentions of using one) into the main bend of the collector. The angles and positioning of these are rather sensitive, e.g. the nozzle of the sensor has to point downwards to prevent it from collecting moisture and it also has to be as close as possible (but at least 50cm from the exhaust valve) and there's should be no exhaust leaks ahead of it. If you want to follow all of these requirements, you aren't really left with too many positions to put it and as I didn't want to install two sensors, there was really only one position left.


And then it was ultimately the last time to take the exhaust apart and polish up all the parts.


And this is the final result (admittedly the silencers aren't done yet).


To be fair, there's been a lot of mishaps, as originally this was meant as a completely new generation of my exhausts, I had to redo the sealant on the cylinder foot, when swapping valve springs. Oh and then there was this little episode, where I woke up, because I was absolutely certain that I had mixed up the valve timing on the rear cylinder ...
So when setting everything up, the clearance between pipe and chain gaitor was deemed essential. (That's about 10-15mm, measured at max. swing of the swingarm.)

But starting from the front, in this case the cylinder head, I wanted to have nice, meaty flanges and location rings to center the downpipes in the port and ensure good seal, as they wouldn't warp easily. I also turned a step into the rings to make it easier to weld them onto the pipe.


A great deal of time was spent on making these two collectors and unlike in previous versions making sure that all the sleeves are pointing the right way in order to prevent leakages.

As I had started from the silencers towards the collectors, the next logical step was to work back from the front in direction of the collector.
Because the tubes had lots of bending marks, a bit of polishing was due. The thing with polishing is though, once you start with polishing at one end, you have to do the whole lot or it'll look a bit odd.

With the two Y-pieces of the collector already being built, the actual collector almost built itself as it was more a pretty simple case of connecting the dots.


The last part that I had to build was the rear downpipe, going to the collector. Building it imposed two main challenges: 1) clear everything, go through the frame and allow suspension movement and 2) be of as close as possible of the same length as the front downpipe. Which if you have a careful look at the bike is quite the challenge in its own right. Suffice to say, making the rear downpipe almost took as long as all the remaining parts.
This is the go-through-the-frame-without-touching-anything-part.


And once it has come out of the frame it "just" had to clear the collector and other pipework and meet up with the sleeve.


If you look very closely at the last picture, you will notice a section, which in reality is about 25 to 30mm long which looks a lot like an afterthought. This was the hardest part to fit on the whole exhaust as it had to compensate for the total sum of all misalignments of all previous cuts.
The last step was to weld in a bung for an O2-sensor (even though I currently do not have any intentions of using one) into the main bend of the collector. The angles and positioning of these are rather sensitive, e.g. the nozzle of the sensor has to point downwards to prevent it from collecting moisture and it also has to be as close as possible (but at least 50cm from the exhaust valve) and there's should be no exhaust leaks ahead of it. If you want to follow all of these requirements, you aren't really left with too many positions to put it and as I didn't want to install two sensors, there was really only one position left.


And then it was ultimately the last time to take the exhaust apart and polish up all the parts.


And this is the final result (admittedly the silencers aren't done yet).


To be fair, there's been a lot of mishaps, as originally this was meant as a completely new generation of my exhausts, I had to redo the sealant on the cylinder foot, when swapping valve springs. Oh and then there was this little episode, where I woke up, because I was absolutely certain that I had mixed up the valve timing on the rear cylinder ...
Subscribe to:
Posts (Atom)