The shortest fairytale in the motorcycle world goes something along the lines of: "... and then he finished the bike and rode it."Well, I have to say I was a bit shocked, that the last batch of inlet rubbers only lasted about six months to a year, before they started cracking quite badly.
Another thing that didn't exactly stand the test of time, was my engine breather arrangement. I had thought about gluing both parts together, but initially it held up quite well.
Because I was actually waiting for someone and it was (for once) not raining, I decided I might as well check the timing of the ignition, mainly because I noticed some pinging. (I hadn't seen the cracked inlet rubber at that time as it was on the middle cylinder!) While I was at it, I also decided to finally get rid of the mangled philips head bolts and replace them with some decent hex, just in case...
And lastly, I changed the needle position back to the middle one on all three cylinders. Now the old girl truly purrs like a kitten.
The more I think of it, more like an enormously fat black cat...
Sunday 21 January 2018
Monday 8 January 2018
The new TR1 motor - uber-clutch and some lathe testing (part 17)
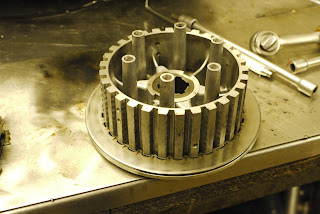
As the stock clutch is somewhat prone to slipping under normal use, even slight power-increases mandate improving the clutch. Luckily the Yamaha engineers made this very easy as the clutch basket of a XV1100 is just a tad higher and once the innermost steel-disk is replaced with a standard disk, a 9th clutch disk can be fitted. Unfortunately the spring mounting posts are somewhat taller, because the later 1100 engine uses a diaphragm- instead of coil-springs.
But once you shorten the posts, it works just fine. In order to reduce time on the mill (and prolong the lifespan of my milling cutters), I hacksawed them off with some three to five millimetres extra.
Then I dialed in the mill to be precisely on zero with a sheet of paper, knowing that the paper of these sticky notes is about 0.1 to 0.2mm thick. And then milled the basket down to final height.
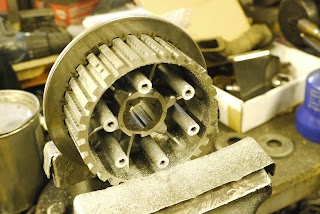
As space is really tight, I also opted to turn down the ribs on the clutch'es pressure plate, which is way trickier than it sounds, as you can only take very light cuts, because the backside only offers some rather inadequate room to clamp it in a three-jaw and I didn't want to make a fixture.
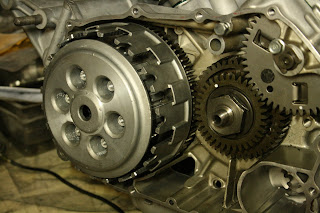
The 1100 clutchbasket is indistinguishable from the original one on the 1000, but in order to make clutch adjustments a bit easier, it is advisable to use two washer on the clutch pusher mushroom.
This really concludes the right side of the engine's bottom to be honest, not much more to do than install the engine cover and an oilfilter.
Subscribe to:
Posts (Atom)


