Saturday 8 April 2023

Dre-XT-Stück - more like Dre-XT-Jesus

It's Easter. Christians all over the world celebrate the return of Jesus from the dead and I guess there's me, celebrating another resurrection of the old Dre-XT-Stück. If my notes are correct this is the 5th time I am rebuilding this engine and the 4th time because of some sort of terrible engine disaster. 

On today's menu:

A properly f*cked up piston 

... and a crank with both dead big end

... and small end.

Impressive, eh? So how did THAT happen? Guess there's a reason they didn't build them with high compresison (10.5:1) 635cc engines from the factory, because some stupid 200 pound Gorilla (even technically I am more of an Orang-Utan) behind the bars will try to break the ton like it was meant to be. Throw in a bit of wet mist on the front and a large tank shielding the back of the cylinder from cooling air and a very spot on jetting and you have a beautiful recipe for destruction. May I point out though, judging by other cars speedos we were doing a healthy 150+ kph sitting up right and with the panniers installed. Old 'Stück had some proper get up 'n' go. 

As hoarder has this terribly negative connotation, I will rather call myself curator of parts of questionable usability. BUT this time it has saved my bacon again. We have: one crank with a slightly knackered alternator-side taper and lots of glittery metal coming out, when being flushed with oil. 

Turns out, not only are red oil-cans faster, but when filled with fresh and clean oil and not whatever was too slow to run away, the crankshaft will eventually no longer spit out oil laced with the remnants from other dead engine. (Also meaning I should really clean out that other oil-can at some point!)

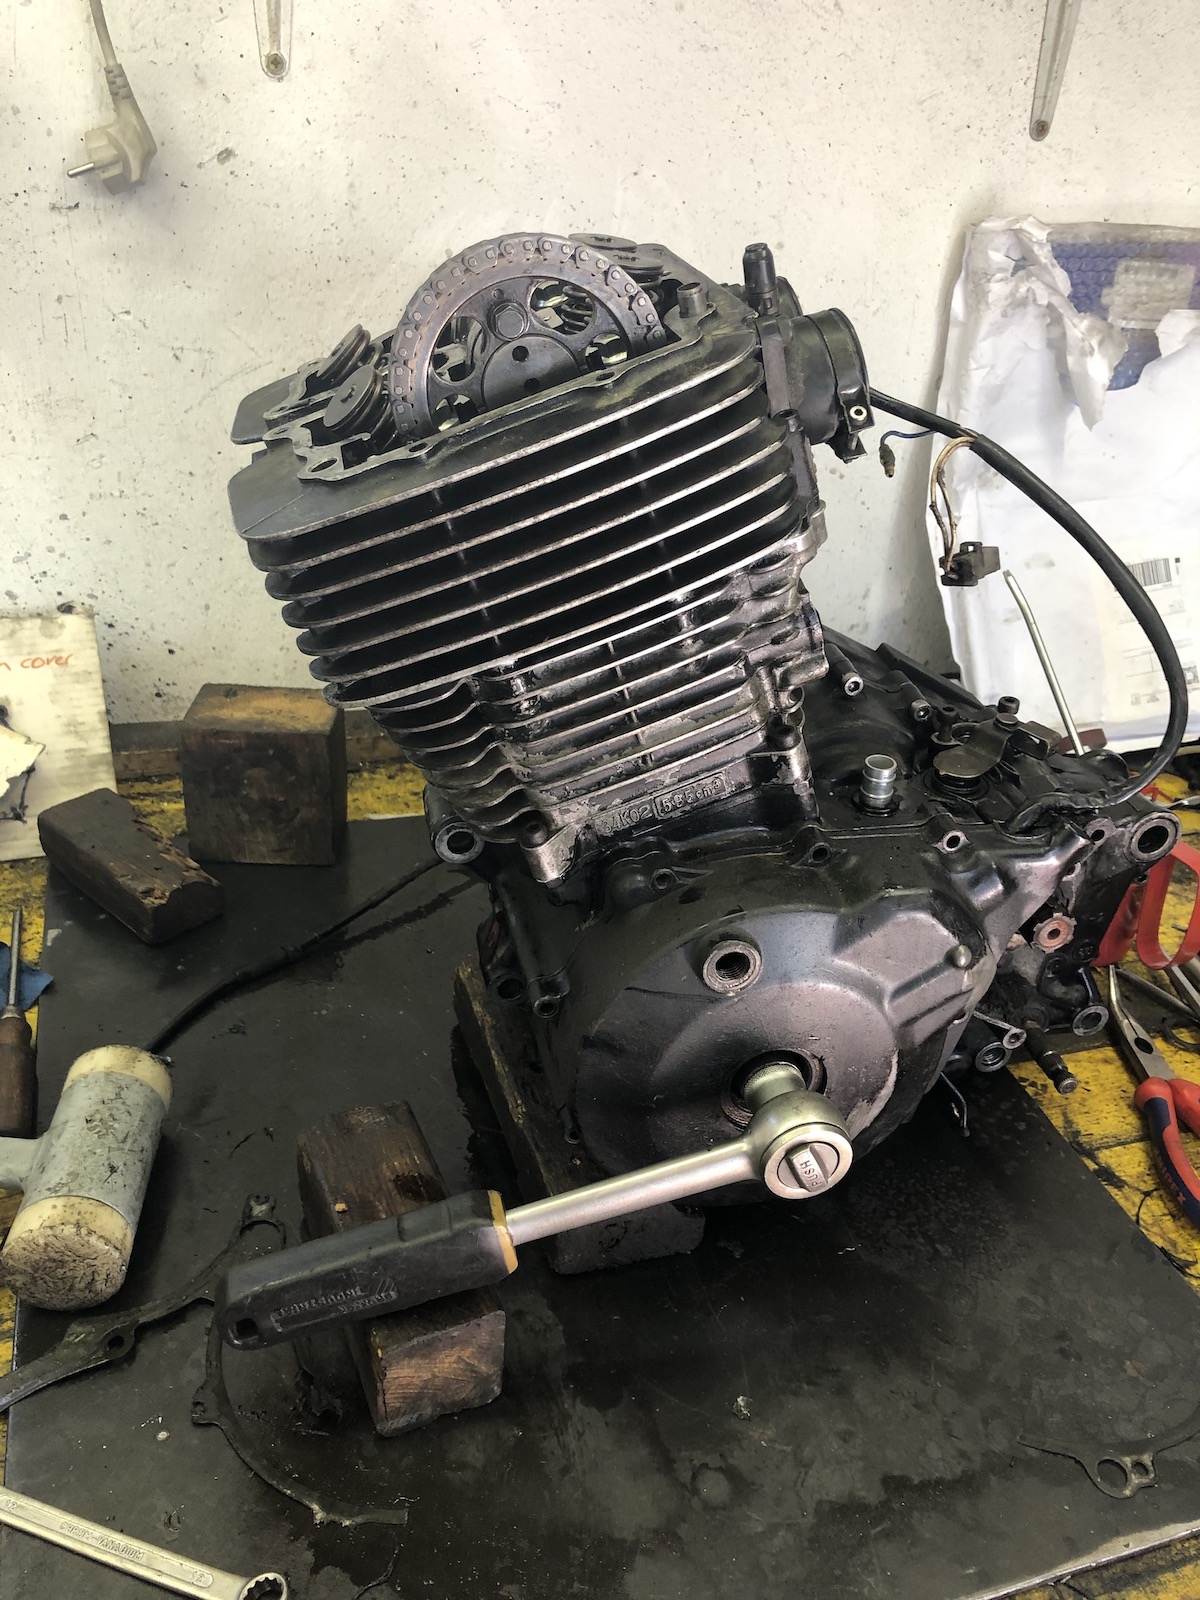
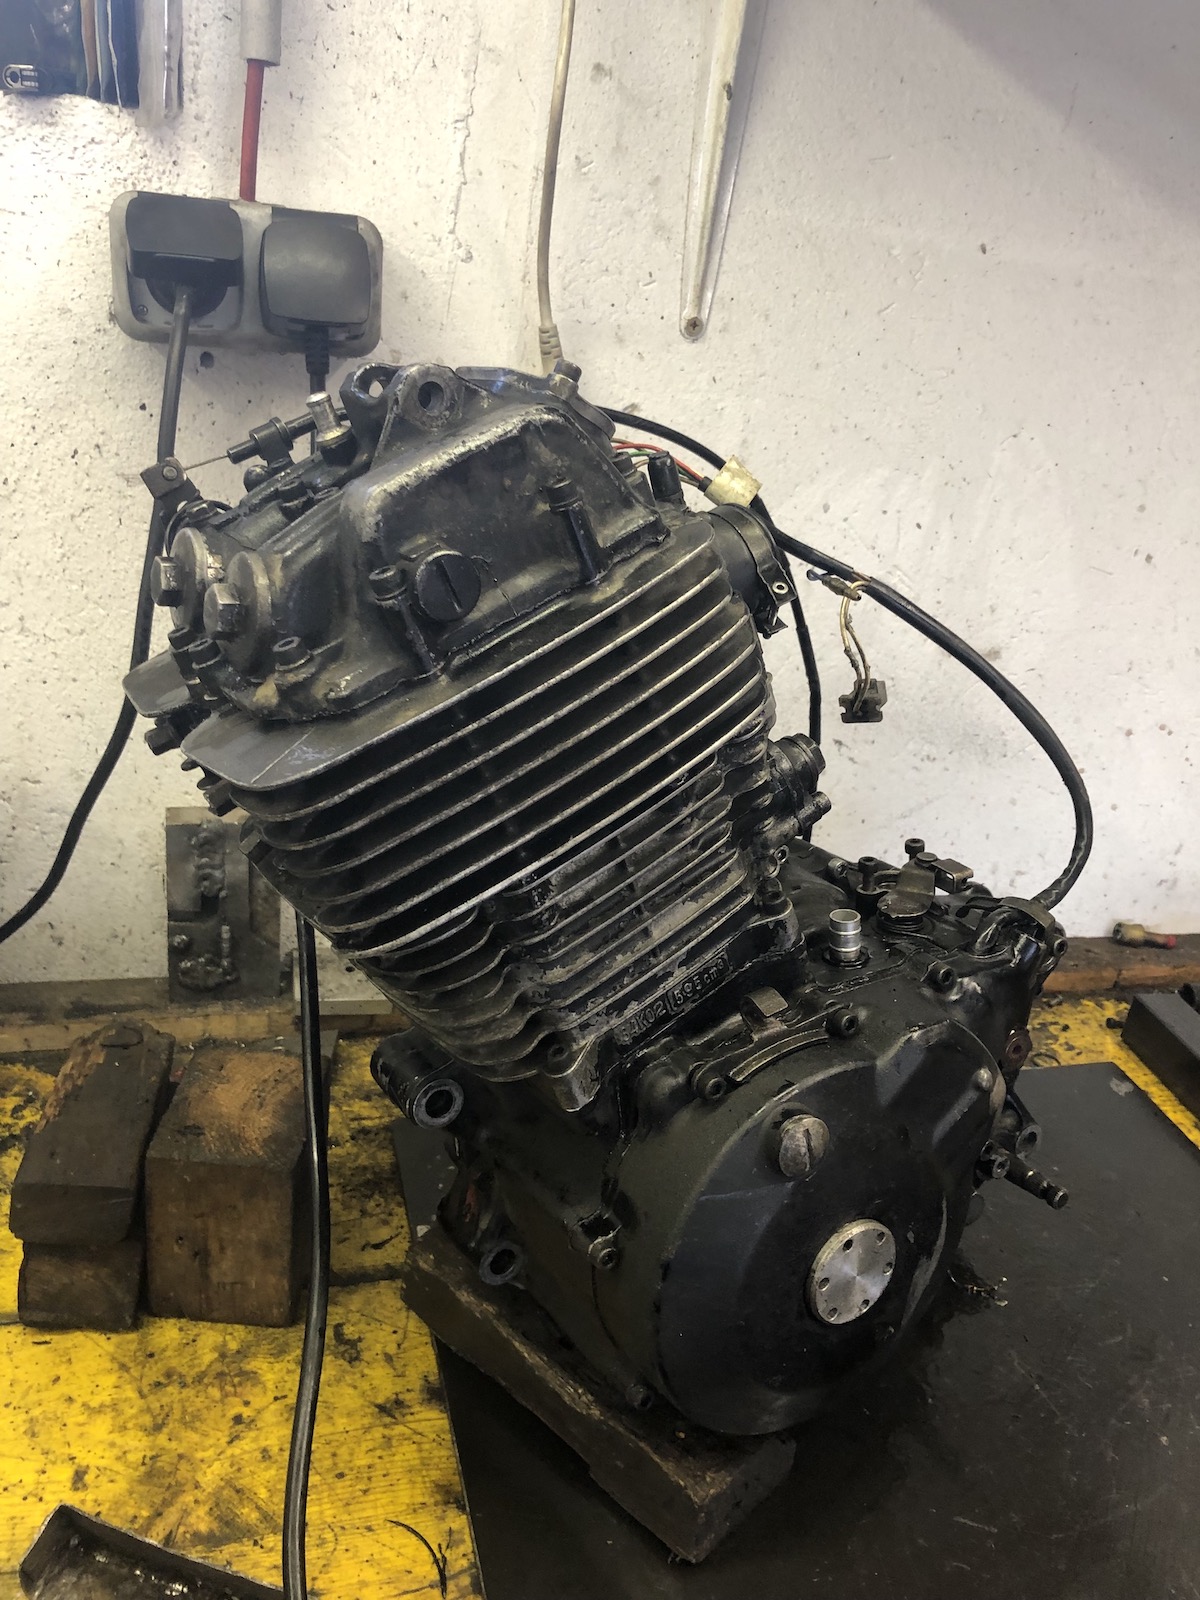
Disassembly was sort of the usual, just a few highlights (you saw the outcome already): 

Cam and rockers all good and plenty of oil up there (meaning that the engine didn't die from oil-starvation).

Cam-chain tensioner still tensioning.

Combustion chamber shows no signs of "performance flying around in the chamber", i.e. imprings of metal bits.

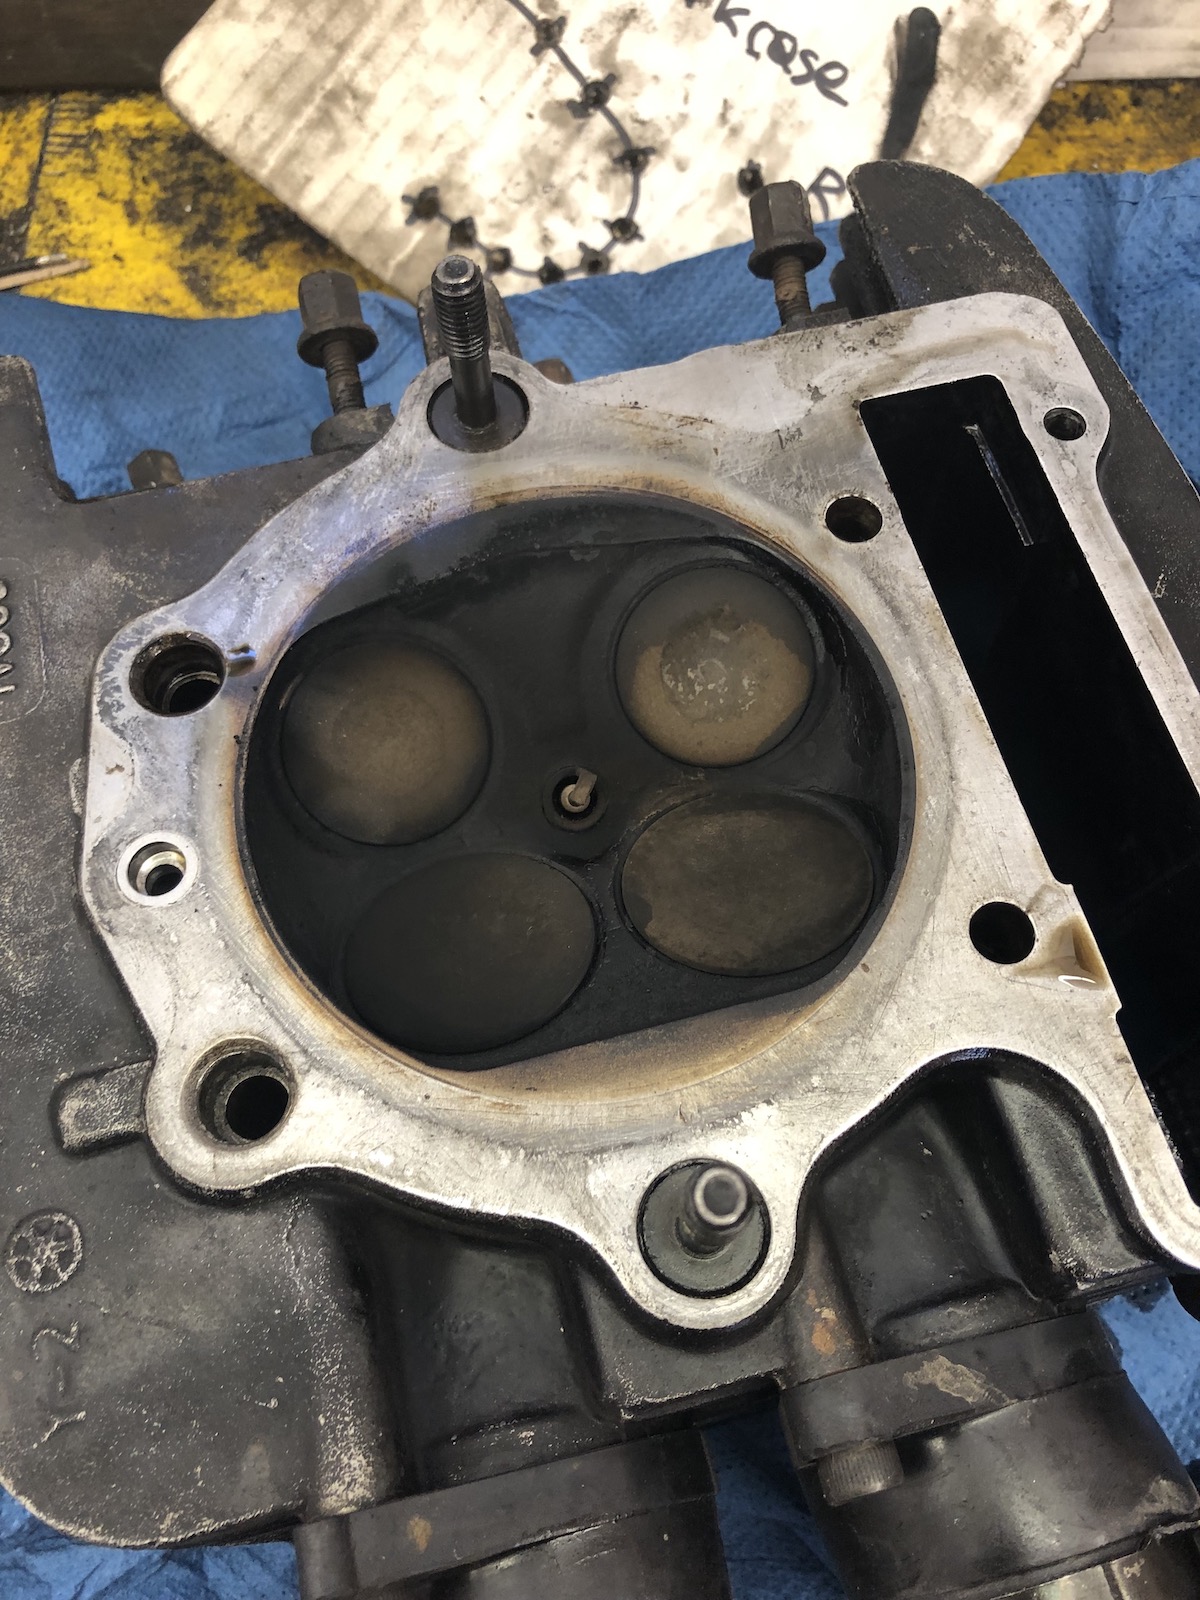
The piston-top is the living proof that even with a completely seized oil-scraper after maybe 20km of riding you won't be able to see much on the piston or on the cylinder wall.


As you've already seen what Petey the piston and Charlie the conrod looked like, just a few more selected pictures from tearing down the engine to get to the crank. The rotor put up the usual "good" fight.

As did one of the mangled allen head crank case bolts - that's why you should have at least ONE good vise grip. 

Once all the bolts are out, the whole splitting the cases thing is pretty straightforward. A few things to note: 1) no need to take the oil-pump out and there's tabs on the front and back of the engine and with a wide flatbladed screwdriver you can break the seal rather easily.

2) Prop up the cases on some wood and the whole crank-swapping malarkey is easy-peasy.

(If you really want to see more on taking the whole lot apart/reassembly, have a look at one of the previous iterations...)

3) Make sure the gear-selector assembly, is in the correct position. (Genuinely no idea what one could use as a landmark to gauge whether you're in the ballpark or not.)

Knowing that this time the engine would be rebuilt with VERY stock parts, i.e. first oversize stock compression cast piston. I thought I might at least try out a few things. 

First one's a classic: polish the gear selector fork guide rods. They are either stainless or chromed from the factory and mine had lots and lots of residue on them and felt sticky, when moving the forks on them. 


The other thing was a sort of "tried and tested" idea on my TR1/XV engines: omit the base gasket for some liquid sealant and get the piston closer to the head to improve the squish.

For those who want to do the same, the thickness of the headgaskets in the various kits varies a lot. With the 98mm piston I used a really thick headgasket, which even after being compressed once was still 0.95mm, whereas the MLS-gaskets from my usual cheap gasket sets was at 0.78mm without being compressed even once. As my piston sits slightly low in the bore (probably 0.5mm), I was pretty sure it would work out after spinning the engine over a few times and not feeling any binding caused by pistons and valves having a bit of a "get together".

Obviously the whole job wasn't problem free. Left front head-bolt thread rather rudely asked for a helicoil.

And the taper on the "new" crank was in a moderately bad shape, so a couple of extra ugga-duggas and a generous amount of Loctite have to take care of this matter.


Timing marks line up rather nicely, even though the crank to cam distance is shortened by approx. 0.5mm

All together again.


I really had the best intentions to let the sealant cure for 24 hours. 


It ended up being more like 24 minutes...

... and behold the braap was good.

The verdict after approx. 50km: I honed that first oversize cylinder a bit tight, which means once the engine heats up properly you can feel how the performance goes down. Mechanically this has to be the most quiet XT600 engine I have ever heard (including a couple of new ones back in the day). Not sure if getting the piston closer to the head was worth it, it does seem a bit happier than in the past, when I first ran this setup, but the cylinder and piston are still too tight to say much about it. Oil-consumption appears to be pretty much zero and hardly any blow-by either, so I think it is safe to assume that the engine survived the first couple of kilometers unscathed.

Friday 7 April 2023

Comrade Car - painting Doors, finishing the outer shell (part 8.4)

I suppose by this point you are slightly feeling how much this whole painting and making it look nice malarkey has been dragging on. (Which is exactly the reason, why I did it before really diving into the technical aspects of Comrade head first.)

The last bit that was still due for paint were the outer door skins. Unfortunately approx. 32 years of exposure to the weather had some of the bolts well and truly seized in their corresponding threads. As it was "only" the mirrors, this wouldn't have been much of an issue, weren't it for the fact that the right mirror wasn't just a bit blind and would have to come off to be replaced anyway...

 To my great surprise on a 1600 these are proper M5 bolts, so I drilled out the heads...

... and attacked the remnants with a very grumpy pair of vise-grips.

Getting the door handles off is both pretty annoying, mainly because the factory manual thinks the whole lot is pretty self-explanatory. (And pretty much any car thief in the whole USSR would probably know about at least five ways to get that handle and door out without a key etc.)

Seriously though, one nut is well visible in the picture below and the other one can be accessed through the little hole behind that sheet of plastic.

Only catch is that the window guide is bolted over it. Unlike the manual states, just undoing the two bolts holding the guide in and unhooking the guide-rod is sufficient to get to the nut. Once the handle is loose, a pair of needle nose pliers is the weapon of choice to lever off the rod going down to the actual door lock.


At this point it was a classic case of paint prep taking longer than the actual job itself. 


... also if I ever catch that idiot, who came up with the idea of the two-tone paint on the comrade. This has easily doubled the amount of work. (I love it and it looks dead cool, but still...)

Because I already had that paint-brush in my hand anyway, I touched a lot of spots, which will most likely be invisible behind the grill.

With doors re-installed the door cards were put back on and the first of two "vanity" mods were done: The inner door handles were swapped out for metal ones from a 2101 and the window-cranks for die-cast aluminium ones from a Lada Samara.

And whilst some more paint work will undoubtedly happen over time until the Comrade hits the road, I am inclined to say that the topic has been covered rather exhaustingly and maybe one should turn their attention back towards slightly more exciting topics, like... more welding? 😒

Sunday 2 April 2023

Comrade Car - "myshka" the party pooper (part 8.3)

 "мишка" is Ukranian and means mouse/mousy in a sense of cute lil' rodent. Comrade Car's wants to let everybody know that he is absolutely a friend of furry little animals, but definitely does not identify as a toilet with wheels. (At least this explained the strong scent that he was giving off initially.)


Ironically it wasn't the worst idea anyway, because the headliner was very filthy and it didn't exactly help that when painting the interior I touched it with the paint roller in one or two spots. Also the insulation between roof and liner was one hell of a moisture trap.

To be honest, I haven't regretted my decision to paint the car with a roller very often, but when painting that roof and hitting all those nooks and crannies, yep I paid for quite a few sins. 


Ironically painting the doors and bonnet was a much more simple and lots quicker job than doing that roof. 


As I might have pointed out one or two times before the bodyshop that repaired old Comrade must have been proper bondo-artists. I on the contrary, belong much more to the school of no-bondo-and-show-off-those-welds. (At least on a car like the Comrade.) But as the tailgate had been leaking like a sieve, a bit of TIG-magic was due.


It may not look like it had improved a single bit, but now the whole seam is fully welded and the max. difference between high and low spots after a the slightest bit of touch up with a flap wheel was less than one milimeter.

And with a bit of paint the weld is almost invisible. 


<Insert big-butt-joke above>