Saturday 24 April 2021

Turbo TR1 - back from the dead

There's many good excuses to why I haven't done anything to the old girl in the last year or more like almost two years. Regardless of which, with a bit of shuffling around bikes, I put the Stinkerle (my RD250) in storage and pulled out the turbo and immediately found quite a few flaws that needed to be addressed and some bits that straight away have to be redesigned.


Removed the tank to get an idea of the situation and yep, nobody secretly fixed the flaws the old girl has. 

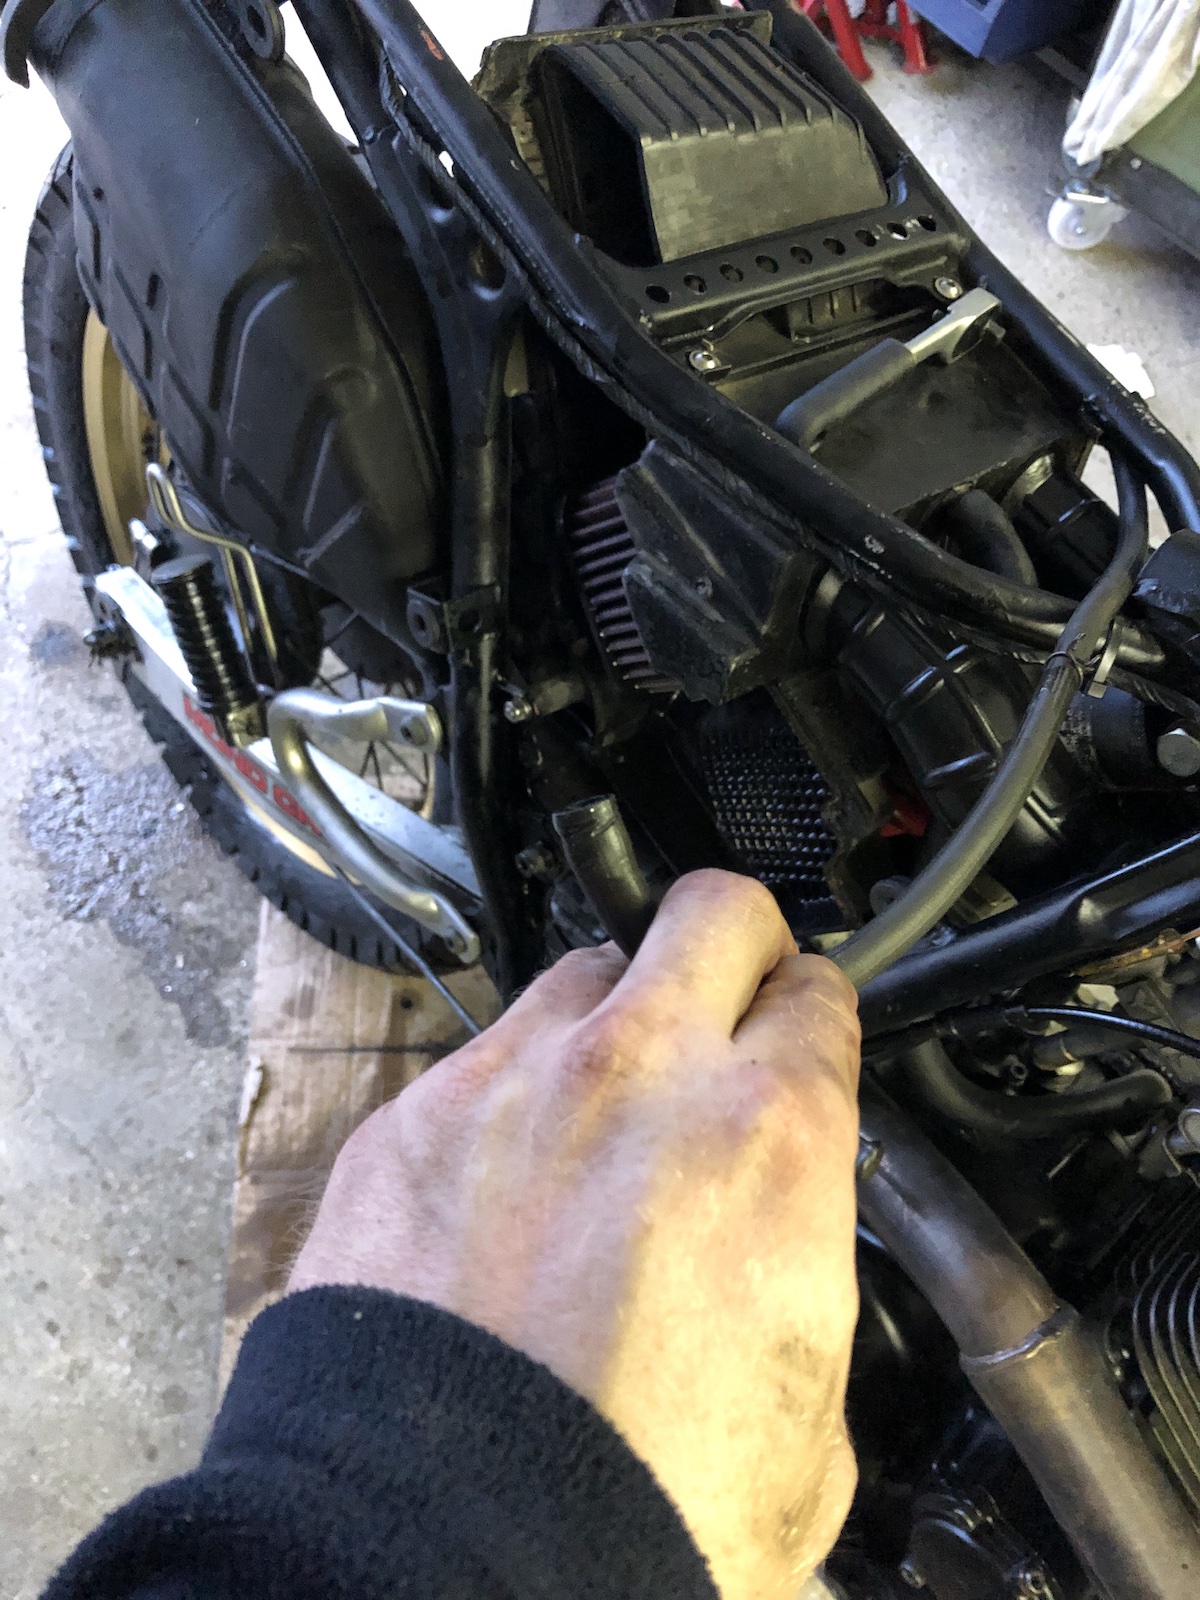
After finding out that the manifold was more hanging in the breeze than sitting properly I removed it to fill the vacuum ports on the inlet rubbers with some liquid gasket.


As I recalled that the last time the oildrain was leaking oil from... quite literally everywhere two hoseclamps were thrown in a sort of band-aid fashion. (Turns out now it also leaks from the turbodrain right at the housing.)

This gash, where the original seat lock sits had to be addressed with some paint, because honestly, why not?

And the rest, as they say, is history - bit of fuel, bit of rejetting and the old Turbo TR1 ran for the first time in ages.


So how to proceed or in other words, the issues so far:

  • the manifold is utter crap - too short to fully engage in the rubbers and somewhat twisted. I already have an idea for a much simplified version of this. Also if you go up to the second picture, you will see that the heat distribution in both headers is dramatically different, which means the manifold doesn't work very well that regard either.
  • Turbo will move over to the left side of the bike, this will allow me to drain via the engine's oil filler cap and also allow to tuck everything in a lot neater - curious to see, if the oil-line is long enough, pretty much the same goes for the throttle cable
  • wastegate actuator needs to be adjusted as it's not closing the wastegate flap strongly enough
  • the header of the rear cylinder melts the battery - probably a combination of a heat shield and re-routing the header is due
  • find out if I even put in a gasket between the oil-drain of the turbo and the drain-tube, also I have to make a new drain-tube anyway, if I move the turbo to the other side 
  • the current oildrain will become my oil-filler hole
  • an oil-cooler might be a smart move.

Wednesday 21 April 2021

Everyday TR1 - I'll just quickly...

 ... which is usually how some very long stories start. 

First of all, I was a bit unhappy late last season regarding the brake-performance with the old brake pump, so I swapped it out for one from a Honda ST1100 ABS (14mm pump). 


Only after swapping the pump I found out that the actual culprit was one of the brake lines drawing in some air right after where it was crimped. So a set of new lines and bolts in the colour of the season: black.

As there was some waiting time between those two steps, I decided that I had put up long enough with old dry-rotten handlebar rubberbushings.

One would assume that heating them up would be the way to go. It wasn't, as the rubber collapsed and I still had to deal with the steel sleeves. That was a good hour or so of chiseling and hammering.

M10 bolt, washers top and bottom and the new rigid bushes are fitted in no time.

After having fitted a 1-bar opener oil-pressure switch from a Fendt tractor, I had to find out that actually when the engine is hot the oilpressure drops to around 0.8 to 0.9 Bar, which makes the oil-pressure warning light flicker a bit. So after some searching I found the Bosch oilpressure switch 0986 344 033, originally intended for Volvo 140 engines. This one opens around 0.7 to 0.8 Bar and is a perfect fit. 

As I had to take the back cover of the starter off to get to the pressure switch, it was a good moment to clean out the carbon dust that had accumulated in the last year.

As I didn't manage to drill a perfectly square hole, I smeared a bit of black liquid gasket around the pressure switch'es base and let it dry for a few days. Result this part of the engine is now bone dry.

And then there's sort of the elephant in the room - when I had the bike inspected, I noticed that the swingarm could do with a little less play in it. 

The big(er) guns had to be brought out.

A bit of gentle tap-tap went (almost) nowhere.

So I called in the really big guns, i.e. my dad, because as it isn't his bike, he certainly has a lot less qualms giving that bolt a proper good smack. Which obviously did the trick


Obviously the bushing (24x16x144mm) was already on more than it's last legs and the bearings weren't that much better, but luckily I had bought a complete repair-kit a while ago. 


Obviously the lack of grease hadn't done the bearings a favour and the axle-bolt wouldn't have lasted that much longer before rusting solidly into the bushing. So the answer obviously was grease nipples.

One into the frame, in a space that can later still be reached to grease the actual needle bearings:


And the other one into the axle bolt. (Btw.: It's 16x200mm should you be forced to replace it, because you didn't catch it in time.)

The bolt was center- and then cross-drilled, so I could easily grease the bushing on the inside, which should make getting the whole lot apart a lot easier the next time. (And given the fact that the stock bearings still lasted nearly 40 years, this should be plenty good enough.)


With the center bushing removed, getting the old bearings out and subsequently the new ones in, is a fairly easy job. 

With the bolt-head facing right, the grease nipple can be reached right through the right footrest-backplate and there's now no excuse NOT to pay it a visit with a grease gun every now and then.

Verdict? I even painted the swingarm and the bike feels a lot more stable and well planted on the road and I've got that warm fuzzy feeling that by now every single chassis bearing of this frame has been done by me at least once now.

Sunday 18 April 2021

Dre-XT-Stueck - when you think you're done

 ... you probably haven't really started yet. 

Quite frankly, it wasn't that bad. You can't blame the old girl for the weather. 

I admit the brake-pump had felt a little spongy lately, but that one of the seals had almost failed entirely, that was a bit of a surprise for me as well.

Way more annoying that the speedo decided to call it a day right before I had to take the bike to its annual inspection. But as can be seen in the picture: if you need a much cheaper speedo, get one for a DT80, they fit nicely and with the wider spacing the bike feels a lot faster.

 So what's on the list for the immediate future? Most importantly a pannier rack for my old ammo box panniers and that's pretty much it. Not going to say she's perfect, but she's pretty good and up to the job she's intended for.

Wednesday 7 April 2021

Dre-XT-Stueck - there's always room for a few more mishaps

 ... you didn't really think this was it, did you?

So let's start with the most simple fault, even though it mandated a partial disassembly of the cylinderhead. 

THIS is not what you want to see, when you park your bike somewhere. (The oil-stains on the ground weren't there before.)

Now the story behind it: my later version 1VJ-cylinder head didn't have a provision for the little rubber hose shown below, which is the oil-tank's breather. If you route it into the airbox, well you get the scenario as shown above.

The quick and dirty solution was to tap the valve and use a broken grease nipple to route the breather back into the cylinder head.


With this issue resolved and the bike still not making any funny noises, after at this point having clocked up around 100km or so, I didn't think too much of it, when the odometer jumped to 57666km right before I headed home... oh ye of little faith.

Well the next day I limped back to the workshop with the old girl hardly accepting more than one eighth of throttle. (Still managing 70-80kph on level ground.) And this was a first.


Turned out, the needle-clip broke and thus the needle of the secondary carb got stuck in the slide.

While I was there fixing this, I quickly had to take care of "the pretty one" my dad's XT500 4-valve as it suffered from some rather noisy exhaust valves. 

Actually you can get to them without removing the fuel tank - only the wings have to be taken off.

... and replaced a mangled bolt thatwith a decent stainless one on the tach-drive.

As I already had entered full vanity mode, it was time to tackle the left rear sidepanel and remove some of the stickers and paint the the recessed bit black to match the other side. 


So after one or two days of happy riding I realised that I am not quite satisfied with this solution especially as the breather hose wouldn't sit very well on the nipple. In other words, remove the engine mounts and exhaust, lower the engine take out all the bolts and don't forget about the one hidden behind the valve cover and the other one hidden inside the mount on the head. 

Luckily the head-casting still had the recess for the breather cast in so it was really just a matter of drilling the hole and making a totally over-engineered breather tube on the lathe, because I had run out of 8mm stainless tubing.


Press-fit, no glue.


And then finally with this bit being sorted, I still had to tackle two oil-leaks right below the sprocket cover. One of which was the neutral-switch where the plastic had become brittle and it leaked out between plastic and body and the other one being the copper washer behind the philipps bolt, which holds in the clutch lever. 

I was about to say that with all these issues tackled, the bike is running like a charm, but... well now the speed died after making some terrible sounds yesterday on the way home. I mean, the needle still bounces up and down, but the speed it reports is slightly more arbitrary than usual.