Sunday 30 October 2022

Comrade Car - clutch and brakes (Part 4)

If there's one thing that Comrade Car has already taught me about, then it is the fact that even economy spare parts are mostly made to vastly different standards than what came factory in the 1980ies. At least as far as all sorts of plastic and rubber are concerned, when it comes to metal - totally different story.

Take this beautiful clutch slave cylinder and it's hydraulic line...

 ... or the expansion vessel for the coolant. I swear, I only tapped it with my finger and it shattered like glass.

So out with the old clutch-slave, assemble the new one and chuck it in. I really have to give the Lada engineers a thumbs up here, because you can totally do this on the side of the road with not much more to remove than the spare tire.


And on almost the same matter - right when I sat in Comrade Car for the very first time, the brake pedal fell straight to the floor. So a complete brake overhaul was due.

At which point something absolutely amazing happened:


That's right, no heat, no violence, just take the drum off, swap the brake cylinder and re-assemble. Thanks to the unknown previous mechanic, who went through all the trouble and slathered all mating surfaces in anti-seize.

So next were the fronts. With this being a Lada Niva, they actually are both very weird and rather ineffictive, as the car basically sports two front brake circuits, one of which is also connected to the rear. Also the actual brake design is sort of free-floating, but not really. 

Everything is held in place with these D-shaped rings and a pin through it.

Guess what took "a bit of persuasion" to come out. Defintely the bit of kit you buy new or at least have in stock, whenever you do the brakes on one of these.


Respectable Lada-owners told me that usually the pistons never fail, but the seals inside the piston are a bit hit and miss. Well, I got lucky and had one piston, which was still good enough to be used as a template. That being said, the sketch in the background is just that - if you want to machine your own brake pistons, it will let you know that each one is 51mm long and has got an outer diameter of 30mm.

As you can see, I deliberately omitted some features (it's a sketch), so if you really want to make your own, take one of the pistons out and take the features off that one.

I decided to make them from stainless, as I don't really want to do this again any time soon. So after standing at the lathe for quite some considerable time, I had this in my hand.


The really big job is to clean the o-ring groove on the inside of the calipers as due to aluminium corrosion they will shrink and thus cause the piston to seize in the bore. (Which is also the reason, why normally the pistons aren't really the problem here.)


The other thing to note: the actual calipers are held in place with a pin, about which most people will tell you to drill it out. I found a much better way is to punch it in as it will get stuck on all the rust at the bottom, allowing you to quite easily free the caliper from the holder. Now the big trick here is, to fill the hole with some penetrating oil (so far not very surprising) and apply quite some heat. (Best done before resealing the caliper.) And then push it back a few times. After a while it will just happily fall out, the bore can be cleaned and everything assembled with a bit of grease, keeping that pin and spring assembly happy and in place. Also the pin has a locating pin for the spring on it, i.e. it's got a correct orientation. 


Generally "lube everything" appears to be a pretty good strategy on this car. So all the pins and springs have been installed with plenty of copper-paste and the mating/sliding surfaces have been cleaned with a wire wheel.


After being warned (again by some more experienced Lada drivers) that bleeding the brakes is more than "just a bit" of a chore, I built my own little pressure bleeder, by using a cap from an old Lada reservoir and drilling the top to feed through a valve stem. This way one can apply some constant pressure with the compressor and very comfortably bleed the brakes without needing assistance.


From here onwards it was a case of about one litre of brake fluid and about 30 minutes of bleeding on all four corners.

And in essence that's the brakes done on the old girl.

Monday 24 October 2022

The SR500 sidecar - pinning down the rockershafts (Mk.2)

You've only solved a problem successfully, when you actually have tried all available ways on how to not solve a problem quite as successfully. This time the grub-screw modification as illustrated on quite a few SR500/XT500 forums. Whilst the solution is technically sound, it will only prevent the rockers shafts from lifting in their bores, but not from spinning, which is the original reason, why the bores wear out.

So let's turn that engine to TDC, remove the oilfeed to the rocker shafts and measure just how far in from the mating surface I drilled those holes last time. (8mm on both) and get those shafts.

Transfer those 8mm onto the shafts and with a new carbide endmill, make a flat on the rocker shaft.


Which brings us to the star of the show: M6x10 grub screw DIN916 (flat tip/no tip) as shown in the top right, which is in contrast to its tipped brethren on the left. Even though in theory the tipped version will be less likely to work itself loose it has no means to prevent the shaft from rotating. Given the not unrealistic concern regarding the grub screw coming loose: bolt adhesive has been invented already.

For the rear screws (yes, two stacked on top of each other) a cheap allen key from a well known furniture house had to be shortened on the long leg.

From a technical point of view, now this 2J4 head has reached the same level of rocker shaft retention as the later 48T mode. From here onwards, wear should only occur between rocker and shaft and judging from what I've heard these thanks to a good material combination and plenty of lubrication should last quite a while, before a replacement is due.

Sunday 9 October 2022

The SR500 sidecar - pinning down the rocker shafts

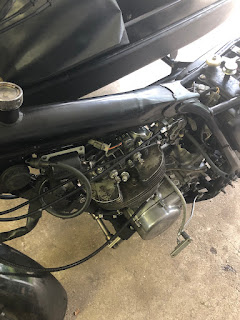
 Pinning down the rocker shafts - what's it all about? In short the rocker shafts in a SR500 cylinder head should be an interference fit, making sure that the rockerpads are nicely parallel to the camshaft axis. When they start to spin, initially nothing much happens until the rocker shafts wear out the bore allowing the rockers to move up and down in the bore at which point the wear rate accelerates and rather soon than later, you end up with egg-shaped holes and rocker pads which do not wear evenly in the center but on one side. In the process of which this will not only lead to premature wear on the rockers, but also on the camshaft. Most notable because it sounds like some angry troll is swinging a really big hammer in the top-end of the engine. The fix is pretty simple: four M6x10 grub-screws, a few minutes on a drill press and some loctite.

Leading up to this point, a few more things had to be tackled. First of all, was to polish the valve covers. Yep, you read that right, a pure job of vanity. Remove the flaking, yellowed clear lacquer and then go to town with ascending finer grades of emery and then buff living daylight out of them. Technical value of this mod: -1, i.e. completely pointless and I don't like freshly polished stuff. But scratched, weathered aluminium? Hell yeah, one really, really dirty secret of mine. 

Way more useful and completely unseen: a knurled nut as a petrol tank hold down. So at this point I can strip the whole bike off its seat and tank without a single tool. If you're messing about with one of these as much as I do, it's a real timesaver.

For example, when you have to take off the rockerbox.


Which can be done, without taken the engine out all the way, tilting it is actually sufficient.

Even though these are brand-new rockers, it's obvious, that the wear patch is nicely centred and very even on both. (Also a reliable indicator for good lubrication at the first startup.) The four bosses that are visible in this early 2J4 rockerbox are actually the spots where the later 48T-model will have bolts to lock the rocker-shafts in position and thus prevent them from spinning. In theory this will lead to more wear on the shafts, but with none (or next to none) on the heads this is a way better solution. Positioning might be critical, but the more I think about it, the more I am pretty sure, one could pull this one off on a 2J4 cover as well...

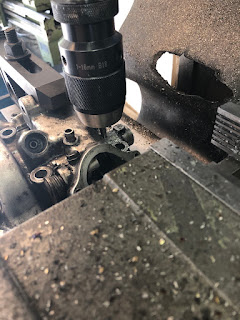
The actual modification can be carried out with drill-press and probably, if you're confident even with a handheld drill. I did it on the mill, because that's what I have. 

The upper "ears" of the head-mount obviously have to drilled out to 6mm afterwards or tapping would require a very long M6 tap.


The finished article. Loctite and lock-nuts is a bit of an overkill, but I think considering the extra-weight of the sidecar, those two M6 nuts should be bearable.

As a gentleman in general is not meant to motor after dark, it took me a while to find out that: the illumination in my tach had failed, I really want LED bulbs in both speed and tach (to save a few extra Watts for charging the battery) and the sidecar position light is super bright and blinding me - again fixed by installing a LED bulb. 


It says a lot, if you can notice the blinding of the position light in bright daylight...

And lastly - it's not a bodge job, if it works. Now all three contacts are soldered onto the LED cob, because the socket in this (admittedly) cheap Guzzi V7 sport tail-light is single-handedly the worst I have ever had on any bike. 

What next? Guess a few lovely Autumn ride outs won't do harm...


Sunday 2 October 2022

Comrade Car - digging into the interior (Part 3)

Comrade car wasn't just dirty. Comrade Car was filthy. A mix of wood dust and general neglect for vehicle hygiene, meant that once he was parked in the sun this car was a dusty, stinky mess. Plus there were two weeks between buying and the delivery, which left me with ample amounts of time to read up on all the weak points and things one should change, if he or she wants to enjoy their car for a while. 

I decided (and that's rare for me), at least a basic cleanup might work wonders.


The next step was a warning that I had heard from a lot of old car owners: The sound deadening common at the time was most commonly a combination of woven fibre and bitumen mats underneath. Whilst not an entirely bad idea, the problem is that the if the car leaks (and they all do), the woven mat soaks up the water and stays moist for months and the moisture then slowly creeps through the most minute cracks in the bitumen mats onto the steel, slowly rotting the car from the inside out. Especially on vehicles that were built in a rather cost conscious (i.e. cheap) way and have only primered panels under the bitumen. And that's exactly what happened here. Plus add the charming scent of "wet dog" to the mix and you'll probably understand, why I was motivated to dig into this matter rather sooner than later.

And then there was this one moment, where I just sat in Comrade Car, sighed and took it all in.  I am pretty sure that in official Soviet language there wasn't really an overarching concept of design in a Western sense as to make something appeal to the potential customer. Because why would you? The people were lining up to buy your cars, not because they were great, but because that's what you could get. (And from what I gathered, you actually had to be somewhat priviledged to get a Lada Niva at all.) 

Therefore just look at this dash and the steering wheel and the ignition barrel on the left side, like in a Porsche 911. Everything is at its place and all the extra gauges are there to let you know about the (important) vitals of your engine, when driving to that one oilfield in Baku, that you're supposed to prospect or along those railroad tracks in Siberia...


... then reality kicked in and I decided to clean the driver door window. Three times. Inside and out. Guess what, the glass isn't milky at all.

A few days later my first trip to a somewhat local Lada-dealer brought back memories of buying spares for my various Dneprs - new parts, rusty from the factory wrapped in sheets of newspaper with Cyrillic letters on them and the more fancy ones in wax paper. Knowing that the car would run, brakes and clutch were the logical next steps. As Comrade Car was forced to wait his time with the bonnet removed, both the containers for brake and clutch hydraulics were so brittle that the cracked, when I tried to removed the rotten supply lines. (I would later find out that any plastic vessel had severely degraded due to UV-light and age and thus I ended up replacing every single one of them.)

Niva's are known to be somewhat rustprone, but when people think of this they usually refer to the rusty exterior. Whilst absolutely true, in my opinion the bigger issue comes from the inside. In an attempt to quiet down the somewhat agricultural nature of these beast, generous amounts of fibre-mats and bitumen sheets have been applied on the inside. The problem: the furry mats suck the water up like a sponge and stay moist for a very long time. At the same time the bitumen mats will start to crack and thus water can seep through and slowly make the car rust from the inside out. 

... and that's just what came out more or less straight away. Ultimately I would fill up two full bins and a smaller bag.

That being said: This is the original red - ain't it absolutely gorgeous?

I suspect, in the end it was somewhere around four to five hours with lots of swearing to get all of the bitumen out. In those areas where rust had already formed, it was an easy task of just peeling it off, but those spots, where it was constantly stepped on it was a real b*tch.


Then some brush-on rust converter.

And for the time being, some regular etch primer will have to suffice. 

Seats back in and ready for the first testdrive. 

As you probably worked out yourself, this is not a chronological depiction of the events that took place, but I used working on the interior, whenever I needed a break from other tasks. Trust me, of those plenty have been available.