Saturday 27 April 2019

The Turbo TR1 - oildrain and first start (part 6)

Instead of this blog entry there should be a success note on how I got the flatslides on the sidecar spot on and am rolling around on three wheels like an absolute boss. To be honest, I tried my very best and at some point I needed a break from working through all the jetting options chasing both a consistent idle and also some top-end power.

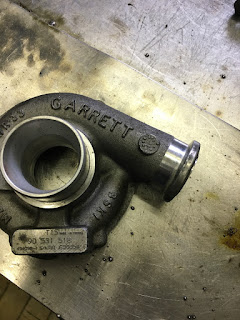
And during that break, I simply decided to get the turbo in running order. The first (and one of the more simple tasks) was to to modify the turbine housing to get a boost-reference port for the wastegate.


Then secondly, because some numpty (that'll be me, thank you) put an exhaust where the oil-drain wanted to go, I had to fabricate a slightly more elaborate oil-drain-pipe than I originally anticipated.
(The picture actually shows the final version, if you compare it to the video clip and some of the pictures above and below, you will notice, that this wasn't exactly the only one built... 😏 )


As I pointed out before, I was a tad grumpy that day, so I decided to hook up a fuel line, plug some of the open ports on the inlet rubbers and see what happens next.


To my utmost surprise, it fired up more or less instantly and after somewhat clearing its throat it fired up.


One of the backfires "fine-tuned" my boost gauge and inspired it to from here onwards give some rather "optimistic" boost readings. (That's with the engine not even running.)


A bit more fine tuning and well the whole engine and setup proved to be hopelessly overbuilt as it lasted more than a quarter mile already.


Next step will now REALLY be to swap out the inlet-rubbers for the ones, with plug vacuum ports and space them in a bit to clamp the inlet manifold a bit tighter. Oh and a seat might come in handy, sitting on a rolled up rag is dead cool, but not exactly compliant with some of the rules and regulations of the racing bodies I want to take part in OR local vehicle road safety legislation. And talking of the latter as some people dropped me DMs on Instagram - nope, I don't see a simple legal way to get this on the road in Austria. Might be a different game in Germany or some other European countries, but I have received a big, fat "no way, mate" from the local authorities, when I presented the whole project to them.

Friday 19 April 2019

How to modify a Suzuki starter solenoid for usage on a TR1

I remember a very irrate comment on a forum, where a user pointed out to me that a Suzuki SJ/Samurai/Vitara/Swift starter solenoid isn't a straight fit on Yamaha XV.To be quite honest, it really isn', but to be honest, not very far off.

As it is usually a solenoid for a plethora of cars, all you really have to do is find one of the 5mm holes in the face and thread it to M6. 


Then find an M6 bolt of the right length and bolt it to the cases.


Strictly speaking this wouldn't be necessary, but once the solenoid is a bit worn or the starter mechanics are a bit stiff, it might not be able to pull the hook all the way in and as such not engage the starter gears fully.  Another thing: the long stud is the one where the battery wire goes, the short one goes to the starter.

Friday 12 April 2019

The Turbo TR1 - turbo oilfeed and new starter (part 5)

Three months since I last worked on the old girl. Well about time to tackle some of the issues.


The turbo definitely needed a better oil-supply than in the past, so this time I am tapping straight into the oilfilter-housing to get oil straight when it leaves the crank. The downside is that it's not filtered. Ultimately I will fit a separate filter in the line leading up to the turbo, but at this point this really is just an experiment really. (I know I can get sufficient pressure at this point, as that's where I normally run an oil-pressure switch!)


Using a little jig to start the hole square to the surface, it's all a matter of using a M10x1.00 (standard on metric hydraulic lines) tap and thread the hole. Brembo brakes use M10x1.00 banjo bolts, so they are easy to get, even though I bought mine at an hydraulics supply shop.


And that's the oil-supply sorted.


Then it was a matter of swapping the starter motor because the original Mitsuba I had on there had happily chewed up its carbon brushes.


With the battery installed the bike slowly came back to life.


As it had sat so long, I drained the oil and rinsed the engine with some diesel I had around.


All the old dirt had settled "nicely" at the bottom of the engine and came out with a good wash... Yes, that was fresh diesel. With a bit of fresh oil and a fully charged battery the bike gave its first signs of life in about 18 months...


Next step is to swap the inlet rubbers for the modified ones and space them out correctly for the manifold and then basically give here a good cranking until there's some oil at the turbo.

Saturday 6 April 2019

Various small jobs on the everyday TR1

Modifying the old girl to make her go fast is one thing for everyday usage, but another equally important bit (if you daily a bike) is to sort out as many of the small niggles that tend to bug you or make servicing harder than it needs to be.

1) Vacuum ports

I know that more than one person will (rightfully) think or even say out loud, if you'd left it stock, those inlet manifolds would have come with a set of perfectly good vacuum ports... Well it's not an option and whereas I agree that you can totally get the engine to run right by just syncing the flatslides by eye and ear, doing it with a set of clocks will actually yield some benefits in terms of fuel consumption as you simply get it closer to spot on than by the affore mentioned methods.


A press fit would be perfectly sufficient and if you have a look at what your local metal dealer has got in stock and what you have in drills it should be quite easy to achieve satisfying results, but that bit of epoxy is giving me some peace of mind. 


The tubing in my case is 5mm o.d. stainless and sticks out by about 15mm and if you do it, 20mm might be a bit better.


2) Insufficient backlighting of the clocks

In the past I had to run LEDs everywhere possible on the bike as in reality I had only two of the three phases of the alternator working. Now LED-technology is making giant leaps on what feels an almost daily basis.

About 30 Euro-cents gets you a wide-angle LED and to be honest I had next to no hopes for them to be any better than the old LEDs that were in there already...


The lighting is with a single LED and as is obvious the whole clock is very well and pretty equally lit  all the way round. (Ignore the brighter spot near 10k, that's because of the angle of the photo.)


Over time the old mounting rubbers of the clocks shrunk a bit and needed a bit of reinforcement. My local hardware store had some of these black rubber washers in stock, which appear to be perfect to stop the clocks from bouncing around on bad roads.


3) choke cable

Having a handlebar-mounted choke is only useful, if it works properly. So I had to shorten the cable a bit to stop it from leaving it's place on the lever.


4) New center-section of the frame and new swingarm

The swingarm bolt in my old frame was seized and the bearings at the very least would have desperately needed some greasing, so blessed is he, who hoards.


And lastly as the old locking tab plate was beyond hope and I didn't fully trust "just loctite", I decided to go with some drilled allenhead bolts and some locking wire to keep things where they should.


As you can see, it's always a smart move to mark the lock on a chain in order to make finding it at a later date easier. Also, even though the old chain was perfectly fine after 117,000km, unfortunately it was discontinued several years ago and as such it was impossible for me to buy a new lock, so I could re-use it when swapping the rubber chain sleeves. So I had to get a new 630 chain as well.


So what can I say in retrospect to my previous post: I was really keen to see, if all that work has paid off – and it did.