Now there's plenty of good and some really dreadful advice out there on how to
setup carburettors and yet I plan to add one more to the list, mainly because I
haven't found some good info on how to set needles correctly, because that's
usually where most people tend to go "a bit funky" and just mess around to the
best of their knowledge.
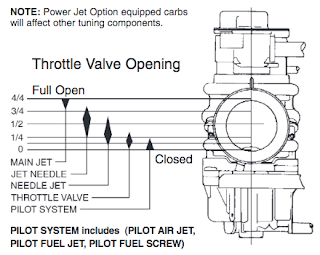
At first, let's flog a dead horse by having a look at the following
schematic:
|
|
Source: Mikuni Corp, 2012
|
As you can see, this is a slightly newer version of this well-known graph that
contains diamond-shaped indicators to highlight the fact that a carburettor will
NOT digitally switch over from one jet to the next, but that multiple jets
(within reason) affect the performance at various points in the slide lift. (And
that's completely omitting the fact that the engine has rather varying air- and
fuel demands depending on the terrain you're driving on!) But there's more
that's missing in the graph, because it assumes that the setup is correct. Not
to worry, we'll get to that point.
Let's just simply follow the carb slide through a usual day at work and identify
the problems I encountered. (and most likely you did too, because quite frankly
otherwise you probably wouldn't be reading this!)
For coldstart we obviously need to pull the choke knob and enrich the mixture
and then run the bike (mainly) on the pilot jet and the additional choke jet.
There's mainly two things aside from the choke affecting the mixture at this
point and that's the pilot jet and the slide cutout. (called throttle valve in
the schematic above) Now it should be obvious that the smaller the slide cutout
the less air goes through at the same height of the slide, also the slide cutout
basically determines how steep the curve rises that determines how much air gets
to the engine at very low slide opening. This (within the limits of the engine)
determines how "snappy" an engine will feel to the user. Additionally a smaller
slide cutout will help to keep things more moderate and make jetting the pilot
easier.
Real world example: a VM38-9 has got 2.5mm slide cut-out and a TM38-86
has got 4mm. The jetting on a Yamaha XV1000/1100 engine is pretty close in both
instances, but trust me, a TM38 with the bigger slide cutout will feel a lot
snappier.
Pitfalls (or also why you shouldn't start jetting from the bottom up):
For rather obvious reasons it would be very tempting to start jetting from the
bottom up, because then even if everything else fails, you at least would end up
with a decent idle. And here comes the catch: as I pointed out before the
schematic above only applies, if everything is working perfectly and even then
the whole system is rather dynamic, meaning if your jetting is off, it simply
doesn't add up. Assuming that for example your mainjet is dramatically
oversized, it will overlay and obscure incorrect (lean) jetting in other areas.
The art of jetting carbs is knowing some recipes, which usually work and then
apply some common sense, e.g. if you run a #300 main-jet and the smallest pilot
jet IIRC a #12.5 and your bike is still running so rich it will fire up without
using the choke, there is a strong reason to believe that maybe your pilot jet
is not the reason. Let's assume you get past this point and your jetting is
somewhere in the vicinity of #20 pilot and a #185 main-jet. (Seems to be roughly
the golden numbers for a Yamaha XV with a TM38, when sucking through the frame
with a correctly sized airfilter and a free flowing exhaust.) Yet still it seems
to idle weirdly when cold and once hot it will race to stupidly high rpm or even
worse, when really hot will fall on its face again and not idle properly. The
next thing is to look at the slide height: One of the standard pitfalls to
compensate an overrich pilot is to raise the slide until it will idle just fine.
This will then result in climbing idle for a bit only to have the bike lose idle
once it has warmed through.

Next let's look at mid throttle openings. As stated before when the slide opens,
the slide cutout is the main determining factor for how quickly the amount of
air increases that gets into the engine. In parallel, as can be seen in the
picture above, the carb needle isn't a straight control rod either, but is
tapered. And now this is where things get tricky, because there's a lot of
things that can be adjusted at the same time and even though on paper the
results in AFR will be comparable the consistency of maintaining said target
AFR. This brings us to the resulting question: Which options are there and what
does what?
-
The needle taper controls the steepness of the curve (progression). A
thinner needle will mean a richer initial mixture and depending on how steep
the needle is, it will mean also affect how rich the mixture is at max.
slide opening and thus affect the main-jet.
-
The clip position will set up where the starting point on the taper is. This
can be very helpful, if you run a needle with a relatively flat taper, but
almost impossible to use with a needle with a steep taper as even small
increases dramatically change the effective diameter of the needle in the
needle jet. (And that's completely ignoring the effects of worn carburettor
needles, which may have a ridge worn into them at one point...) It has to be
noted that some carbs come with needle shims to somewhat compensate for
this, when quite literally the setting changes that can be achieved with the
clips are too coarse.
-
Lastly the needle jet, this is the only linear modifier in this equation. A
bigger needle jet will quite simply increase the amount of fuel all the way
from bottom to top.
So in order to choose the right needle, needle-jet and slide combination a bit
of seat-of-the-pants tuning is mandatory. The easiest case would be that for
some reason your bike idles like a champ and once the revs have climbed
sufficiently full throttle makes your bike go like a scalded cat. What you would
do next is to lower the clip a bit and see if that improves the situation. For
reasons outlined above that will improve pickup at low to mid throttle
openings, but will maintain a large gap at 3/4 throttle until it picks up and it
runs nicely again on mostly the mainjet. So you lower the clip once more and now
it's better at the last bit, but all of a sudden it falls on its face up to
about half throttle. What you established now is that you need a bigger needle
jet and then have to re-check, if the needle taper matches your desired engine
characteristics. You could try to off-set the situation by running a smaller
pilot jet, but this will lead to a much inferior idle, in the sense that it will
become very temperature-dependent. And this is where the varying tapers also
come into play. The exact tapers for a certain are simply not published, so you
have to get your own micrometer out and determine what you have in your carb and
then get a needle that matches the data as close as possible.

|
|
Source: Mikuni Corp, 2012
|
As you can see this list contains the recommended needles for use in a Mikuni
TM38. All of them are from the #6 family and the leanest three are of the
6F-type, meaning their initial diameter is 2.522mm. The subsequent letters and
numbers outline where the taper starts and how steep it is. Also just to confuse
you: the code overall doesn't say anything about the length as these are all
around 68.x mm long, whereas a 6DP01 is 62.2mm long. After doing quite a bit of
extensive research on the difference of the two-stroke (snowmobile) and
four-stroke (TM38-85 and -86) variants of the TM38 carb, it turned out that
there literally only where two main differences aside from main- and pilot-jets
that catered to vastly different fuelling requirements. Basically what Mikuni
did to turn a TM38 into a two-stroke carb was to add a slightly richer needle
and install a restrictor into the air-port in the back and thus making the
mixture a lot richer at part throttle. (Which is where most seizures on
two-strokes happen during the setting up of carbs...)

The last stop in our journey is full throttle. Even though this is the point,
where the most can go wrong, it's also the easiest to jet. Following some
gutt-feeling and experience one usually starts this "a tad" richer than is
expected to be right and once the bike has warmed up, literally just hammers
the proverbial snot out of the engine by doing full throttle pulls. Installing
smaller mainjets until the performance can be felt to go down, pinging occurs
or the oil-temp goes through the roof. (Usually it''s a combination of all
three, but with a bit of careful testing one can keep this within safe limits
at the very first point of the list.) With the orifice of a main jet being so
vastly bigger than all of the other jets that's also why you usuall start
there and try to get the mains right for a start as mistakes there will
trickle down all the way and even affect pilot jetting.
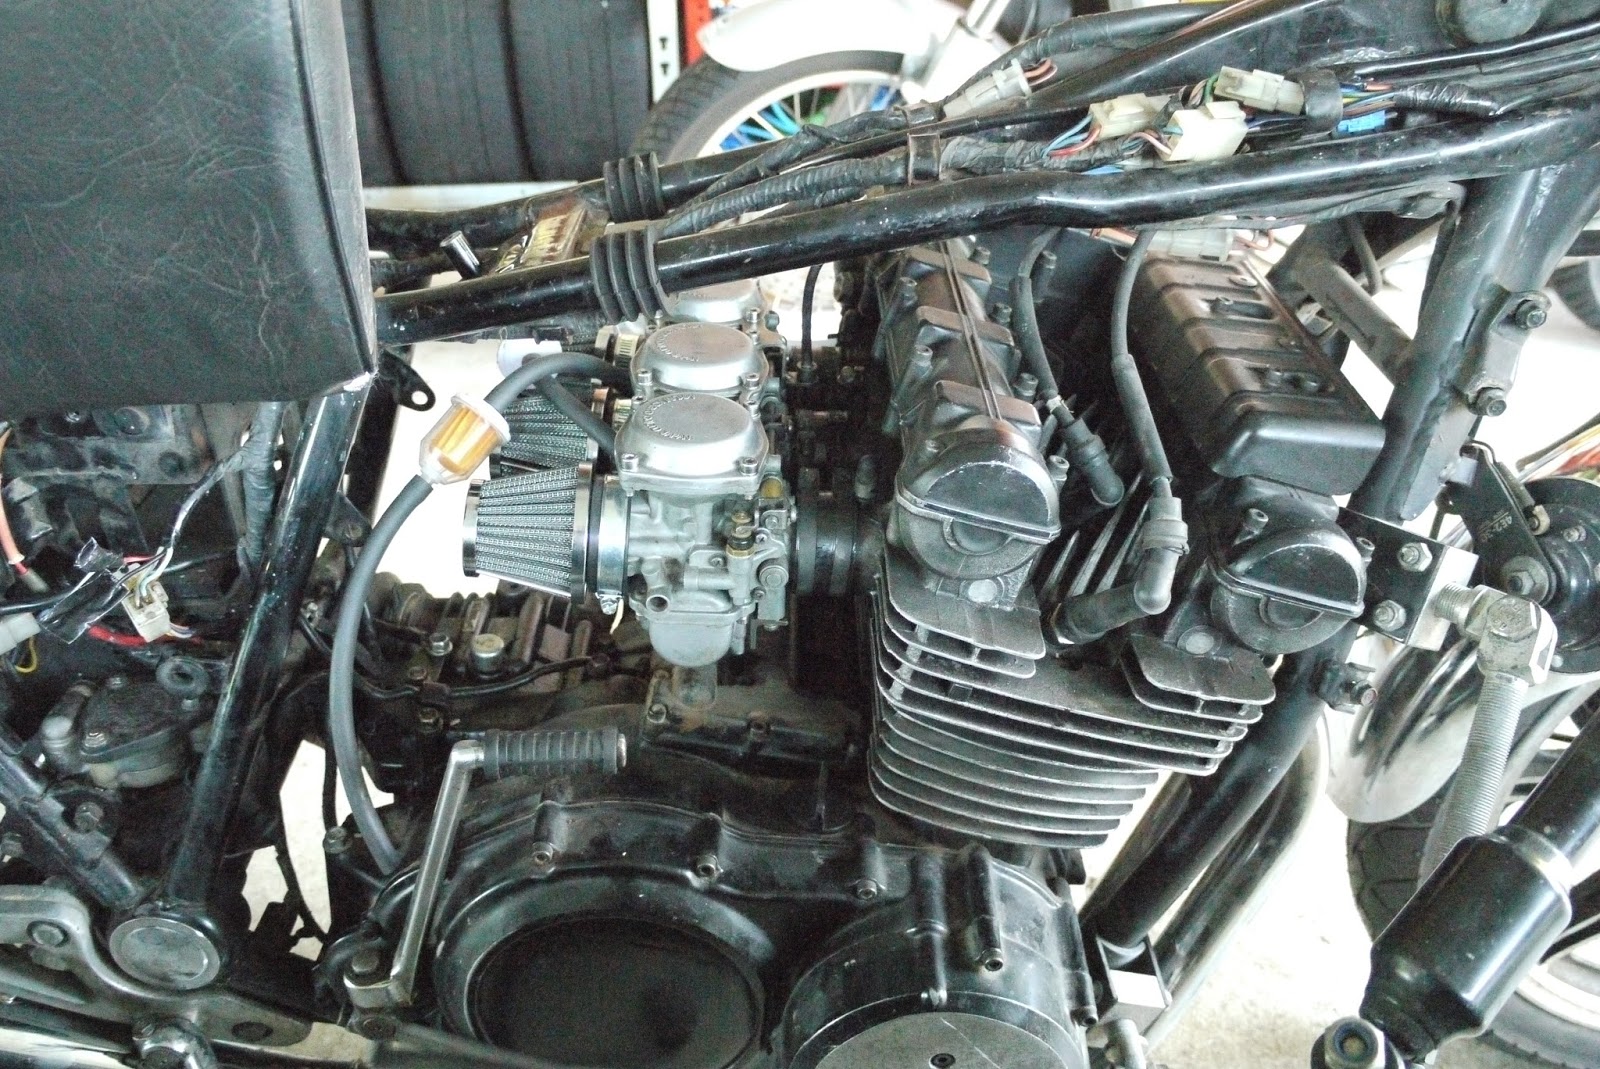
So where does this post come from: Basically I was trying to organize
my thoughts and trying to work out, what exactly needs to be tackled to get
the TM38 carbs on my Everyday TR1 working perfectly. The situation is as
follows: Bike idles fine when cold and up to a certain temperature, even
though the RPMs vary a bit, once really hot (as in above 110 degrees C of
oiltemperature) it completely falls on its face and will only idle when the
slide is lifted a bit, clearly indicating an over-rich pilot. At the same time
when up to temperature, there will be a certain amount of pinging at low (1/4
to 1/2) throttle opening indicating a relatively lean mixture at that and the
mainjet is quite substantially larger (#185) than on my old VM38-9 carbs
(#165), even though the effect is less felt at wider throttle openings.
Following the long winded text from above everything is pointing towards a
somewhat too lean needle and as the problem isn't really linear (especially as
the main-jet is actually about right, keeping the engine oil-cool, no
detonation, power seems about right and the plugs aren't fouling), it all
points towards the needle I am using isn't perfectly right for the
application. As I actually ordered the new needles before finding the chart
above, I now have a set of 6FJ40 needles to play around with. (Once the snow
and salt are gone, some serious testing will commence!) I expect to finally be
able to decrease the size of the pilot by one size and go back to a #20 and
overall experience lower engine-oil-temps as the bike isn't running on a lean
midrange.
Overview on the stock jetting of various Mikuni VM and TM carbs: