
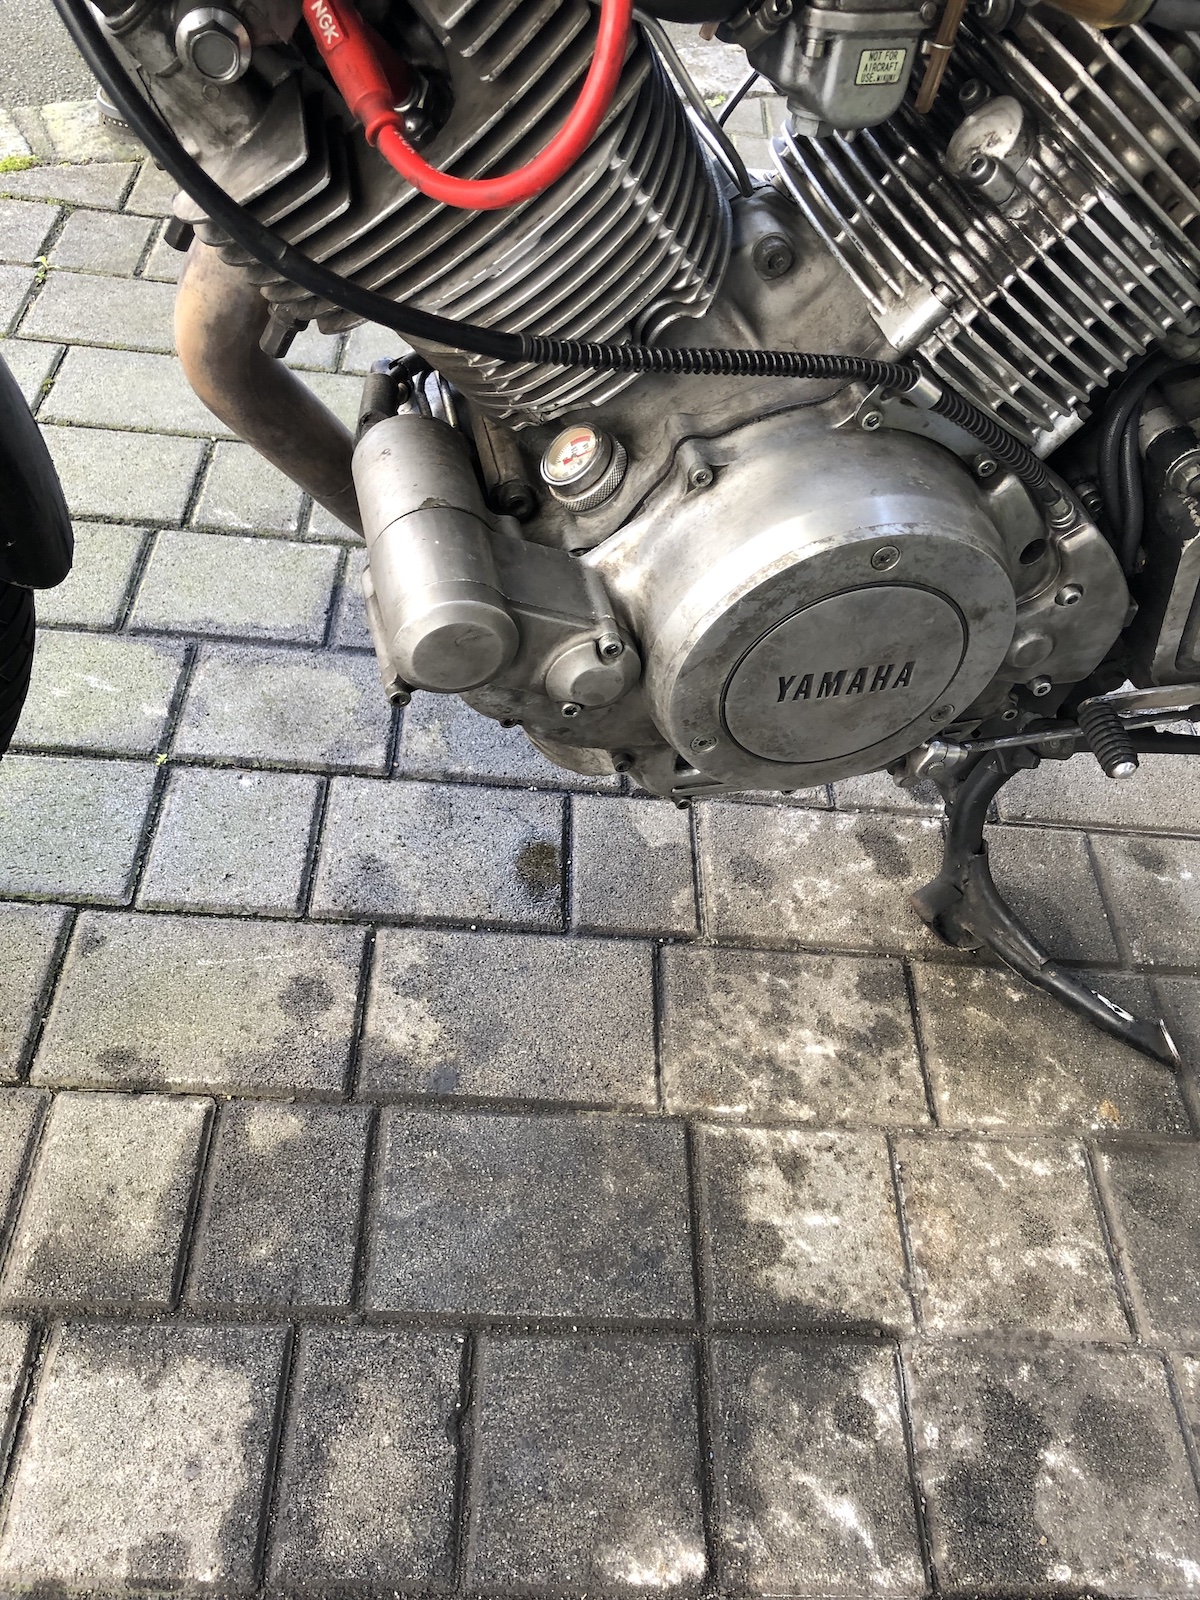
The story starts at the very time, when I (again) had to swap starter clutches on the old girl and did an oil-change at the same time. As you've seen the title, you can probably guess how well that went.
The first attempt (and here's a little tip for you fellas) to get a Mercedes oildrain-plug as it it the same M14x1.5mm thread as the stocker, but about twice as long, so if you only stripped the first one or two threads, you might get lucky. (Spoiler alert - I didn't!) To be fair, I didn't get lucky as the thread wandered out a bit and thus the new drain-plug wouldn't sit flat on the housing. Not terrible, but over night a little oil was to be seen on the pavement.
In general there are two kinds of thread repairs: Coil-based ones and full inserts. Coils are awesome, because they are cheap and are bit more elastic, meaning that if you don't undo the corresponding bolt frequently, you even have a certain level of bolt retention built-in. As much as the last bit would have been nice, an oildrain-plug is undone fairly frequently, thus repair inserts were the weapon of choice.

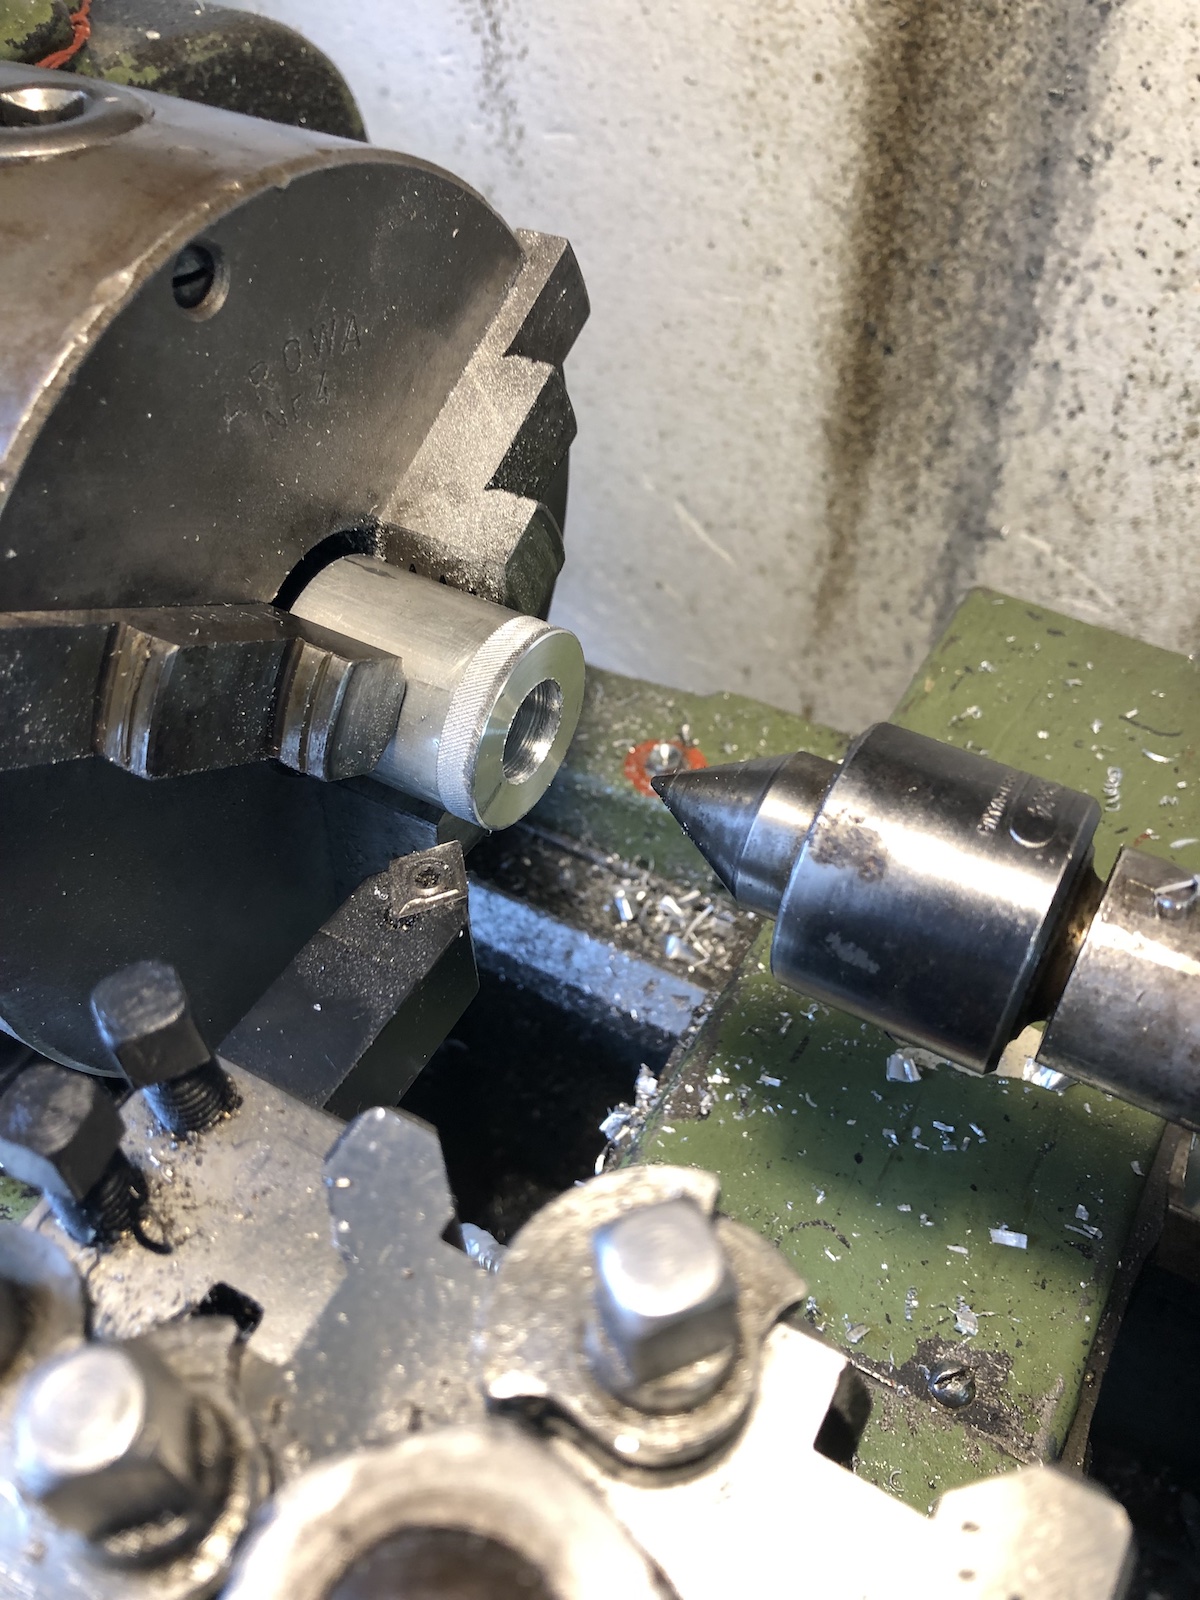
The kit did come with a guide for tapping (worked fine), but did not include one for drilling. So I quickly made one on the lathe.
To cut a long story short, the inserts didn't work, because it was impossible to guide the drill onto the right track, i.e. it would follow the original hole. (Which under normal circumstances is outright perfect, just not this time...) So the next step was to get an old engine case out of storage, turn a top-hat bushing and see how good the engine cases can be welded.

The answer is: not well. As much as I am a well seasoned TIG-welder on ferrous metals, aluminium is a different beast. I am pretty sure the more experienced guys can see at least ten mistakes that I made, but fact is, I for one will not be able to pull this off in a decent fashion.

BUT I do know my way round a lathe and with taps and dies. So I drilled out the old oildrain to 17mm and tapped it M18x1.5mm (the same thread as can be sound on AFR-probes).

Yes, it would have been smarter to do the tapping, when the old girl was still upright.


M14x1.5 on the inside, M18x1.5 on the outside all made from 1.4501 stainless, which is the stainless variant that is at least slightly less annoying to machine.

And then it was a case for the belt and suspenders approach: Loctite the insert into the thread and then seal the gap with some clear epoxy, pre-heat it so the capillary effect would suck it in and then let it cure for roughly 24hrs. (It says 12hrs on the box, but a bit of patience never hurt anyone.)

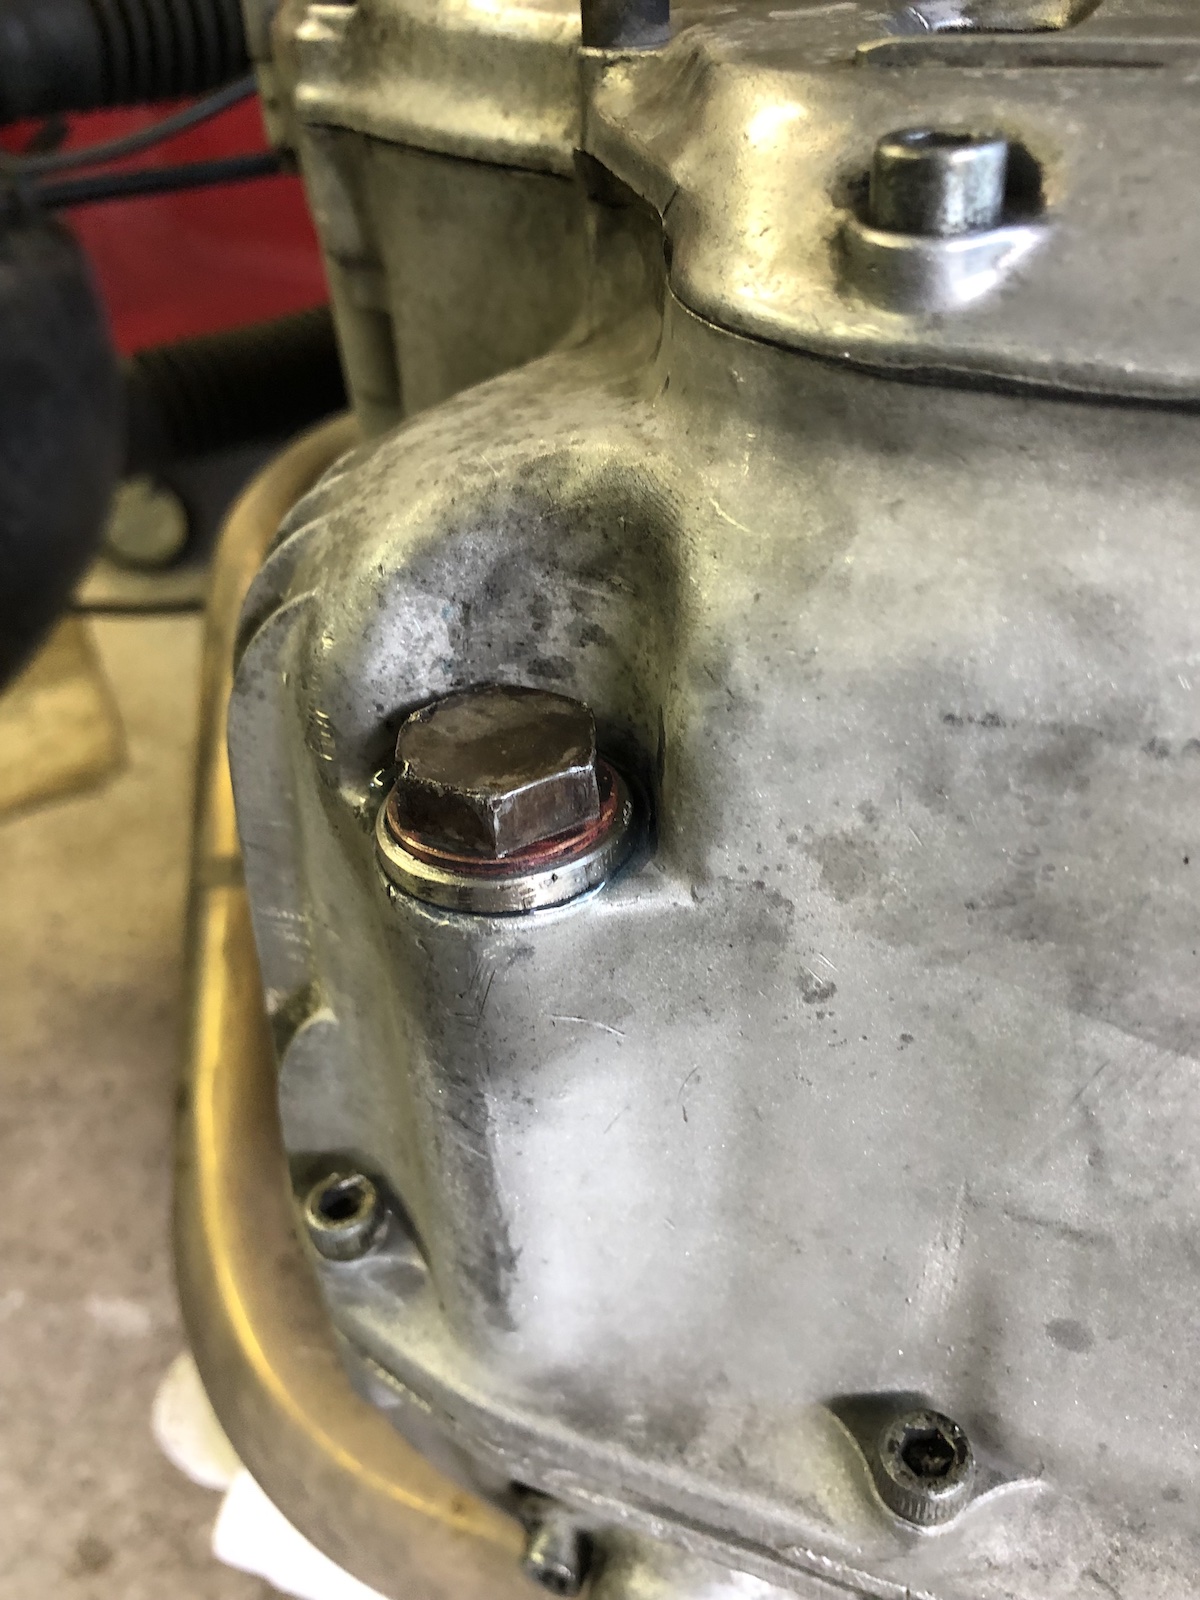
And that was quite literally that... no more leaks and an oildrain bolt, which now firmly sits in a steel bushing, i.e. can easily take the necessary torque. As I did a very similar repair on the old Turbo about 6 years ago (crank-case broken right next to the drain bolt) and that one has lasted a fair bit, I am cautiously optimistic that this will work just as fine.
No comments:
Post a Comment