Sunday, 24 March 2024

Project Pickle - the elephant in the room: rust (part 7.1)

Let's say you have a simple and mechanically robust vehicle and around 10 years after the production ended only a very limited number of those are still on the road. As breakdowns and crashes only play an insignificant role, there's just one potential explanation left with these cars: rust. Whilst built to a very Japanese standard (especially if compared to let's say a Lada Niva), there's a few rust traps, which just have to rust out and then there's the fact that these were rather cheap to begin with...

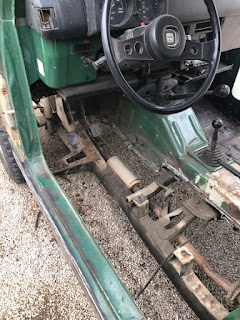
Yes, that's yours truly inside the little Suzuki without floors, doing my finest Fred Flintstone impression. But I hear you: didn't you say that it wasn't such a bad car to start with? I did and maybe I was simply wrong. One could probably even have rolled with some of the bodges shown over the course of this post and probably a few more coming up in the coming weeks.

After establishing that the floorpans where a collection of patches stacked on top of more patches and going from a first casual inspection to looking at stuff closer, it became apparent that not only the floorpans, but also the foot well and the inner sill would need replacing. A few rust spots on the transmission tunnel complimented the left side rather nicely. 

So as a first step, get the doors out of the way. The JIS-bolts wanted a good, old fashioned tap with the manual impact to come out, but didn't exactly put up a fight.

The sealant did its job very, very well, with the bare metal not even showing traces of rust.

With the front fenders off, one encounters a recurring theme on this car: Why bother with cutting out the rust, when you can put on a sheet of roofing tin and patch it up for another year? ... and the next year do it all again, leading to what I have dubbed the "croissant effect".


Peeling back layer after layer, one reaches the original metal, which quite frankly would have been pretty simple to repair twenty years ago - but the nice thing is: it's still quite doable as the repair panels are readily available.* (* which isn't quite true as I later found out, as the repair panels for Samurais and 413s are available, yet not for the early 410 with the narrow gearbox tunnel like this one... )

With it rapidly becoming being apparent that this wouldn't be the quick cosmetic job I anticipated, I tackled the driver side floor pan. Or should I say pans? He did use some nice thick sheet metal though.


Admittedly seeing the car without a driver-side floorpan was a bit disheartening.

On top of that this was the first mistake I made: instead of cutting out the floorpan and then drilling out the remaining spot welds, I should have drilled all of them out first and then do some relieve cuts if necessary, because to put it very mildly, things get quite floppy, with no floorpan around. 


Say what you will, the last guy was a massive supporter of the local steel mill. 

Admittedly I was close to forgiving him his sins and if it was for the mere fact that he tried to keep the old girl on the road. Until I saw this: Well if your frame mount is too rotten, what do you do? That's right, pidgeon-shit weld a bit of sheet metal to the frame and the sill and then cover it up with 5 layers of steel. Ironically this would have been one hell of a showstopper, if I had gone ahead and separated the body from the frame as is common practice on these old Suzukis.

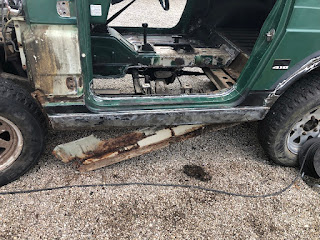
With this out of the way, I was finally able to remove the inner sill (at this point I still thought that the outer sill would be salvageable).

As a matter of fact this side didn't look too bad and definitely not bad enough to warrant a nearly two hundred Euro patch panel.

... and with this one, let's finish the first post on the rusty side of things. (There will be a few more no worries!) To this date, it's been approximately five weeks of cutting out rusty sheetmetal (started on February 28th) and only some minor fixes to the transmission tunnel and a few panels where the angle grinder veered off course.

Project Pickle - carb-work, filter and the suspicion the ol' boy might be invincible (part 6)

Invincible is a mighty big word to say about roughly 900kg of rusty metal on wheels, but once you've seen what came out of the petrol tank and given the fact that it still ran, at the very least it well earned its chromed tank cap. 

So far it can be assumed that it's common knowledge that the last owner took some very "pragmatic" approaches to problem solving. What you see below is a widely available OEM fuel filter for Suzuki SJ and Samurai carburettor models. It has a very distinct shape to trap water and debris at the very bottom. It makes the carb work a lot better, when it is present at the car.


... and to defuse potential future fire hazards the worst of the brittle and cracked fuel lines were replaced in the engine bay. (Together with another pre-filter, because the pump makes plenty pressure to be honest.)

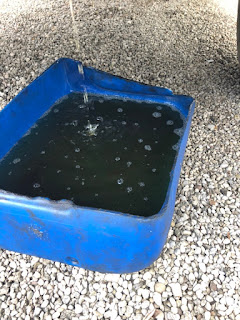
Remember that invincible comment from the beginning? This is what came out of the tank.

Nope it wasn't looking this black, because it was under the car... pretty sure the little Pickle picked up QUITE A FEW horsies, with some fresh fuel in the tank. Started up way easier too. (Nope, I do not wonder why.)

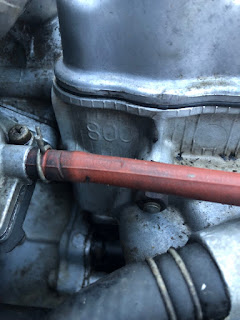
Whilst fiddling with the fuel lines in the engine bay, I found this little surprise:

As I was informed by quite a few people "in the know", fitting an LJ80 head to a SJ410 was a common thing back in the day and is meant to bump up the compression from sensible to spicy... 

 For those wondering: I am in the middle of the rust repairs and whilst making some fairly good progress, it'll be a bit longer until I can show some positive results on this front, so this is in fact a bit of a throw back from about a month ago...

Sunday, 17 March 2024

Project Volksrad - something abouts prophets, mountains and stopping

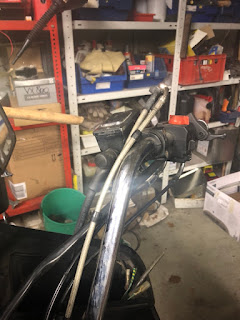
 "If the prophet does not come to mountain, the mountain will come to the prophet"... and it better not have early 1980ies Honda Goldwing integral brakes - 1st book of Greg, the Goldwing sermons, p. 1200.

With the plug wires hooked up correctly and a handful of fresh ones, which (added bonus) actually were long enough to route them properly things started to look a lot better on the engine front. 

So naturally the next step was to go through my box with old steel braided brake-lines and start converting the Goldwing from integral to conventional brakes. This would basically mean doing two things: Fit the front brakes with a double banjo bolt to handbrake pump. (Which would later be swapped out for a unit from a GSX600F with a 5/8" bore as the stock 14mm was leaking like a sieve.)

And the somewhat more elaborate part, of sealing up one port on the footbrake pump btw. the pump turned out to be somewhat of a show stopper as, just like its front counterpart, it was leaking and the old brake fluid had eaten away the paint on the frame. (Luckily repair kits are readily available and on the way.)

The actual conversion is pretty straightforward, as all I had to do was to cut the hardline with the fitting installed in the brake pump and then weld it up. Why the hardline? Because the flare on the bottom is what actually seals and whilst I am 99 percent sure that an M10x1.25 bolt and copper or ally washers would have done the job just as fine, this is kind of the more correct way to do it. 

The remaining port got a bit of cleanup with a brush and a file just to make sure it would seal well with a washer (it does, thanks for asking) and then really just route a brake line along the swingarm. Easy peasy really.

Which basically only left one hydraulic circuit left to tackle and for this one, as the name implies I went to a local hydraulics supply shop and bought a totally-not-a-brake-line to replace the bloated mess that was stock on this bike. 


Aside from a completely clogged up bleed nipple on the clutch slave cylinder things went about as smooth as one would expect things to go, when pretty much all the components are new or freshly overhauled. (Even though I overhauled that clutch slave four years ago.)

(Also in this picture - the new brake pump and slightly re-routed brake cables to make them fit a bit neater.)

Looks pretty good or stock if you ask me.


Bleeding went... well enough to be honest, but as for now Project Pickle, my new (to me) Suzuki SJ410 has priority over the Goldwing and before fitting the exhaust, I really want to overhaul the rear brake system entirely as the pump is leaking and brake pistons are "a bit" sticky or in other words, once applied won't let you move the big girl an inch. As such,  for now she's back in hibernation, but I promise it won't be another four years...

Sunday, 3 March 2024

Project Pickle - making the engine run again (part 5.1)

Now I ended the last post along the lines of:

I somewhat doubt I messed up the timing

Which, to be honest is exactly what I did. Luckily it was the kind of harmless, not breaking anything  kind of "messed up the timing". At least I was right about the fanblades hitting the shroud. As I had a few lovely days in Palermo to think about all of this the most obvious answer was that I must have gotten the crank 180 out, when I rolled it forward to flush the block and accidentally knocked it in gear. 

Whilst my working hypothesis would turn out true, I was a bit relieved to see that the markings still lined up and nothing had gone terribly wrong on the inside for the timing case.

The master-bodgineer in my concluded that if this was truly the case, the rotor would point in the completely wrong direction, as in the opposite of either of the cylinders 1 or 4 that would be at TDC. Easiest way to establish this was by taking the distributor cap off and having a look and guess what: #4 was at TDC and it was in the ballpark of #1.

Now you can obviously fix this the right way, by adjusting the cam-timing, or you could test it by flipping the cap around 180 degrees, which some clever Nippon-Denso engineers prevented by making the distributor body sport a little nose on one side. Cheeky b*st*rds.

So I removed the timing belt tensioner and turned the crank a full revolution until the marks lined up again and then reinstalled the belt, making sure that it would be tight on the tension-side.

As a sort of extra-curricular activity, I also marked TDC on the crankpulley. Even though there are no marks on the outside of the timing belt cover, it could at some point in the future come in handy for adjusting the valves or the like. 

Talking of stuff that might come in handy in the future: I also painted the timing marks on the flywheel so I will have a slightly easier time dialing in the ignition in the hopefully not too distant future.

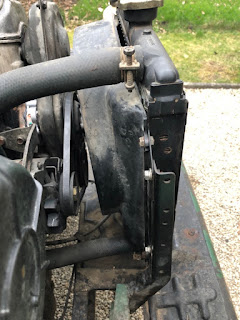
With the engine running again like it should, as a matter of fact with 4 tightened spark plugs it ran nicer than ever, the terrible noise of the fanblades hitting the shroud hadn't disappeared and left quite a mark...

... and for future reference: there's a quite prominent UP-mark on the right side of the fanshroud that's obviously not just there for stylistic purposes.

I still have one more post in my quiver to bridge the current work of cutting out all the old rusty panels and until I am able to show some actual progress in that field. (Or in other words: currently tackling the floorpans and oh my, some good surprises there...) Regardless of that I hope someone will find this post useful in troubleshooting his or her timing mistakes.