Showing posts with label improving brakes. Show all posts

Saturday, 13 January 2024

Dre-XT-Stück - brakepump upgrade

Let's agree that even when new XT600s weren't exactly known to be the absolute wonder-weapons when it comes to braking and admittedly the addition of a later model (still single piston though) brake caliper, steel braided brakehose and a freshly rebuilt brake master only got it to a level, where I am willing to call it a very early version of ABS. Or in other words: that front brake sucks. 

And here it is, the answer to the question: what else can you do? What we have here is a 1980ies vintage XT350, 55V brake pump. Looks pretty similar to the one fitted at the moment, except for this little "11" marking.
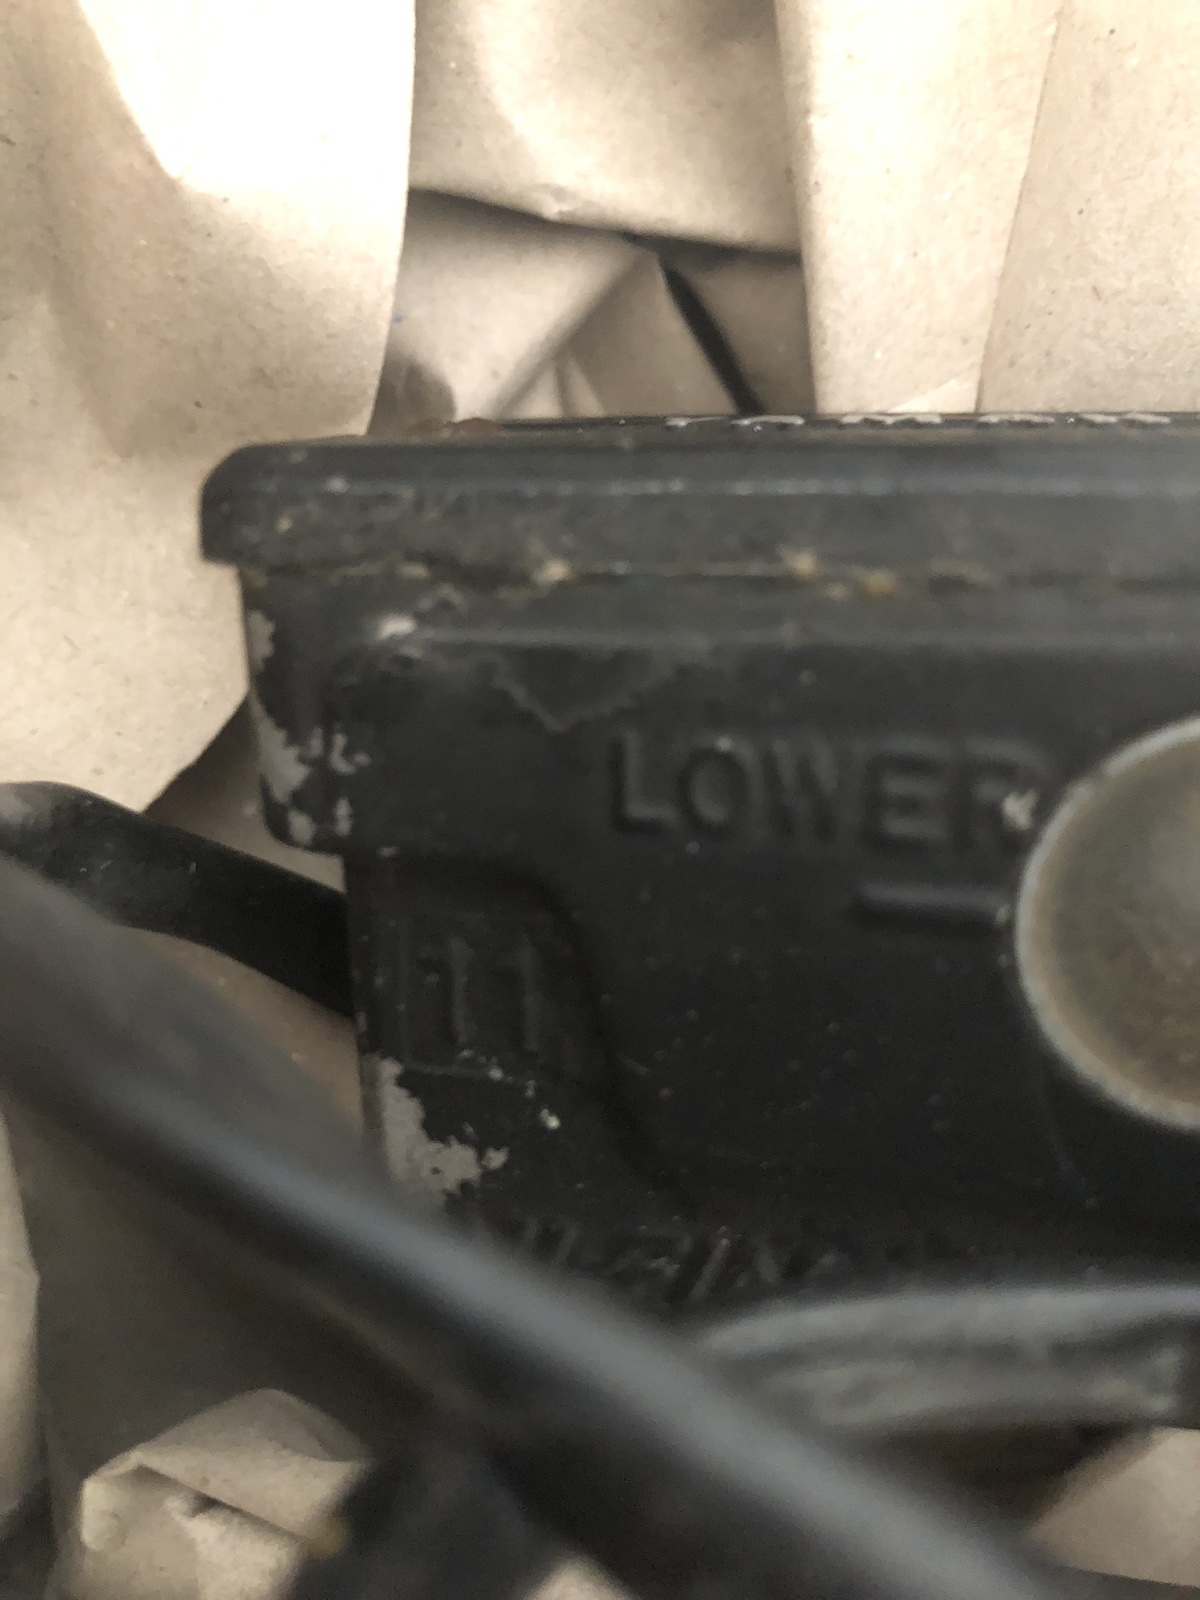
Which stands for 11mm brake piston diameter instead of 1/2" (12.5mm) and those 12 percent less diameter result in 12 percent more travel on the lever, but also 12 percent more clamping force on those brake pads. 

Unfortunately this isn't a genuinely new idea or in other words, these pumps are pricey. So much so that at the current rates, four pumps would cost the same as the bike. Which in turn means, I went for a rather affordable example. It wasn't affordable without a reason, the lid has got some road rash, the bolts holding on the lid are hopelessly rusted and obviously the original brake lever pivot bolt was replaced with the "box-o-random-nuts'n'bolts" finest. 

Not that this ever stopped me from anything really. A bit of heat and a bit of penetrant got both the old mirror mount and the bolts off the lid open. The latter admittedly with the help of a bit of Newtonian persuasion.

The brakefluid in the reservoir had turned into something rather nasty.
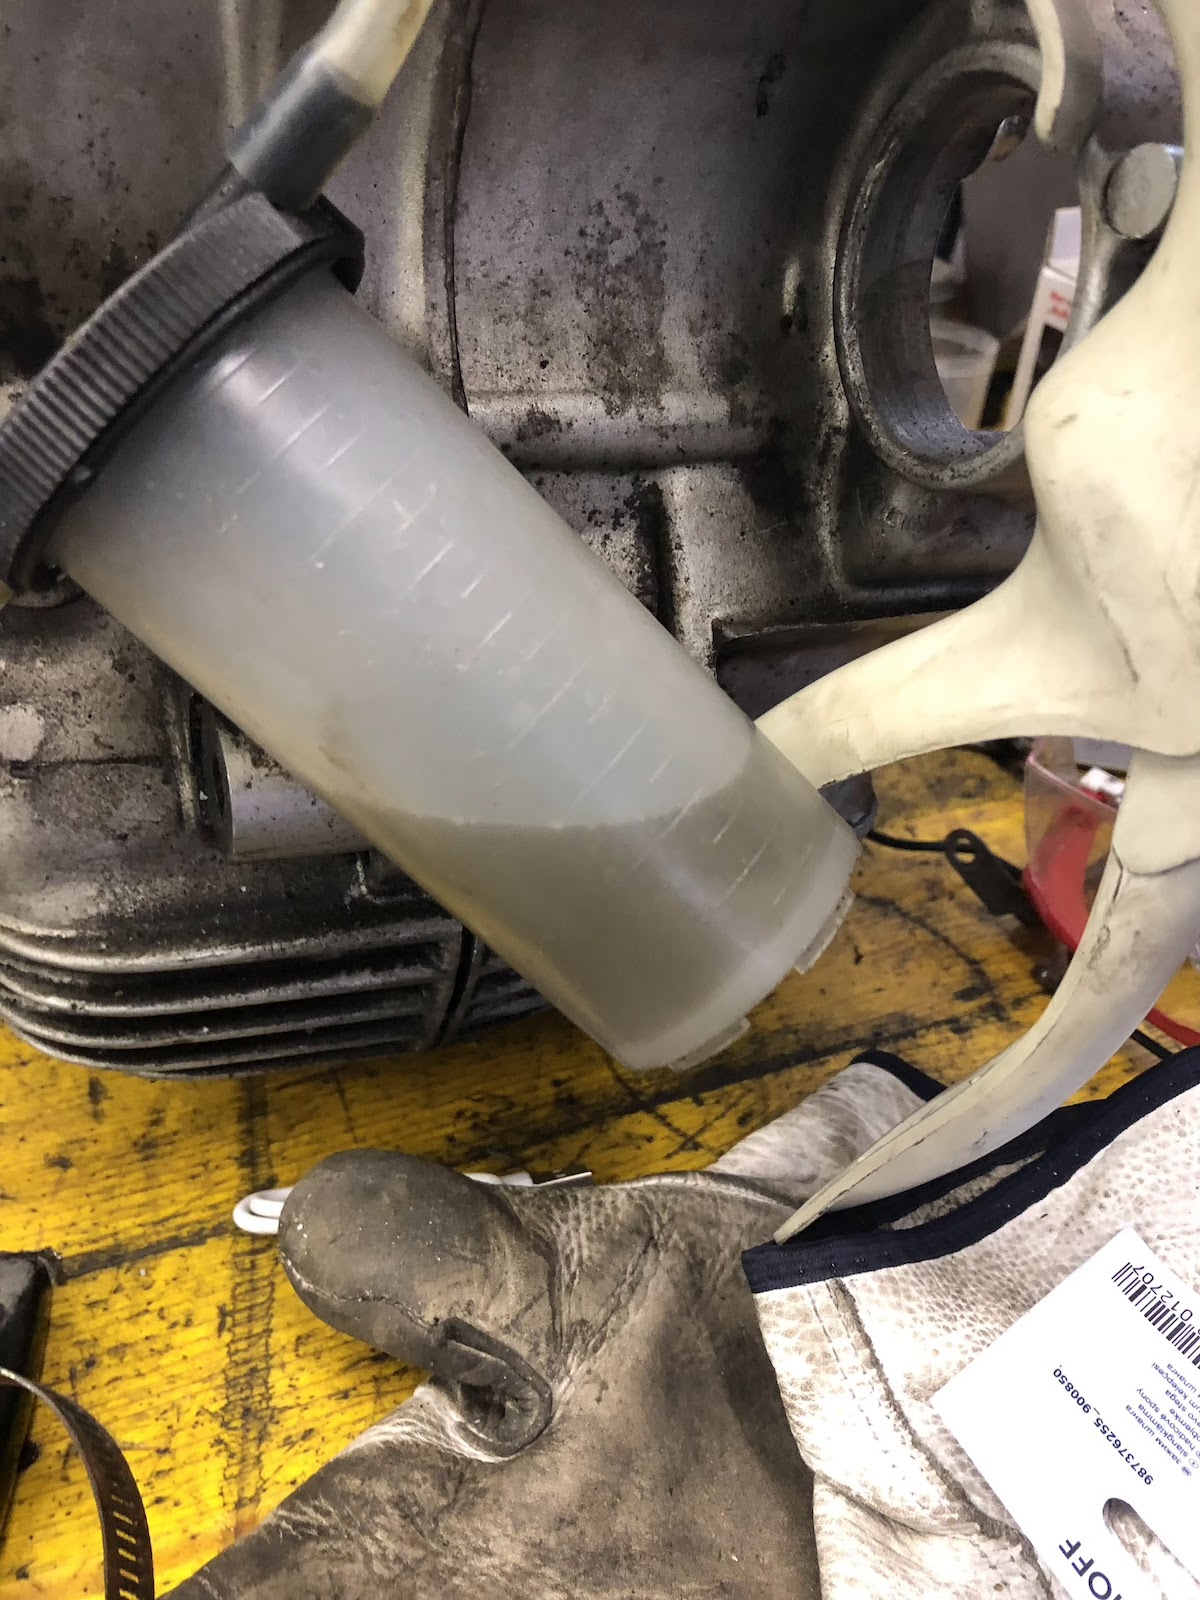
Some decent bolts and a new(-ish) brakeline later, brake performance was at bluing the disk levels and that was still with a set of glazed pads. 


As is already somewhat custom, the sightglass wasn't just a bit dull, but completely blind. So I drilled an 8mm hole into the plastic, well I tried as the "glass" crumbled away and then levered out the backside metal shield and knocked the remnants of the glass out with a drift. This also meant that the outer metal ring was pretty much unsupported and I could easily pry it out with a flat blade screwdriver.

As there's a very convenient hump on the inside, the new glass was pressed in with a set of parallel-jaw pliers in absolutely no time.

And with the mirror and the handguard reinstalled it looks pretty much as it did before. 

Verdict: can't recommend enough to do this mod. In fact 1984 and 85 models would have come with a variant of exactly this brake master cylinder, so strictly speaking on the very first Teneré model (34L) and perhaps the very first XT600 (43F) models, it would actually be the right tool for the job. Unfortunately it was too cold and icy to really test out what the new setup can do, but with a set of half decent (i.e. not glazed) pads I bet it can work wonders. 

ADDENDUM: With the temperature being in the double digits above zero in the last few days, I had a go on the Dre-XT-Stück, really just running some otherwise rather bland errands, but boy oh boy does the old girl brake now. She even did her first (little) stoppie at a traffic light today.

Tuesday, 25 August 2020

Everyday TR1 - improving front brakes

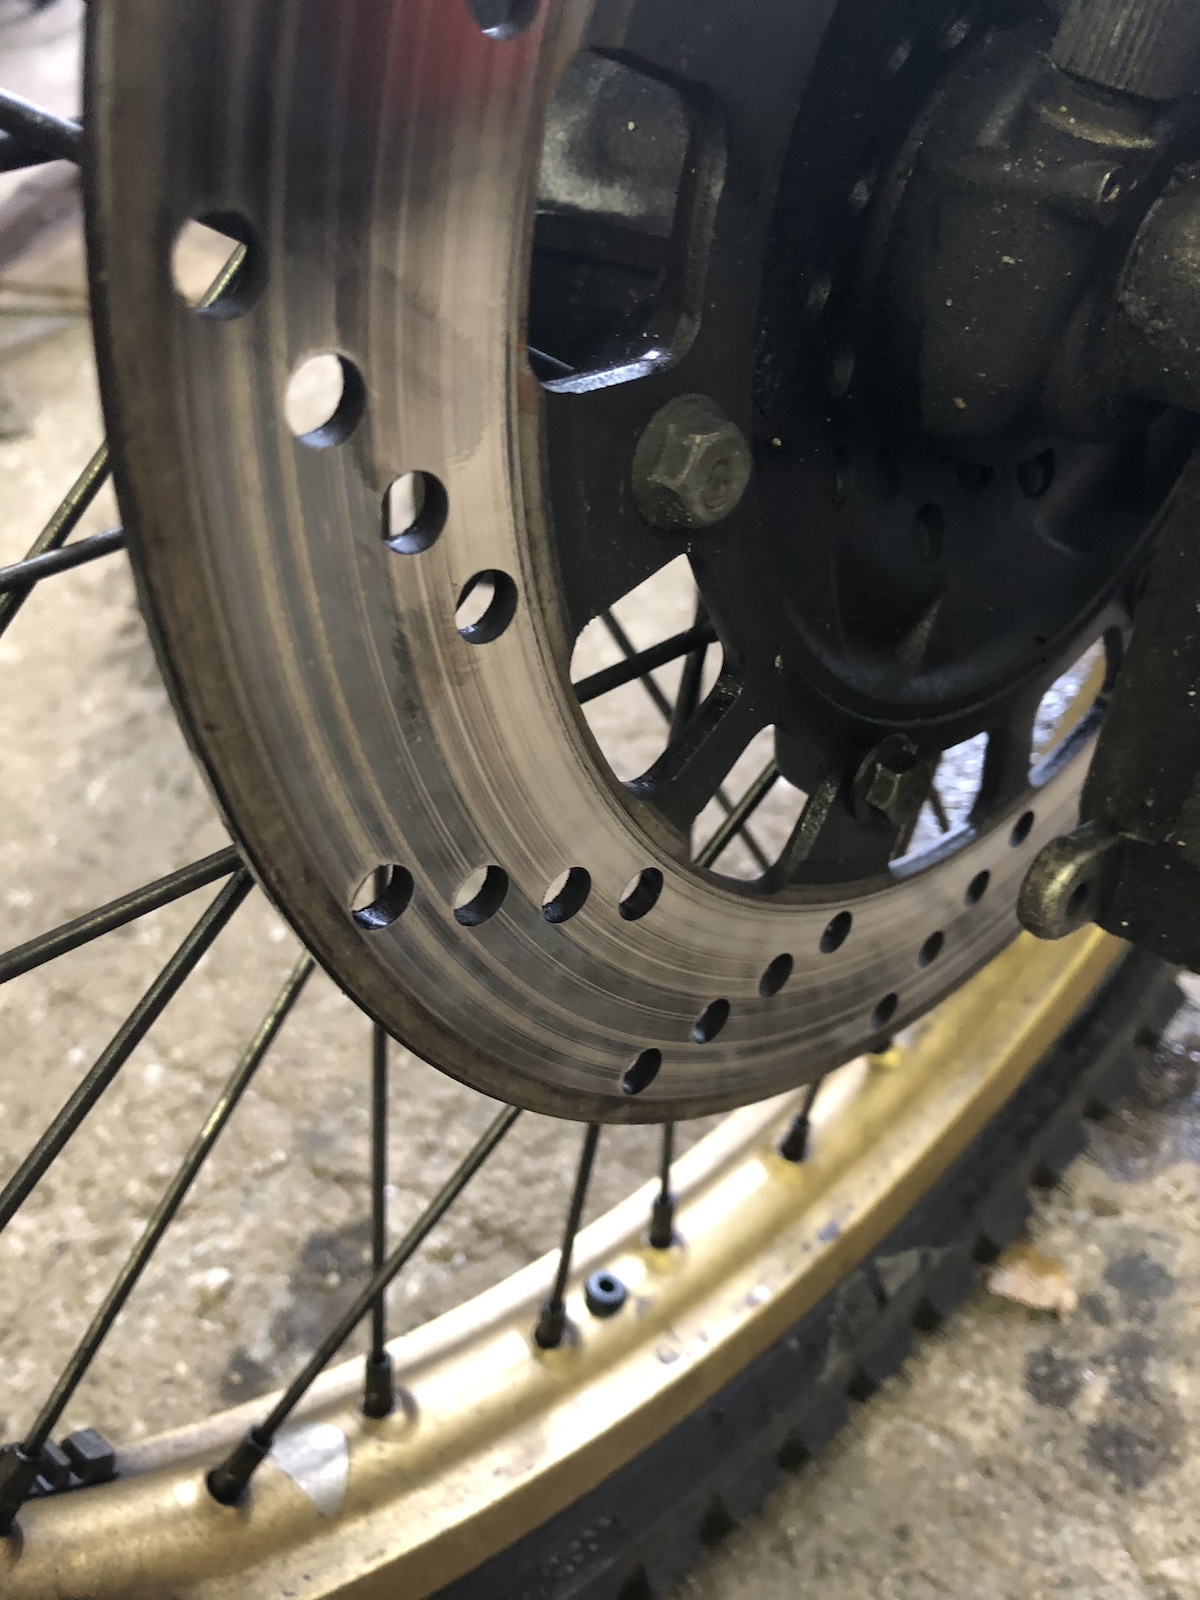
Lately I did some work in order to get the rear drum brake to work as it should. The front brakes are actually working very well with the right pads, but... they squeal a bit.

In general these calipers are meant to slide freely along the center holding pin, once this one gets a bit sticky, the caliper will not align perfectly* perpendicular with the brake disk anymore.

As suspected the slider is sticky and the silicone paste that was on there has vanished. (Been washed out.)


After quite some scrubbing with a brass brush removed most of the caked on residue, yet still the surface felt somewhat rough.


Therefore the next step was to attack the slider bushing with a small polishing disk and polish it to an almost mirror finish. 


Then reassemble the whole lot and lo-and-behold the brakes feel more crispy. Especially the point where you can feel that they start to bite is more precise. The squealing? Well, it improved...

Saturday, 25 July 2020

Everyday TR1 - doing drumbrakes

Whenever I talk to someone, pretty much everyone is quick to point out that drumbrakes don't work as well as disks or don't really work too well at all. After all, disk brakes were the future back then...

Let's start with one Yamaha TR1 rear drum brake, which performs very, very poorly.


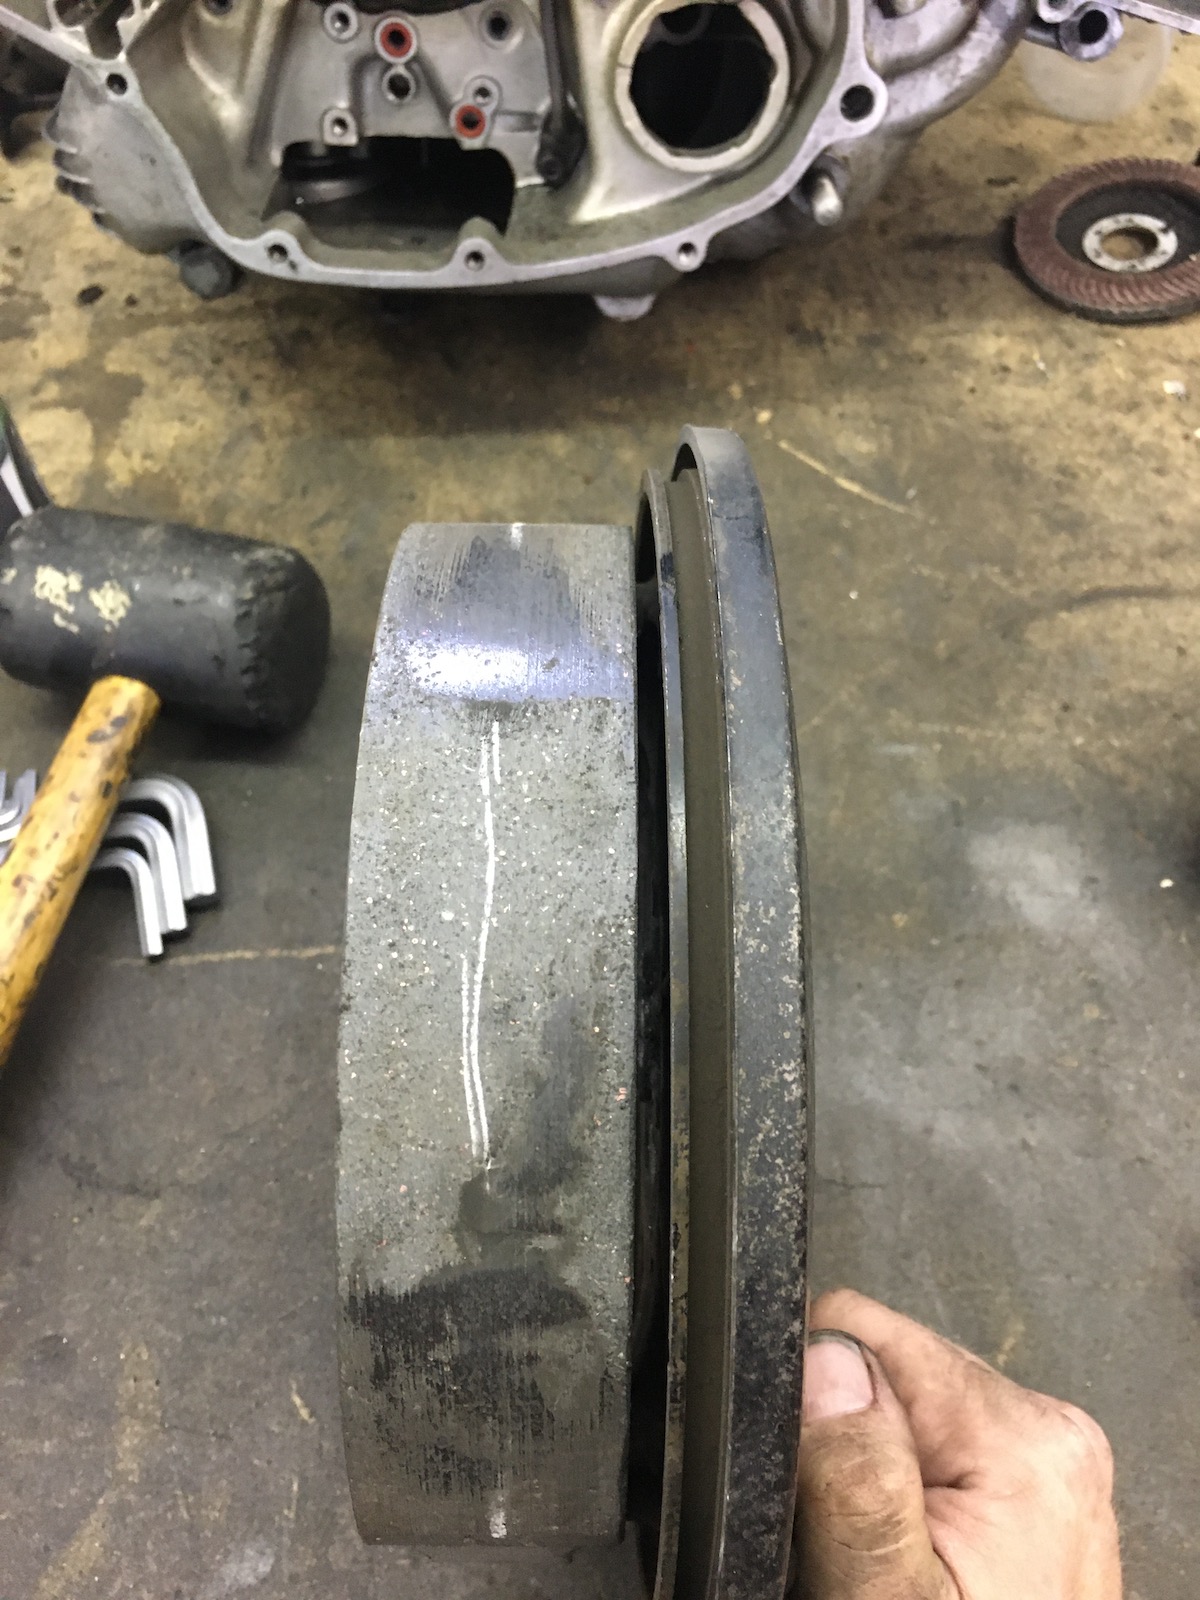
The wear pattern looks pretty good, a bit glazed, but looks like it touches on pretty much the whole surface? Wrong.


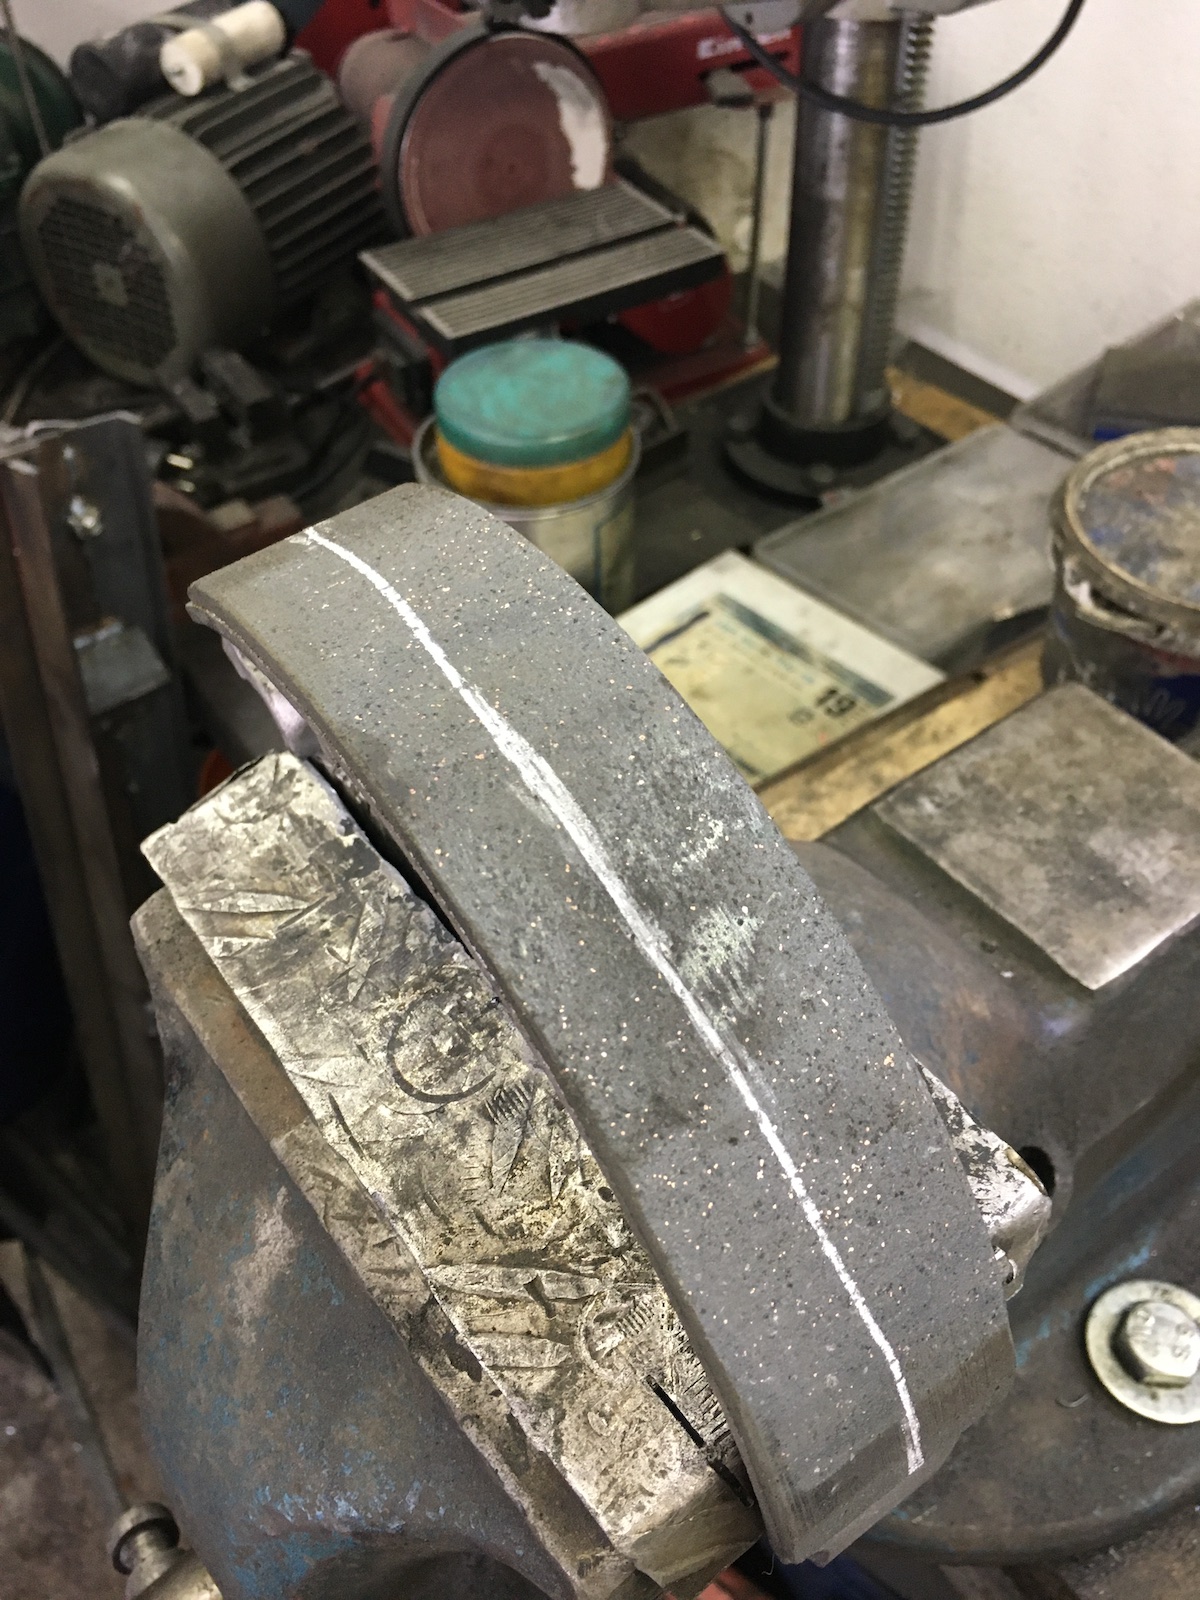
 After scribing a line with some chalk on the shoe, you see it only touches in one spot.


So what do you do? You get your best handfile (or an electrical one, if you're feeling lazy) and file down that high spot a bit.


Then you draw a new line...


... assemble the whole lot and notice that not much has changed.


So you file it down a bit further.


Rinse and repeat ...


 ... and at some point the wear pattern (and the spots where it actually touches) will start to change.


At this stage you file down the (new) high spots down again, making sure to take off less material every single time.


And once you reach the point, where the spots are distributed pretty evenly over the whole pad, they will actually bed in nicely by themselves. But beware... your rear tire may all of a sudden start locking up under hard breaking even at relatively high speeds (70kph), as I got reminded when testing my work...

Now there's one more aspect that needs some attention, when working on drumbrakes: And that's the mechanics. At full compression of the brake lever the one on the drum should be close to 90 degrees in order to achieve the maximum mechanical advantage.


So in order to do that, the lever had to be moved on the shaft for a better angle. 


And lastly all internal friction are losses, so cleaning and lubing the shaft and the cam is totally worth it.


After lubing the shaft, it would do almost a full rotation just from the weight of the brake lever. Before... well it was more like it was filled with sand. 


The outcome of all this work? After just 80km (50mls) the wear pattern on the shoes looks like this. (Which means, now you touch up the high spots again and after some more kilometers they will actually have bedded in and touch on 70-80 percent of the surface, which is more than plenty...)


Yes, this is a tedious process and you could (of course) go with relatively soft pads, which just mandate you to dust out your drum more often and wear faster, but a good drumbrake-compound actually has to be hard to be able to last some time.

Saturday, 18 July 2020

Everyday TR1 - getting ready to race

If you work in a company, where there's some motorcyclists, an annual rideout is a given. (And I am really looking forward to it to be honest.) But given the sporty nature of the rideout and the fact that I am pretty much certainly going to ride the oldest bike of the pack, well some tweaks have to be applied to remain competitive.

But before I could dive into that, first I had fix the mechanics of my fuel cap and grease up the locking mechanism. 


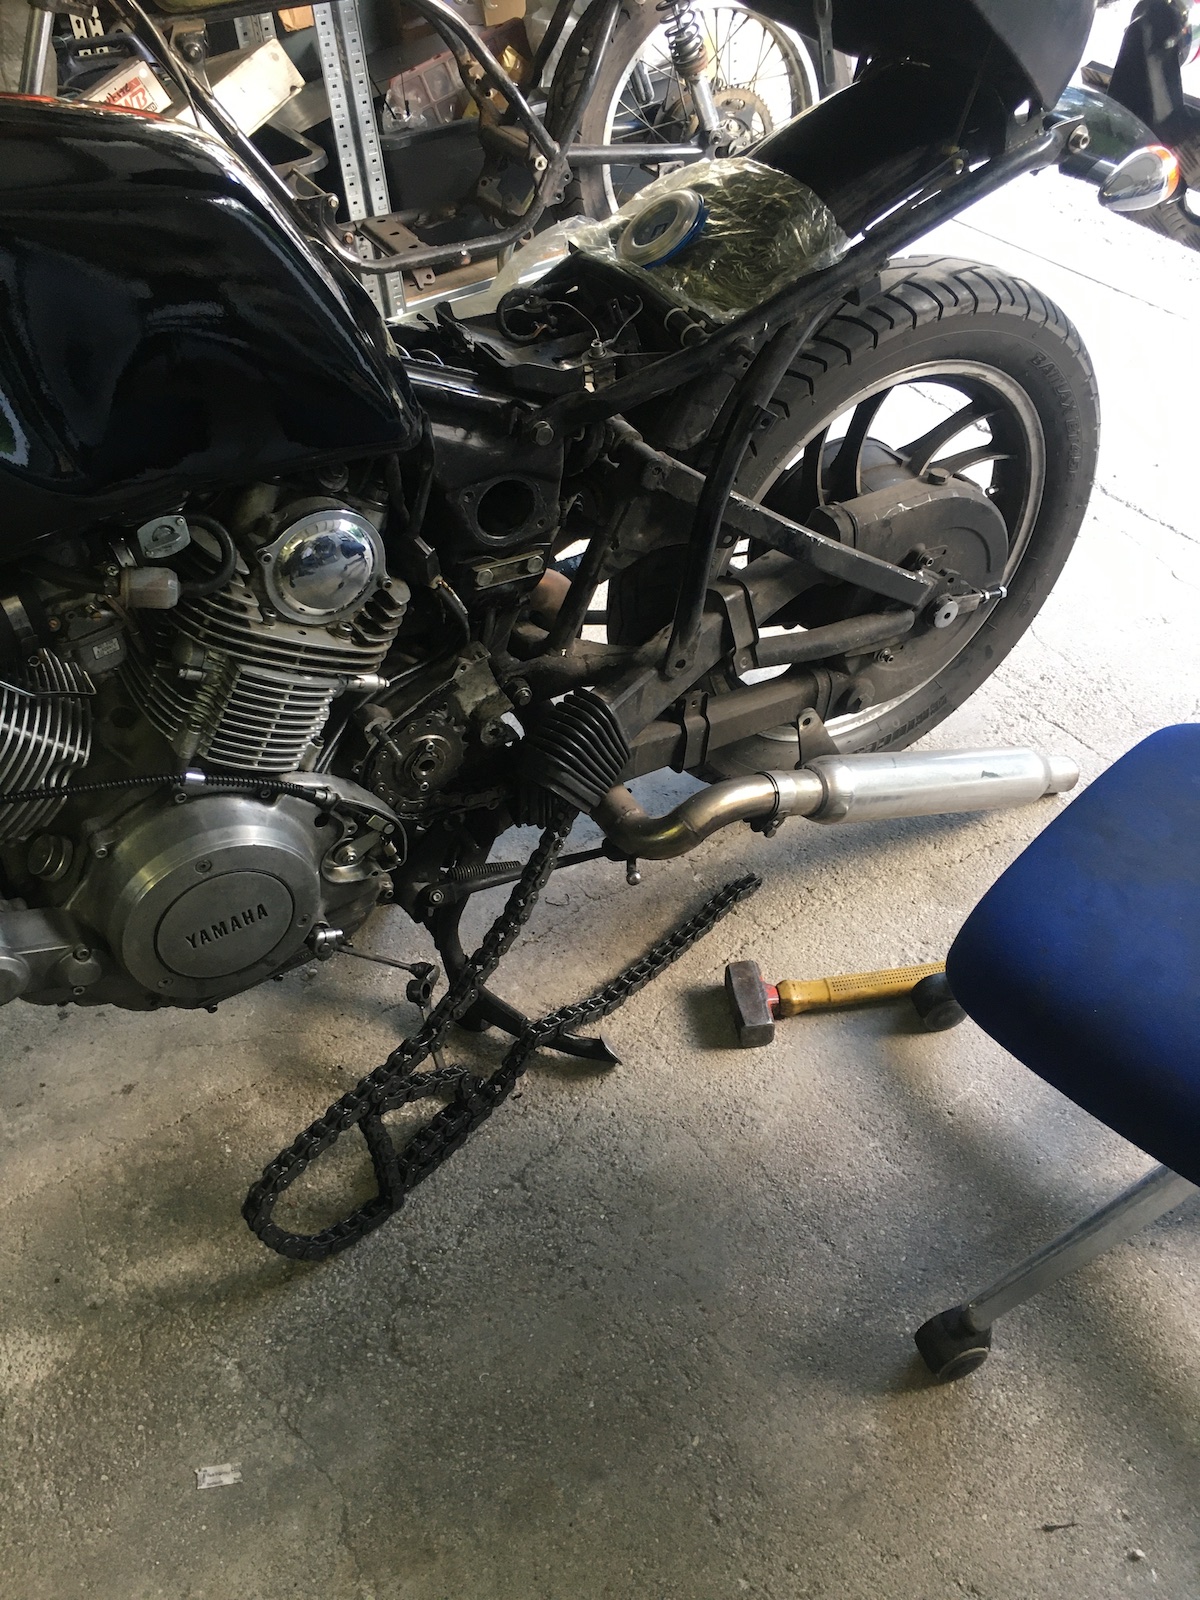
And then it was time to do something that might sound counter-intuitive: I swapped my o-ring-chain for a standard chain. (As it lives in an oil-/greasebath, the o-rings only mean additional drag anyway.)


If you run a bike with a (proper) chain-enclosure, swapping a chain is a bit more work, but then also means that you only do this every 100,000km or so...


It does get a lot easier, if you just connect the two chains...


... and then pull them through. 


Now this is a personal fetish of mine, but with clip-locks on chains, I always mark them with some paint, which makes finding it again a lot easier. (Not so much an issue with an open chain, but if you only have a peep-hole to look into the chain enclosure...)


And lastly add about 0.5kg of grease into the enclosure to make sure this chain never runs dry.


As I was already on the subject of greasing the gear-lever pivot needed some attention too.


Let's simply assume that less drag also means more power making it to the wheel. As a result this implies that something needs to be done about slowing down as well. (I know, it's overrated 'n' all...)


I've run this type of organic pads before and had some rather good experiences with them. With these? Not so much. They squealed like it was going out of fashion AND performed rather poorly feeling unpleasantly dull.


So I took a chance and settled for some sintermetal-ceramic pads in a "hotter" compound, i.e. by the company's own description, the "S3" is on the edge between road use and road-racing. (This is not a sponsored post, but I am very pleased with the pads, but be forewarned, they need two or three attempts at braking to come up to temperature and actually show the full potential.) The same pads are also available in their "AD" compound, which is strictly more road-oriented. (And notably cheaper!)


So let's see what the rideout brings this year. Last year it led me to overhaul the engine and ultimately build bumblebee...

Thursday, 27 April 2017

The XS Triple Sidecar(s) - parts galore and other good news

A very wise man once said, you can fix everything up, if you only throw unlimited amounts of ressources at it. Luckily the other XS Triple Sidecar turned out to be a lot nicer than anticipated and in reality only needs very few technical fixes, but admittedly quite a bit of cosmetical work.


The list of absolutely necessary parts is pleasantly short:

  • new (stainless) brake pistons and seals
  • overhaul kits for both brake pumps
  • new ignition lock
  • new footpeg rubbers, because they disintegrated and "the man" would consider them a risk to injury in case of a crash (and it looks rubbish)
Not shown but also coming up:
  • new tyres (these are properly rotten and the sidewalls are cracked)
  • new battery 
So it's probably going to be about a full day with (hopefully) some help from my dad and we can have a first test ride around his house!

In other news, earlier this week, I've visited my mate Don Carlos and was able to take these two pictures, which show a (relatively) unmolested wiring harness of a '77-model on both the main loom and clocks and that is what I have to replicate on mine. (All of this is gone on mine and hidden in that blob of black tape...


  And finally a small bit I can't show you, but which pleases me even more: I now have the confirmation, that I will be legally allowed to put my spare 850 engine into my '77 750 frame and officially run it as a (fully legal) 850. It's not like I haven't planned installing that 850 somewhere down the road, but to be fair, it does make things easier to have it all in the papers.

Wednesday, 15 February 2017

RatZ brake upgrade - floating disks on Z1000J/GPZ1100 wheels

Now this is a bit of a blast-from-the-past. RatZ used to be my trusty old Kawasaki Z1000J, which in its last incarnation consisted roughly of about as many parts that belonged to a Z1000J as there were parts that were more intended for the proverbial Bulgarian tramway.

That said, there were a couple of mods that may (or may not) actually be interesting to other people as well. This post will deal with how to install OEM 300mm floatin disks onto stock wheels and while we're at it, fit some Nissin twin-pot sliding calipers out of a Bandit 600.

Step one, find the right brakedisks. I am not fully certain, whether some brakedisk manufacturers do this on purpose or not, but both the TRW Lucas and the Metalgear catalogues are pretty good for finding alternative brakedisks for your steed. The ones pictured below for example were originally intended for a '96 model VN1500, but be aware depending on country etc. they may be full floating or solid disks.


Next step, bigger brakes would mean an adapter for the brake caliper, even if you sticked with the stock calipers. The easiest way is to cut some stiff cardboard to size, pinch two through it and mount it to brake caliper mounts on the forks. Then put the brake caliper on the brake disk and put some toothpicks between the outer edge of the brake disk and the caliper, so you space them out a bit as they'd otherwise rub.


If you're as lucky as I was on the old Z1000J, you're pretty much done on this point as the new calipers had thinner mounting brackets than the old stockers, meaning that not exactly a lot of messing around was necessary and a bit of 10mm flat stock was all it took to get the calipers sit nicely on the brake disks.


... and as the adapter plates didn't look exactly as elegant as I had hoped, I took them off once more, bolted them together and radiussed them a bit. It didn't improve things much though... 😆


The next post will be about the earle's forks on the XS-triple sidecar, which are in fact progressing very nicely, but I don't want to go down the road of posting five updates on something, which shouldn't be THAT much work. Most likely, I'll split it in two.