First things first, last time when I returned the next day after the little Zinc-plating session, I was shocked to find some very rusty parts in my shop.
A quick rubbing with some scotchbrite solved the situation and another go in the bath (much longer this time) made sure it hasn't happened again since then.
After this shock I started with the first and most simple mount on the bike as far as the clamps are concerned, the rear upper mount. Unlike on my last SR-sidecar I wanted to retain the inner rear mudguard as it keeps a lot more dirt away from the engine than one would think.
And with that out of the way, it was time to turn towards the front lower sidecar mounts. Marked the parts on the lathe and then drilled and milled them. As I had decided to go with 12mm thickness one of the struts was used as my thickness gauge.
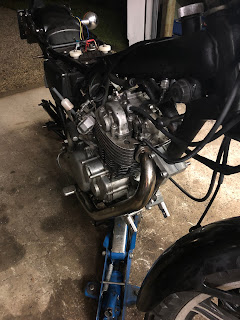
The downside of my beefier front mounts is the fact that I have jack up the engine to get the inner mounts between frame and engine. Once in, everything clears nicely, even though I had to shorten the left-side stud a bit as it was touching the engine, once tightened.
Now the bit between those two clamps was meant to be a very simple case of some 30mm stainless bar that I had over from some other work. Turns out my 10.5mm drill decided to call it a day on the second hole and wallowed said hole out to 11.xx mm. No chance of drilling a half usable M12-thread in there. Lobed the other end of (and got a few new drills the next day) and made two spacers with M12 threads in the middle and grabbed some 20mm stainless bar from the shelf.
With a little recess machined into the back they were a breeze to TIG onto the 20mm bar.
There you go, looks overly complicated, but works just fine - front top mount is more of the same.
Ball-head was straight forward and that knife-head really works nicely, if you put on some fresh inserts...
And then it's spot all 4 mounting points on my SR500.
At this point it could be all so simple: shorten the struts, alter the lower front sidecar mount so it can connect to ball joint and weld on a block for the rear swivel mount. Easy three or four hours of work (it's the small stuff that takes time), put the wheel on the axle and be the coolest kid in the neighborhood.
I swear I had the best intentions to leave the sidecar-chassis alone. Really.


No comments:
Post a Comment