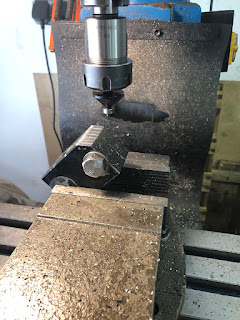
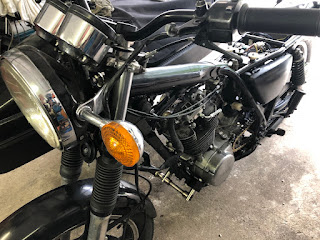
After taking the engine apart and assessing the damage an attempt was made to bore a cylinder to the next oversize on my lathe. In the end I gave the cylinder to a machine shop. (I am in the process of upgrading my mill to be able to do that myself in the future!)
Whilst the cylinder was out, first order of business was to swap out the crank. It's not like the one in the cases got damaged or anything, the small end was fine, but the big end had a bit more slop in it than I liked and then "the right kind" of offer came up.
This incidentally means that the crankcase had to come apart as well.
(Pro-tip, there's one M6 bolt hiding behind the clutch actuator arm, with that
one removed, cases come apart really easily.)
As I would later find out, these particles came down from my (dirty) engine
breather and must have been some leftovers from a previous engine.
I didn't know one could take the breather apart, but guess what, makes it a lot easier to clean out.
Actually the breather was pretty full with these little shavings, which looked
a lot like plastic to me.
This little intermission aside (I found out about it when the engine was already installed in the frame), getting the crank out is pretty easy on these engines. There's two handy holes threaded in M8, which you can put some althread in and then just use an L-bar with 3 holes to press the crank out in theory. In practice my old crank was so undersized that when it slipped off the wooden blocks, it already pushed out a bit and so a few taps with a plastic-capped mallet got it out the rest of the way.
With the gearbox and crankshaft out, I cleaned out the cases until they were
spotless on the inside and all the mating surfaces were proper too.
... and that was a pretty good point in time to finish work for day
(afternoon) one.
The following day, I chilled the crankshaft down a bit and it got itself started in the bearing. Admittedly the rest was done in the press with 3-4 strokes and it went where it should.
There's basically just one trick you should know for installing the gearbox on
these: Fit the shafts, then the shifter claws (on polished sliders), but pull
the sliders out and set them aside from the holes they should go into. Then
you can drop the shifter drum in and just slide everything in place.
With the cases together, the gear selector pin and housing are tightened PROPERLY. I didn't want to use loctite on it, as I am somewhat worried that I may have more than my fair share of trouble to undo that cap at a later stage.
As the liquid gasket had to cure for quite some time, I turned my attention to a little something that annoyed me, when I took the engine out. I couldn't undo the lower oil-line, because my sidecar mounts were in the way. So the inner corner of the blocks was milled off at a 45 degree angle, chamfered and then re-zinc'ed.
If one is careful, a woodrouting bit actually makes for a brilliant chamfering
tool.
Fresh out of the zinc-bath (electroplated at around 12V/3A).
The surface ends up very grainy and not mechanically durable, but it can be
improved quite a bit with some passivation. (In this case blue chrome.)
Proof it works. It's no fun, especially lining it up with an engine in there would definitely make it a lot harder, but technically it is possible.
Finally a few days later I got a call from my machine shop that my cylinder is ready for pickup. (Just look at that gorgeous Sunnen hone from the 1960ies/70ies - the rest of the shop is the same, all handcranked vintage equipment.)
Oilpump was the first thing to tackle. First things first, Kedo has got a brilliant video on Youtube on how to do a full swap on a SR500/XT500, which makes it an easy-peasy job. That being said, for sales reasons they leave out a thing or two. As you can see in the picture below, all the parts can simply be bought at the local Yamaha dealer, but as my oil pump had chewed through some hard material, I had to replace the whole lot.
If like me, you want allen instead of philips head bolts on your oil-pump housing, the short ones are M6x16 and the long ones are M6x30.
The paper gasket won't mind being oiled up well and then be aligned with the dowel pins.
Shaft goes in first and then have the return pump stacked onto it. Not shown is that it a bit of assembly lube will help dramatically in having the oilpump build up pressure almost instantly.
Outer housing stacked on top and again, don't be shy with the assembly lube.
Only shown for the outer cover (but the same applies for the inner), there's two oil-seals that prevent oil from leaking out along the shaft. Get them gently started with a hammer and then use a 1/4 nut (11mm in my case) to drive them in. Should take only very little effort to get them seated.
Then essentially just fill the right side engine case with all the bits you had to remove.
As I found out, my alternator was missing one bolt and the others had come loose regardless of all the rust on them, so they were (again) replaced with some proper hardware and loctited in.
With the bottom ready for action, I turned my attention to the freshly bored cylinder and checked the ring gaps and then cleaned the top surface.
Installed fresh headstuds. Even though not entirely necessary, in comparison to the rest of the money spent it didn't really make much of a difference anymore and yes, I forgot to order M8 studs and also forgot to put them back in until (almost) the very end.
Rested the piston on my U-shaped fitting block and installed new clips (and rings).
Turned the crank back so the piston sits firmly on the wood and the rest is a rather easy affair...
Next was to sort out the head. I invested in a new camchain, because with everything else being sorted and this being an "engine-out" type of job, I really didn't want to pull the latter out just for saving a few Euros along the way.
A set of brand new hardpad-rockers looking at you.
Spot the missing M8 studs on the camchain-tunnel...
... and how they appeared out of thin air. Wasn't too bad as the the kickstarter-indicator cover needed a bit more gasket goo on the top anyway, as I missed a spot.
A case of spot the diference between these two pictures:
Amongst the parts I ordered also was a 15 tooth sprocket.
One thing with dry-sump engines of all sorts is that they usually demand a pretty elaborate oiling procedure for the first start. On these singles it's no different. The return side of the oil pump is oiled very well as the return-line is near vertical. The feed side is tricky though as the feed line goes parallel to the sump of the engine and then makes a sharp 90 to go vertical. If you give it enough time, it would probably bleed (all by itself) into the oil filter housing. A 5ml-syring and a funnel that seals into the syringe's body can speed things up a lot.
After a while (mayb 10-15 minutes - can't say exactly as I was chatting with my grandma and filled up then funnel every now and then), the funnel will stay filled and that means the engine is ready to be started.
Then I quickly had to swap the stripped out bolts in my knurling tool as there was one more thing that I wanted to change for a while - it bothered me that in order to remove the seat, I had to get an allen key from my toolkit.
The sneaky shopmanager approves of this mod.
Guess it was a case of turning the petrol tap to on and kick it like you mean it. (And kick it I did. Even though I cleaned the spark plug, the old girl took a while to wake up...)
Oil circulating nicely.
And she does some rather good. Cam-chain tension has got some room for improvement and the valves need setting again, which is normal with brand new rockers.
Finally got the old girl freshly aligned with the help from my dad, toe-in was way out as the front lower strut got loose in the sidecar frame and slid out slowly whilst driving.
She undeniably does look the part, let's hope I can enjoy her for a while now. Next steps will definitely be to set up the TM36 flatslide with the wideband-AFR as the overall performance wasn't exactly stellar the last time and I suspect we're a bit on the rich side on the bottom end (good), but very lean at the top. But first: let's break the 100km mark without breaking the engine.


