Showing posts with label rhino-lathe. Show all posts

Thursday, 17 February 2022

Bye, bye Rhino Lathe

 ... you will be missed. But, as much as I would have loved to, there simply isn't enough room for a big and a small(er) lathe. Even though I borrowed an engine hoist, in the end, we mostly did the lifting by hand and as much as I wouldn't recommend doing it that way, we managed to scrape by without any substantial injuries.


And yes, you can fit the lathe and the cabinet in just one family size station wagon. (I am not going to say, with no problems at all, but...)


So ends the story of the old girl. Now why swap a bigger lathe for a smaller one? Mostly because the Matra just has got a lot more ooomph to her and in general is just that useful bit more rigid. Yes, there will undoubtedly be moments, where I'll miss the bigger work envelope of this old girl, but for the most of the time, I do work that could be done on a much smaller machine than Martha II.

Sunday, 21 February 2021

New motor (again) for the old Rhino- / Coronet-Lathe

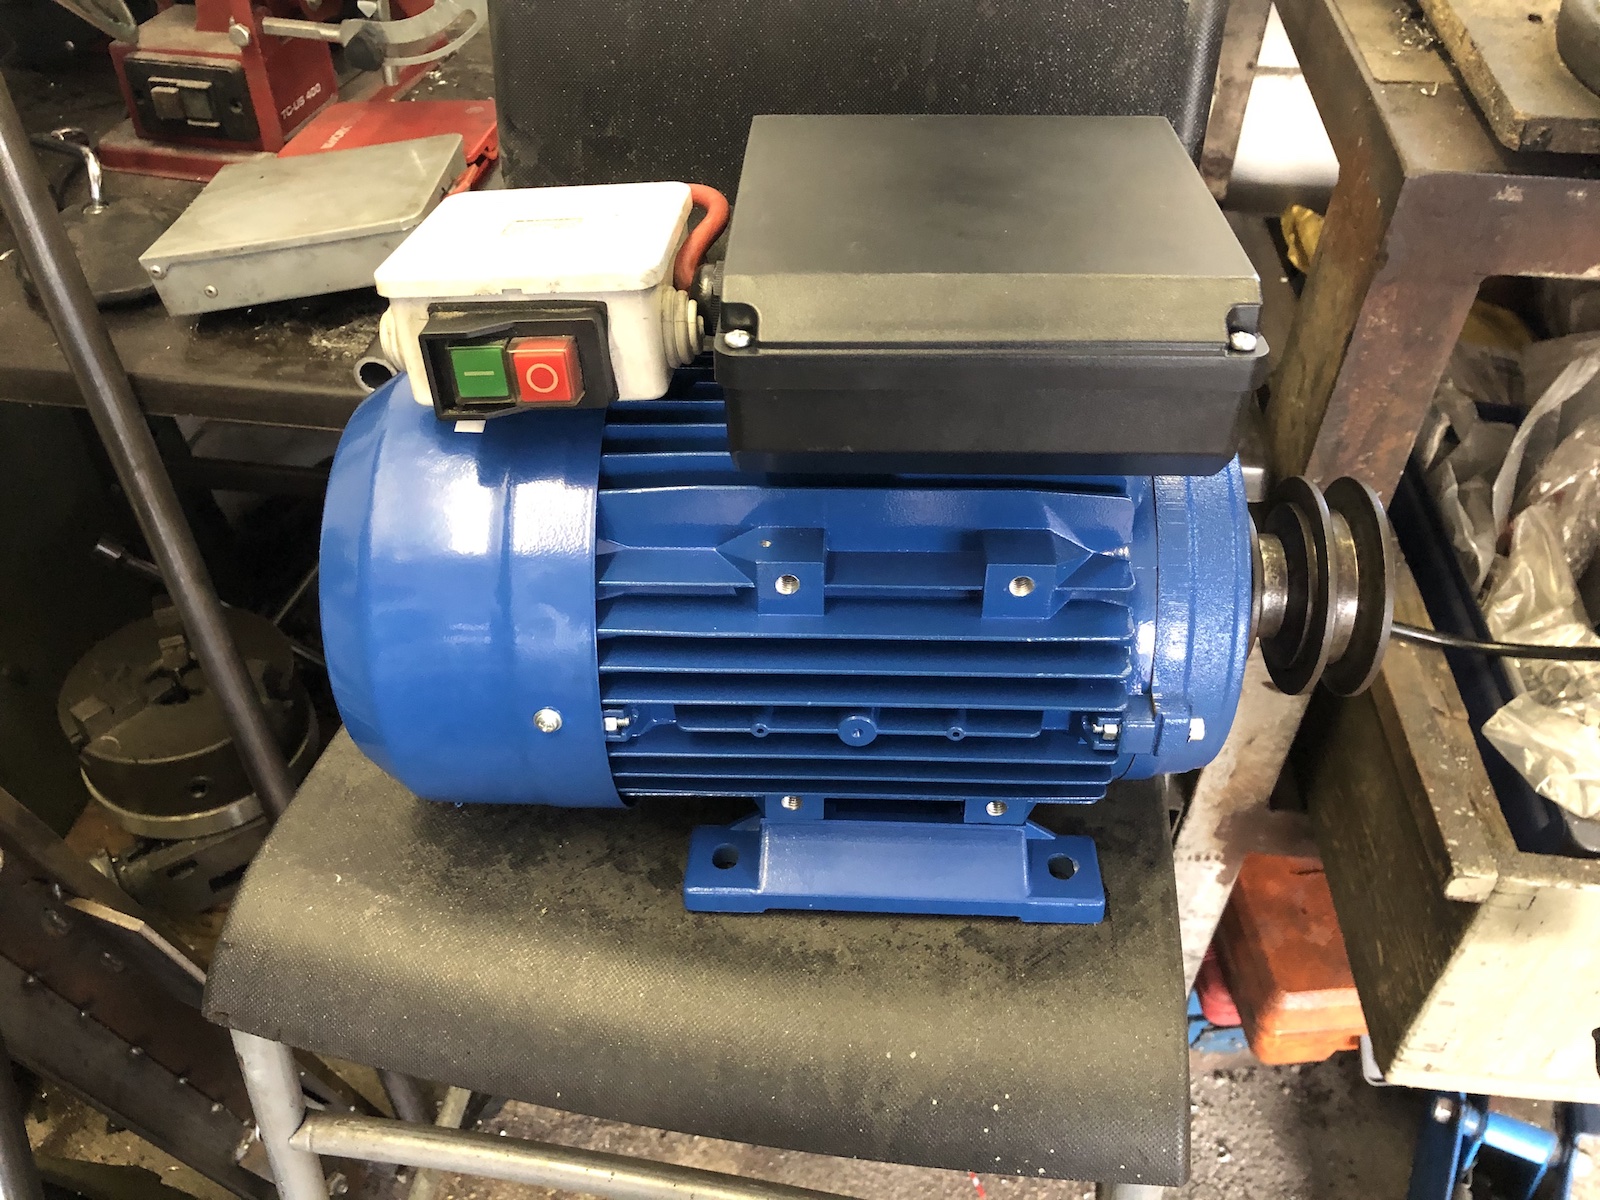
 ... now with even less RPMs. I guess I should this one from the start and not somewhere in the middle - Last Summer I replaced my lathe's motor (found here), with a 2.2hp/2800rpm unit, as I hoped that with higher RPMs and more importantly more oomph (2.2kW instead of 0.75kW) I would be able to finally get the sort of finish out of the machine, that I knew it was capable of. What I did achieve was to heat up the roller bearings, but not much else. As I have little intentions to ruin the old girl, I recently bought a decent 1.5kW/1400rpm motor. 

First things first, the motor had to be set up to run in CCW - and I was pleasantly surprised to see two VERY proper capacitors.


Thanks to a label in the motor cover wiring it up was a 15-minute job.

The pulley came off with (relative) ease and went on onto the new motor in the same fashion.

And now it's a proper self-contained unit.

The thing that actually fought me the better of at least two hours, was to redrill/slot the mounting holes and even more so re-install the motor-tray, without removing the main spindle from the lathe. (I now have a lovely reminder on just how sharp those gears are on one of my hands!)

With (oversized) slots the motor now fits nicely and can be tweaked so the belt runs straight and true.

 Also the new motor sounds a lot less rattly, compared to the old one. 


What's the verdict: If I had mounted the old 2800rpm motor the same way as this one, the results would definitely have been nicer. It would not have solved too-high-rpm issue though. A tad under 1100rpm should still work nicely for most tasks though. By the way the old motor will be turned into the drive for a new massive belt-sander, that I have had in my mind for a looooong time.

Sunday, 2 August 2020

New motor and new tools for the Rhino/Coronet lathe

There was nothing essentially wrong with the old motor on my lathe, except it was only 750W and 1500rpm. Which exactly mirrored the stock 3-phase that was originally on it. But with modern tooling constantly demanding higher speeds and higher chip-loads, it was time for a bit of... more oomph and more speed.


For some reason the 3-phase motor that was on there, was mounted with this spacer plate, so I took the liberty of using it as a drill-jig.


*drumroll*
And here we go: 2.2kW (or 3hp for you non-metric types) of 2800rpm, single-phase goodness. And I really have to work out how to wire in a reversing switch, as that will make screwcutting a lot less tedious.


The second part of the story is the thing with tooling. Normally you would expect people to step up their game from CCMT to TCMT tooling. I went the other way. The former Matra with its geared head, had a better power-factor, which allowed me to run TCMT tooling and get decent finish on my parts. With this lathe being belt driven that's simply not gonna happen. So after some consultation with my local lathe tool rep (and cross-checking with some catalogues), I settled for some CCMT09 tooling, which with its smaller tip-radius decreases the load. In combination with the higher spindle speed, this nets mirror-finish results (at last).


With VCMT-tooling I still have some vibration issues, which I (by now) tracked down to a slightly loose motor and a belt that's a bit jumpy. 


Once I have fully sorted the vibration issues, I have some very, very high expectations for the finish quality that I can achieve with this lathe. I suppose some rubber machine-feet and a new (slightly longer) belt are in the cards to tackle this issue.

Sunday, 9 February 2020

Finally fixing the Coronet-/Rhino-lathe cross-slide

Now this has been one of those tasks that has bothered me for a long while. My lathe's cross-slide was stuck at a weird angle ever since I bought it. Meaning that whenever I used the cross-slide I've cut a three to four degree taper.


As usual I would have expected the bolts to be something weird and wonderful straight out of Whitworth-land, but it turned out to be "just" a set of stainless M12-bolts, which the pre-owner had bought. 


Now if he had taken the time to remove the letters on the bolt-heads, I would probably never have had to take the lot apart. 


A set of fresh bolts, bit of oil and cleaning of the ways where the bolts sit and we've got ourselves a winner.


Which is a typical moment, when the heavy-handedness of the pre-owner reared its ugly head. Now I admit the amount of meat between the dovetails on the inside and the cutout for the hold-downs is rather limited, but the whole lot had fractured all the way over the last fifty or sixty years.


After some very thorough cleaning and with the gib-adjustment bolts removed, I put the whole lot in the vise and used an M8 nut as a spacer to pre-load the broken section.


After taking a deep breath and then turning my tig-welder up to eleven (210 Amps), I floored the pedal and this is where we're at.


As you can see, the crack extended round the corner, so I touched it up from this side as well. Before I did that I could see, that I had (almost) full penetration. The material is only 3-4mm strong at the bottom of the dovetail!


So the precision engineer in me knows that without the correct torque, the dovetail would at least need touching up, but in reality I must have been very lucky, because the cross-slide works all the way with pretty much the same resistance, so there's no loose or tight spots and as such I will call this a proper success!

Thursday, 7 November 2019

Aligning the head of the Rhino/Coronet lathe

So I had the lathe apart for transport and when I reassembled it, I had to do that quite quickly as there were a lot of helpers standing around me and waiting to get other stuff done. But in order to do proper work, the headstock had to be aligned.

A quick and dirty way to do that is by using a (known to be) straight fork leg and zero it at the chuck.


And then move as far as possible away from the chuck and check the alignment error. Tighten the bolts holding the headstock on only fingertight allows you slowly push it into alignment. 


The forkleg in the picture is out of an XT600 and allowed me to work almost at the end of the bed, getting the alignment very close. Just one thing to note: Once you're done, take your reference out of the chuck, put it back in and recheck your measurements. Repeat until the results are repeatable.

It's a fun way to spend a whole afternoon. 😉

Saturday, 26 October 2019

Cleaning, fixing and adjusting the Rhino-/Coronet lathe

In order to move the Rhino to the new workshop, the old girl had to come apart, which was the perfect opportunity to finally clean her up properly and see just how sloppy the pre-owner and manufacturer were. (Spoiler alert: very.)

The picture shows the headstock after attacking it with household kitchen-degreaser and a bit of scrubbing. (Which sort of started this cleaning marathon)

One of the moments of shocking sloppyness: This is one of the cross-slide's gibs, which has never been fully bolted down, because the same bolt also held the oiler-cap on and because at the factory they didn't bother drilling the hole the correct size, tightening down the bolt resulted in locking the oiler-cap... 


Same gib, de-rusted, oiled and ready for install. 


It's somewhat hard to see in the pictures, but now you can make out that the lathe is actually green.


Last task on the list was to clean up and repair the power-cross and longitudinal feed lever, which had been broken off, ever since I bought the lathe.


Yes, that's JB-weld. But the pin had been pressed in from the back and there was no reasonable way to get it out. Also the lever had broken off exactly at the hole resulting in the pin being a nice alignment dowel.


Greasing all the bores and shafts with molybdenum-disulfide grease to make them run nicely again. 


Spot the dirty print marks from touching the painted bits - yup the lathe's now this clean!


With a working lathe, the new workshop is starting to feel a bit more homely at last.

Friday, 24 May 2019

Belts 'n' suspenders - more on the Rhino lathe

The best one can say about an old lathe is probably that there ain't much to say about, because it just does its job. In reality that's pretty much accurate with this old beast. But I have to admit that the lathe belts had a rather nasty tendency of slipping... a lot.

Now in order to swap the belt on this lathe, one would have to take the spindle out. (Which on its own wouldn't be the dumbest move to start with, because the bearings certainly could do with a bit of cleaning!) But what if, there was a way to avoid this?

Bring on the fenner belt or as the seller calls it "linked v-belt". As the name implies, it is comprised of sections that make it possible to lengthen or shorten the belt according to the needs of the situation and also you can link it up in place. 


A thing to note: After running the belt in for a few revolutions, it had to be shortened. A process which I had to repeat quite a few times and I attribute to all the links seating correctly. I was expecting it to run rather roughly, but to be honest, it's not worse than it was with the old belt. Surely you wouldn't do this to some Schaublin finishing lathe or the like, but for jobs like this one: perfect.

Sunday, 20 January 2019

What the chuck ... and servicing the tail-stock on my Rhino-/Coronet-Lathe

During those quiet days between Christmas and New Years Eve, I stumbled over an ad for a 200mm (8") Emco chuck just like mine, allegedly NOS and with both sets of jaws for a price around the same as a new Chinesium one. Originally I tried to convince the seller to simply sell me the outer jaws, but as he wouldn't, I bought the whole set, thinking that I may use the old Emco chuck on the rotary table of the mill and still have the external jaws to swap in, if I don't need 'em on the lathe.

One of the things you only notice, when you have to carry that chuck around: It is epically heavy. A bit of wood was placed over the bed ways to protect them, in case the chuck would fall off. (It didn't the fit of the chuck and backplate is a lovely ever so slight interference fit, which means it needs a bit of gentle *tappy-tap-tap* with a rubber mallet to come of.)


New one installed. You gotta love vintage engineering, the overall dimensions on the backside are the same to within 1/10mm and the chuck sits on just as nicely as the old one.


The last thing I had to address was the quill-lock on the tail-stock. Lately I ran a live center in the tailstock only to find out, that even though the quill would lock nicely, releasing wasn't exactly in the cards.


As it turned out, the sliding bit was well rusty (as so many parts on this lathe) and simply didn't mean to move at all.


The verdict: Even though not strictly necessary, the new Emco-chuck was definitely a nice investment, it will have to have its innards cleaned out and a regrease. And then there's the elephant in the room: I want and have to get the chuck's backplate off to get the spindle(s) out and replace the drive belt, clean out the old grease from the spindle bearings and ideally also replace the seals. And when I am doing that, I'll also address the runout-issue of the primary drivebelt and install a reversing switch for the motor, so I can run the motor in reverse for thread-cutting. And most likely, when I have all those bits of anyway, I'll treat it to a coat of happy engineering grey, because the flaky and faded green disturbs my workshop Feng-Shui. 😜

A shoutout to all Coronet Lathe users: Should any of you have a user-manual or technical data and/or drawings please let me know as they would come in extremely handy

Thursday, 29 November 2018

More work on the lathe - servicing the chuck

At some point in its life, the old Rhino lathe must have had some first hand experience with waterboarding. Either that or it's been parked in a leaky shed, as that's the only way to explain some of the water damage.

Some distinct features showed that somebody must have really liked the lathe, like the fact that all the bolts holding the lathe chuck onto the backplate at some point have been oiled prior installation. Additionally it has to be noted that we're talking about a 200mm (8") chuck and this thing is HEAVY.


First step was to mark chuck and backplate to be able to put it back together the way it was, because the runout was really good.


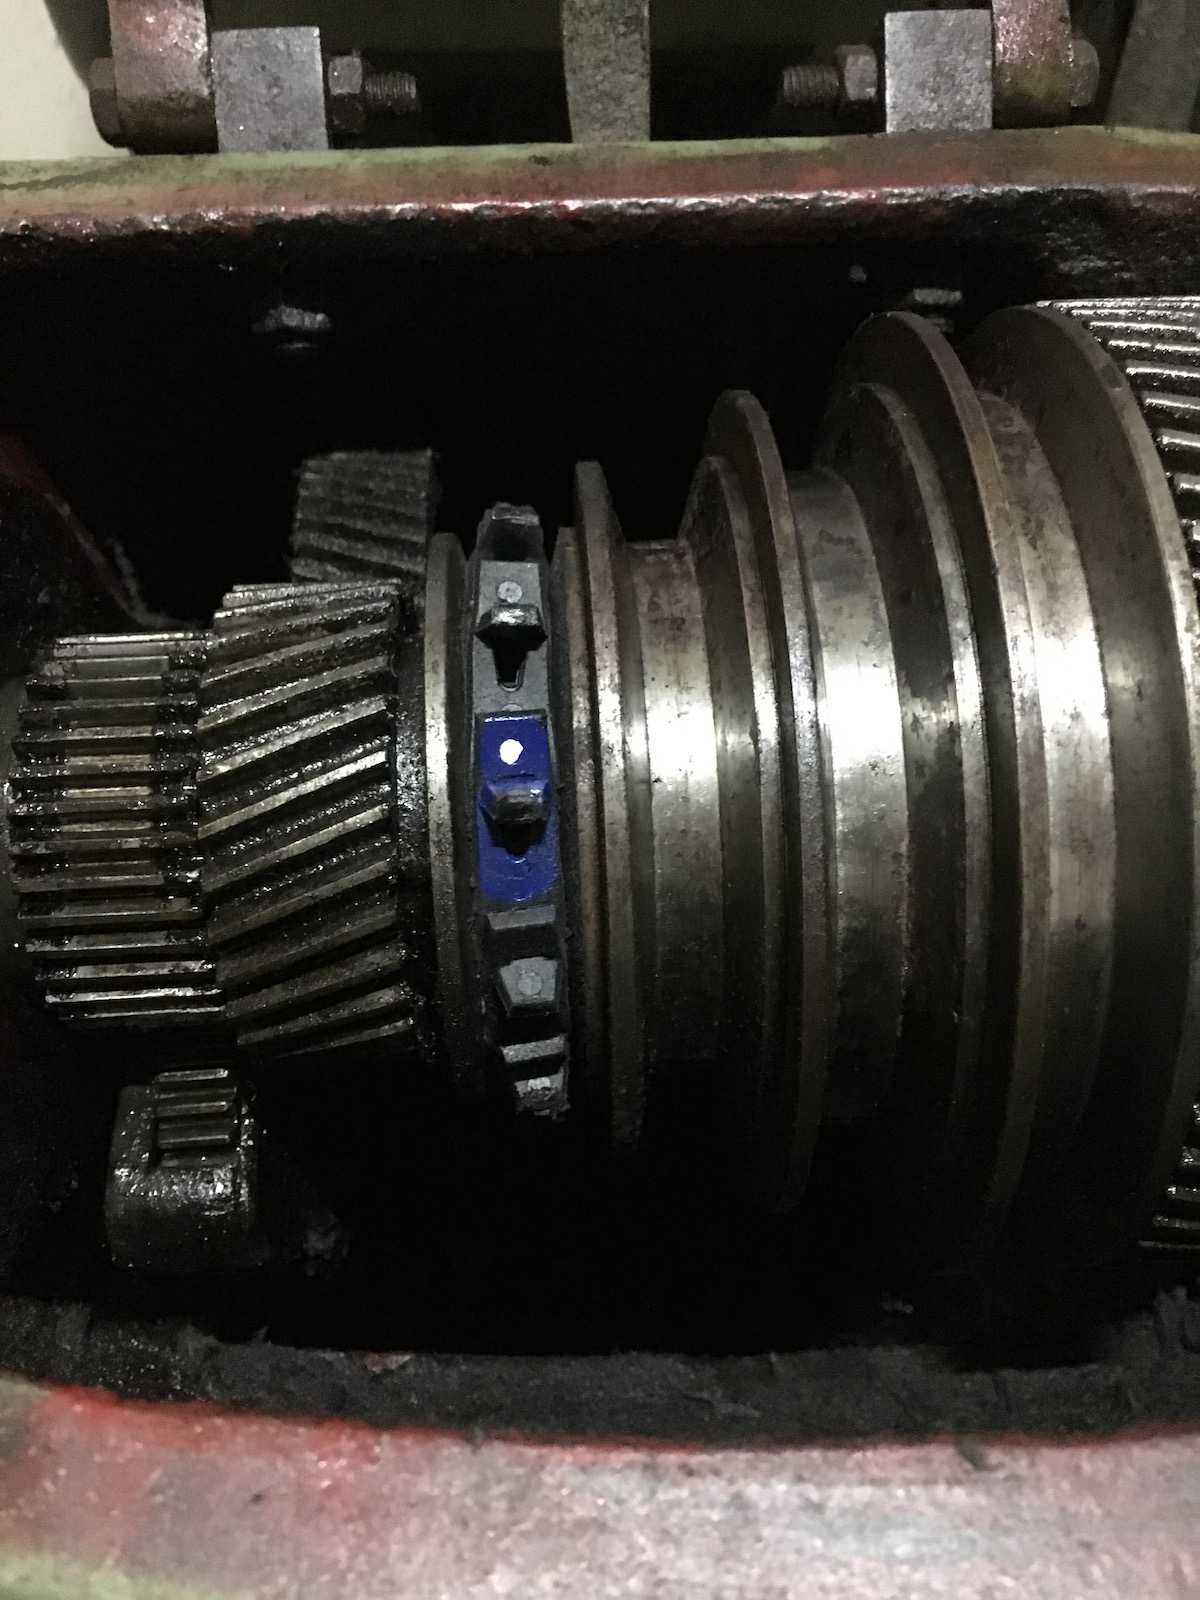
While spinning over the mainshaft, looking for old marks on the chuck and backplate, I found two small cuts in one of the pulleys to align them when disengaging backgear. A bit of white paint should make them considerably easier to find in the future. 


The hardest part really was to carry the chuck over to my workbench.


The chuck splits into a front and back section and even though everything was rust-free inside the grease had gone completely hard, which caused the chuck to be rather sticky. 


A generous amount of molybdenum grease on the ring gear and the running surfaces made the chuck feel a lot nicer to use.


I admit this last step was "pure vanity", but I then took about two hours to clean off the rust from the chuck. Not sure if it paid off, but it certainly looks nicer than what I started out with.


And here comes a little pledge, as unlikely as it sounds, I am missing one of the external jaws and maybe somebody has got a set kicking about that he or she doesn't need, in the dimensions as shown in the pictures below. This would be really awesome!


I might also be interested in a complete 200mm Emco chuck if it comes with the correct external jaws.