Sunday 18 August 2024

Project Pickle - finishing off the body work on the outside: rust (part 7.4)

 One probably unexpected similarity of traversing the Atlantic ocean and welding in the rear wheel arches after someone else has already "attempted" to fix them before you is that you have to traverse a featureless void filled with disappointment... No seriously though there wasn't much left that could give guidance aside from a bit of a reinforcement rib on the B-pillar and a rough idea where the arse-end of the car is. 

As I don't have a sheetmetal nibbler, I had to break down the outline down into straight lines.

Also as I am only blessed with two appendages for holding stuff in place AND welding, I resorted to using sheet metal screws to pin the repair panel in place...

... cut out a section ...

... and then weld it in.

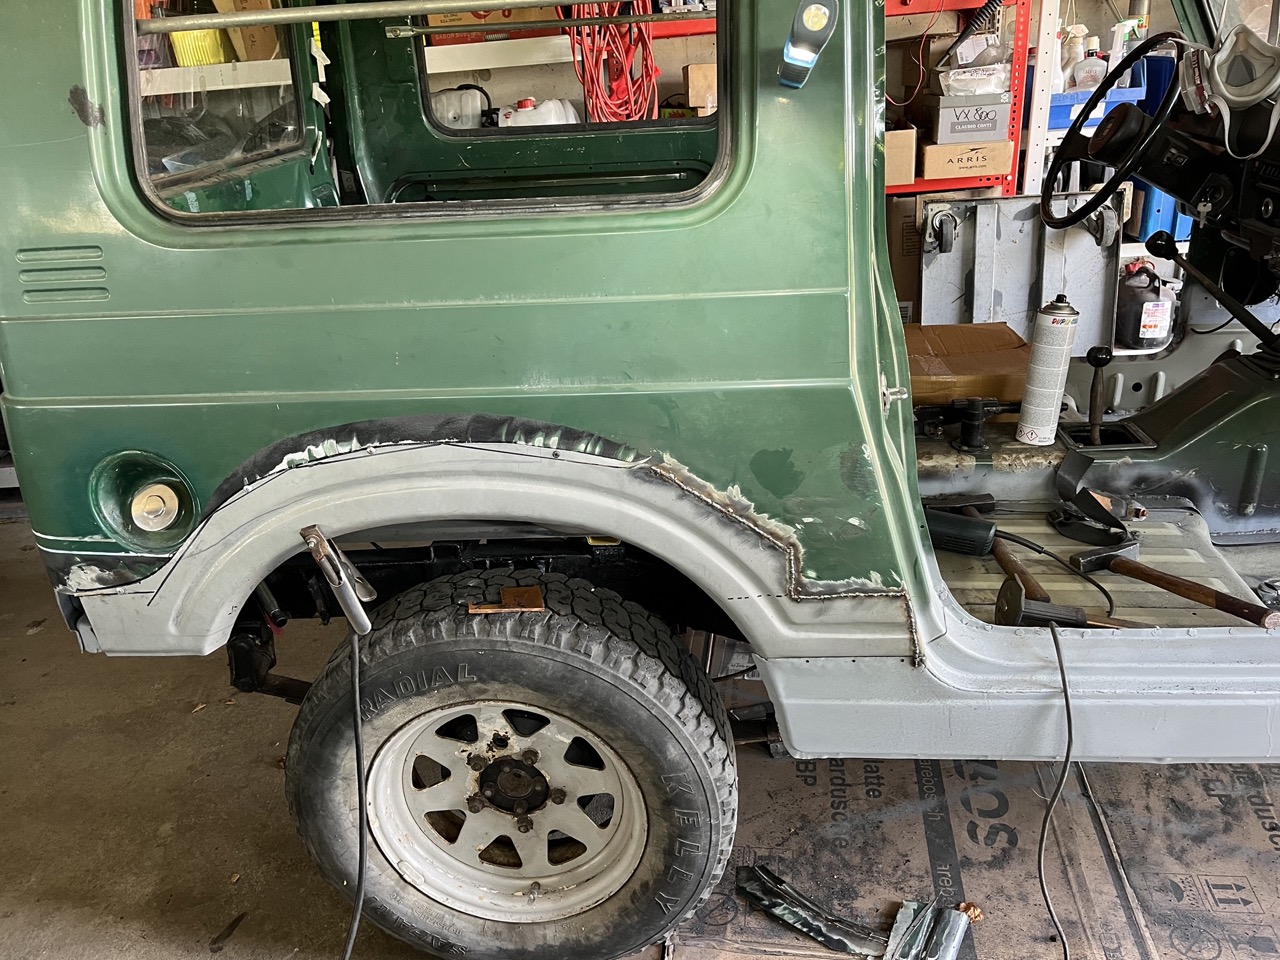
Whilst the sheetmetal distorted quite a bit (it would have helped to have some structure on the inside), the result is rather acceptable, if I may say so.


Same story, other side.


With the wheel arches sorted the front wells were next and let's just say, I learned that you shouldn't cut them before the floorpans are securely in place. 

Or you end up with a lot of extra work on your hands.


Luckily on the passenger side I had refrained from "fitting" them up previous to everything being in place, which made it a lot easier - aside from going back and forth about fifteen times to make it fit nicely. (Which is sort of a theme here - the actual welding takes some time (fair enough), but making the panels line up decently easily eats up the whole morning compared to what feels like twenty minutes of actual welding.)


And then there was this last patch-piece to complete the welding on the outside of the body. 

So it took me from February 28th to August 1st roughly using one to one and a half days per week to finish the tin work (without rework/cleanup), which equates to around 200 to 300hrs for this part of the repair work alone. Let's just call this a financial desaster and move on to the inner wheel houses, boot floor and the other misc. stuff that still needs to be addressed. 😉 Might be a while though.

Sunday 11 August 2024

Project Pickle - more almost sadistic sill surgery: rust (part 7.3)

 Let's face it the front floor pans weren't the only bit that was rusted to buggery, it was *just* patched up more. The rear - oh the last guy got slightly less creative overe there, still it was well and truly f*****.


In order to get the boot floor out, I had to remove the towing hitch and the fuel tank. (Another one of those items, I had not planned to replace, but once I had it out...)


With the floor out, it became apparent that I got a bit more than I bargained for. I was well aware that the wheel arches were completely rotten, but the whole lower door frame as well... 


At about this time a slightly fatalistic: nothing to it, but to do it attitude had sneaked in, so a bit of 30x3mm flatbar was procured at my local steel supplier and now there's one bit of bodywork that's hopefully not rust out as quickly. 

And because all the mounting bolts had snapped off in the captive nuts inside the frame, this little beauty was fabricated.


At this point the body was light enough to lift it with one hand, sneak a wooden block in between the frame and clean up all the welds and bits with the grinder.


With the boot floor removed, the body had lost a lot of its rigidity, but not to worry - a ratchet strap and a few well placed spot welds took care of that (mostly!)


Turns out (duh), mine's not the only rusty Suzuki in the world yet most people probably don't quite go to the lengths to fix up theirs. Regardless of which, there's a few very smart repair panels available to fix the area around the rear door. 


With that in mind I felt a lot more comfortable chopping out a lot around the rear door pillar to fix some other rotten bits. 


If you don't look too close, the whole sheet-metal origami isn't too hard really and just takes quite a bit of time, a vise, a hammer and a ruler to get the dimensions right.


I am definitely not call it "invisible repair", but good enough and with a nice thick coat of paint you have to be actively looking for the patch-piece.

One of the "purely for vanity" fixes: I wanted to have the reinforcement rib underneath the seatbelt rollers in the B-pillar... 

Change of background scenery - moved to my dad's garage - and back to the sills. As should be evident by the second picture, the fitment wasn't terrible, but not exactly great either. 


Primer inside and out... 


Fitting the sills themselves isn't so much the time consuming bit... if you want to make the work last, quite a few bits in the periphery need to be touched as well.


I never thought I'd say this, but a good spot weld can be extremely satisfying. 

Butt-welding the seam was one of my more stupid ideas though. 

... and it took ages. Actually my gas-regulator froze over in the process. 

After a ton of grinding and quite a bit of primer, the result is rather stunning though.

If you take the photo from a slightly less flattering angle, you can see the weld, still that's well within "good enough" range for me. 

Rear wheel arches and front foot wells next.