Saturday 28 July 2018

The Turbo TR1 - some updates (part 2)

During the course of the frame re-build of my Tractor, the Turbo had to share its forks to the everyday bike until I receive a new downtube and can fix the forks that belong onto the everyday bike.


So it's back to that set of perfectly straight and really nice stock forks and stock frontwheel on the Turbo TR1. 


But there's also been some progress on the business end of the turbo setup. As I found out, the inlet diameter of a GT1540 is exactly the same as the inner diameter of a KTM640 inlet manifold rubber, now add a Mikuni BST40 to the mix and this will become a very nice setup, I presume.


At the moment I need a bit of spare time or in other words have to finish the engine build and a bit of stainless tubing and a few bends and the old girl should be mostly there again.

Friday 27 July 2018

The new TR1 engine - installing the engine, first start (part 28)

Stripping the bike down to the frame was a quick and easy enough job to start with.


Taking the exhaust apart required a bit of gentle newtonian-persuasion or in other words a rubber mallet. 


Old engine out.


Seriously say what you will about chain enclosures, but if you 115,000km sprocket and chain looks like this...


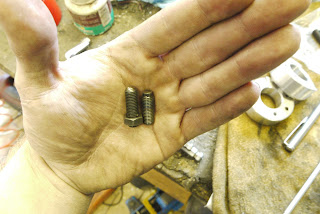
This lower stud wasn't only a bit bent, but also the threads were pretty knackered. And once more it was one of those "special" M10x1.25 Japanese standard threads.


I tried fitting the VM38s with BT1100 inlet rubbers, but the geometry of the retaining lip is different, so they don't sit right.


The fact that both exhausts didn't sit level, was due to the fact that the left exhaust pipe was approx. 6mm too long. A bit of trimming later and finally both exhausts are at the same height.


One of the things I had forgotten was that when using heavier gauge starter cable, the cover needs to be "adjusted" a bit. 


After letting the smoke out of the first new solenoid, the second one luckily worked as intended and did not get crispy hot.


Bit of oil... and starting the engine without the airfilter elbows, to see if the engine backfires through the carbs.


... and she lives.


Couple more things still left to do: The bent fork needs to be rebuilt and both forks require some fresh oil. Oh and then there's this nasty thing called riding the living hell out of it... *ahem* I meant carefully running the engine in.

Thursday 26 July 2018

The new TR1 engine - finishing the engine (part 27)

There really wasn't that much left to do on the engine. But it's the sum of those small jobs that can add up a lot.

First job was to install the clutch...


... a new oilseal for the oil-gallery to the head ...


... and all new dowels for the sidecovers. (Both sides use different ones.)


Then it was onto fixing the threads on the front cylinder head. For that matter I  drilled out the old buggered threads and then made some press-fit inserts on the lathe.


In order to drill the pilot holes for the new threads in the right spots, I made a drill jig (not shown) and then glued on the valve cover with super-glue.


And that's the result: Two-perfectly good threads. (And yes, it would have been smarter to do that BEFORE painting the heads.)


All new starter internals... this will come to haunt me a little later.


 Heads installed and the whole lot lifted off the bench.


One of the other things I always do when installing cams is to replace the original camshaft bushings with ball-bearings.


A word of warning: If you time the cams on XV engines, make sure you push onto the tensioner blade or you most likely end up one tooth off. Especially when you're not using a new camchain.


Swivel head valve adjusters.


New alternator plug as the old one was molten on one side.


At this point I started taking the TR1 apart, but more on that in the next post.

Sunday 22 July 2018

The new TR1 engine - more fixes, more paint and a frameswap (part 26)

After making some good progress on the engine earlier this week, there was one other thing that has been bugging me ever since I bought this bike. When I bought the bike I suspected that it had been in a crash at least at some point in its life. A few fork swaps and the fact that a rubber mallet was needed to install the upper frame in the lower frame mounts lead me to believe that the frame was buggered as well.

But before I could swan-dive into the frame swap, I decided that I had to tackled the heads first. Not very surprisingly I found a leaking valve cover. The reason it was leaking was due to a combination of really poorly executed thread repair or in other words: The threads were COMPLETELY on the proverbial p*ss.


Some fresh engine paint to make the heads look representable. 


Thanks to Torsten, who built himself a lil' "special" based on a TR1, I was given quite a load of stock parts for free. Amongst those parts was one of the nicest sets of TR1 fork legs I've ever gotten my dirty ol' paws on. But because I am a notoriously skeptical guy, I chucked them in the lathe and checked them for straightness.


... and both checked out to be perfectly straight. 


Next was trimming some no longer needed parts of the frame. I have a different breather setup than stock so that rear bit of pipe was no longer usefull to me.


The paint job was nothing to write home about, a coat of grey primer and then another one of satin black. I also painted the yokes, because they were looking a bit tatty and ever since I painted the lower one on the Turbo black I wanted to do the same on the mule.


The headstock bearings were due as well. Getting the old shells out was a dead easy job by adding some tacks with the MIG-gun and they almost fell out by themselves.


How to clamp two things, when you only have one free vise and one part should stay cool, while the other one is supposed to get hot. (There's a bolt clamped between the jaws to prevent the yoke from falling off. 


Then the old girl was brought inside into the operation room and I started to take her apart. Oh and yes, that front wheel really was this much out as can be seen in the picture below.


Also I've had charging issues for a long time on this bike, with one of the main reasons being this plug. It's been well fried since... no idea. Cleaned the contacts and filled it with di-electric grease and it should be good until the new engine goes in, which has a good plug.


During disassembly it has turned out, that one of the forklegs was slightly bent. (This isn't related to the crash the bike must have had before my time, because those are XS1100 forks I bought second hand...)


And that's the new frame installed and among many other things, the rear subframe bolts align correctly and the airfilter base isn't bent anymore... 


So you hear me going on, on just how badly bent the frame was, but then again, everybody can say that. See those brake pads?


As you can see, it's off by at least 1mm on the top. The funny thing is, you stop noticing it, when you drive it all the time only when you hop on another bike it become blatantly obvious that one of the two is vastly different.


And there she is back again in all it's crusty glory and I wouldn't want her in any other way...


... the old girl tracking straight is a nice bonus though. 😎

Saturday 21 July 2018

The new TR1 engine - fixing some older faults and headwork (part 25)

Sometimes you have to accept defeat and start moving on. The whole cylinder fixture was a nice idea, but it just shifts around too much. I have an idea, that I will give a try on the wrecked cylinder, but for now I want to crack on and finally reap the rewards of more than a year's work.

As you can see, I painted the bottom of the cylinder and took a very light cut (0.05mm) and it just wouldn't work. If you increased the RPM on the lathe whole lot would start to oscillate and twist itself into a pretzel.


Time to get back to work on the engine itself. I installed the lower camchain sprockets the wrong way round, i.e. front sprocket on the rear and rear sprocket on the front cylinder.


An M6 bolt, will make the perfect plug for keeping the sprockets under tension and this makes installation tons easier.


If you mark the two teeth adjacent to the "peek-hole" on the rotor with some paint and the single tooth that should go between them on the sprocket, it's totally doable to install the camshaft sprocket without removing the rotor. (Getting the pin out is impossible without turning the crank though.)


And for future reference: the front cylinder, which has its primary gear on the RIGHT is marked "R".


If you followed this blog for more than 5 minutes, you might have worked out, that I am not one massively into shiny paint and polished metal. It's an entirely different story, when valves are involved.


In order to achieve this finish (and lighten the inlet valves in the process), I put some old fuel hose over the valve stem and clamped each valve in my lathe and then went through 120, 220, 400 and 800 grit sandpaper always making sure that none of that touch the actual mating surface of valve and valve seat.


As you can probably make out in this picture, the inner valve springs are the softer Virago 1100 kind. They are being swapped in as the stock blue springs are way too heavy and actually overstrain the valve train and cause premature rocker and cam-failure.


If you have a rather limited understanding of port-work, it's best if you only touch up on obvious mistakes, i.e. casting flaws and ridges and steps in the ports. As these are going on an everyday engine and the overall port design is actually pretty sound, there's only very little that absolutely HAS TO BE touched in those larger ports.

As a matter of fact the only real area of concern I found on these was a step, where the original casting had been undercut to fit the valve seats and a few casting flashes on the inlet port sidewalls. Both were maybe 30 minutes work (per head) with a small flapping disk on a rotary tool.


In this picture you can see where I blended the seat into the port. Also notice the stock exhaust valve in the picture. 


And shiny bits installed. 


Next up: a frame and fork swap for unbent items (did you know forklegs don't usually jam in yokes - weird I tell thee...) and painting the cylinder heads silver.