As the casual observer will not, it might have (already) been a tad longer than 4 days, but I never said, those four days would happen in direct succession. 😉
We left this story off with the need for a new second carb-body, as the first one was ruined (by me).
Turns out, that I also needed a new o-ring on the link-tube and some other bits, so another carb overhaul kit, a float chamber gasket and two needle valves were ordered.
Now there's a mighty good reason, why nobody wants to do needle valves on one of these. They are are an absolute bastard to get out and only some really nasty tricks persuaded them from leaving their place. Including literally raging hell on them with a hot-air gun and driving a woodscrew down the first seat.
The amount of crud behind the seat (even though it was freshly cleaned in an ultra-sonic cleaner), was incredible.
At this point I had thought, I had seen the worst. The second one mandated even more drastic measures in the form of drilling and properly tapping it to M6.
I figured, that the only way to get the new needle valve in without damage would be to freeze it as cold as I could and heat the carb body as much as I could.
Let me just put this here once and for all: I totally get, why people convert to two individual carbs. The installation of the stock carbs has definitely left a mark (on my fingers).
From there onwards, it was almost anti-climactic: hook up an auxiliary tank, fire her up and sync the carbs.
Last but not least with Winter lurking round the corner, the water was drained and the radiator filled up with a water-coolant mix.
So what's still up to do for the fourth day? Bit of wiring is probably the most important bit. It still needs the headlight to be wired up, so not only the pilot-light is working and working indicators front and back would be nice. (Currently none work.) Ah yes and the forks are bent to buggery, so we'll have to find a position where the frontwheel and bars roughly point in the same direction, but this almost counts as a vanity-mod. 😁 And then she'll be off for her roadworthyness-inspection in Spring.
... or even more mishaps. This time coming from (surprise) the starter.
Now for once, I properly let the smoke out of this one.
Also properly fried one of the starter cables, as it shorted out on the lovely chromed cover. (Yes it's actual chrome...)
And this photo is for all of you, who want to use a Suzuki Samurai / Swift solenoid on a Yamaha XV, all you really need is a bit of M4 all-thread.
Another thing that caused me some grieve in the past was the oil-pressure sensor as it sealed ok(-ish), but always weeped a bit when the oil got really hot. A bit of rtv around the base solved the issue. It might not be perfect, but it seems to keep the oil where it should go, if I may be this honest.
Turns out, after a very spirited testride, the conclusion was, that the bike had been running rather lean now, which somewhat indicates, that probably the coils had started to go a lot earlier, than I anticipated. Especially considering, that some time in Summer I started to notice a jumpy tach and the odd misfire.
Also did the (for me) mandatory 50 to 100km oilchange after building an engine.
So what's the verdict on the new engine: Snappy. Very, very snappy indeed. It definitely has lost some (very) low-end torque, but it revs so quickly, you hardly ever drive it around at less than 3000rpm anyway. It feels a bit less flexible, the old engine really made it feel a bit like a tractor - somewhat sluggish, lots of midrange and you had to use your head, because it actually made usable torque as low as 2000rpm or a bit above of that number.
To be dubbed: "ironing out the bugs" and bugs there were plenty.
Now this does sound rather unhealthy, or in other words only running on one pot. The interesting question was... why?
After some fooling around with the carbs it hard become rather apparent, that it was an ignition issue and as such an emergency package was compiled.
I had expected to probably swap out the spark plugs and maybe a coil, but in the end I needed all of it.
Went back to the stock TCI...
... swapped out the coils for old stock ones ...
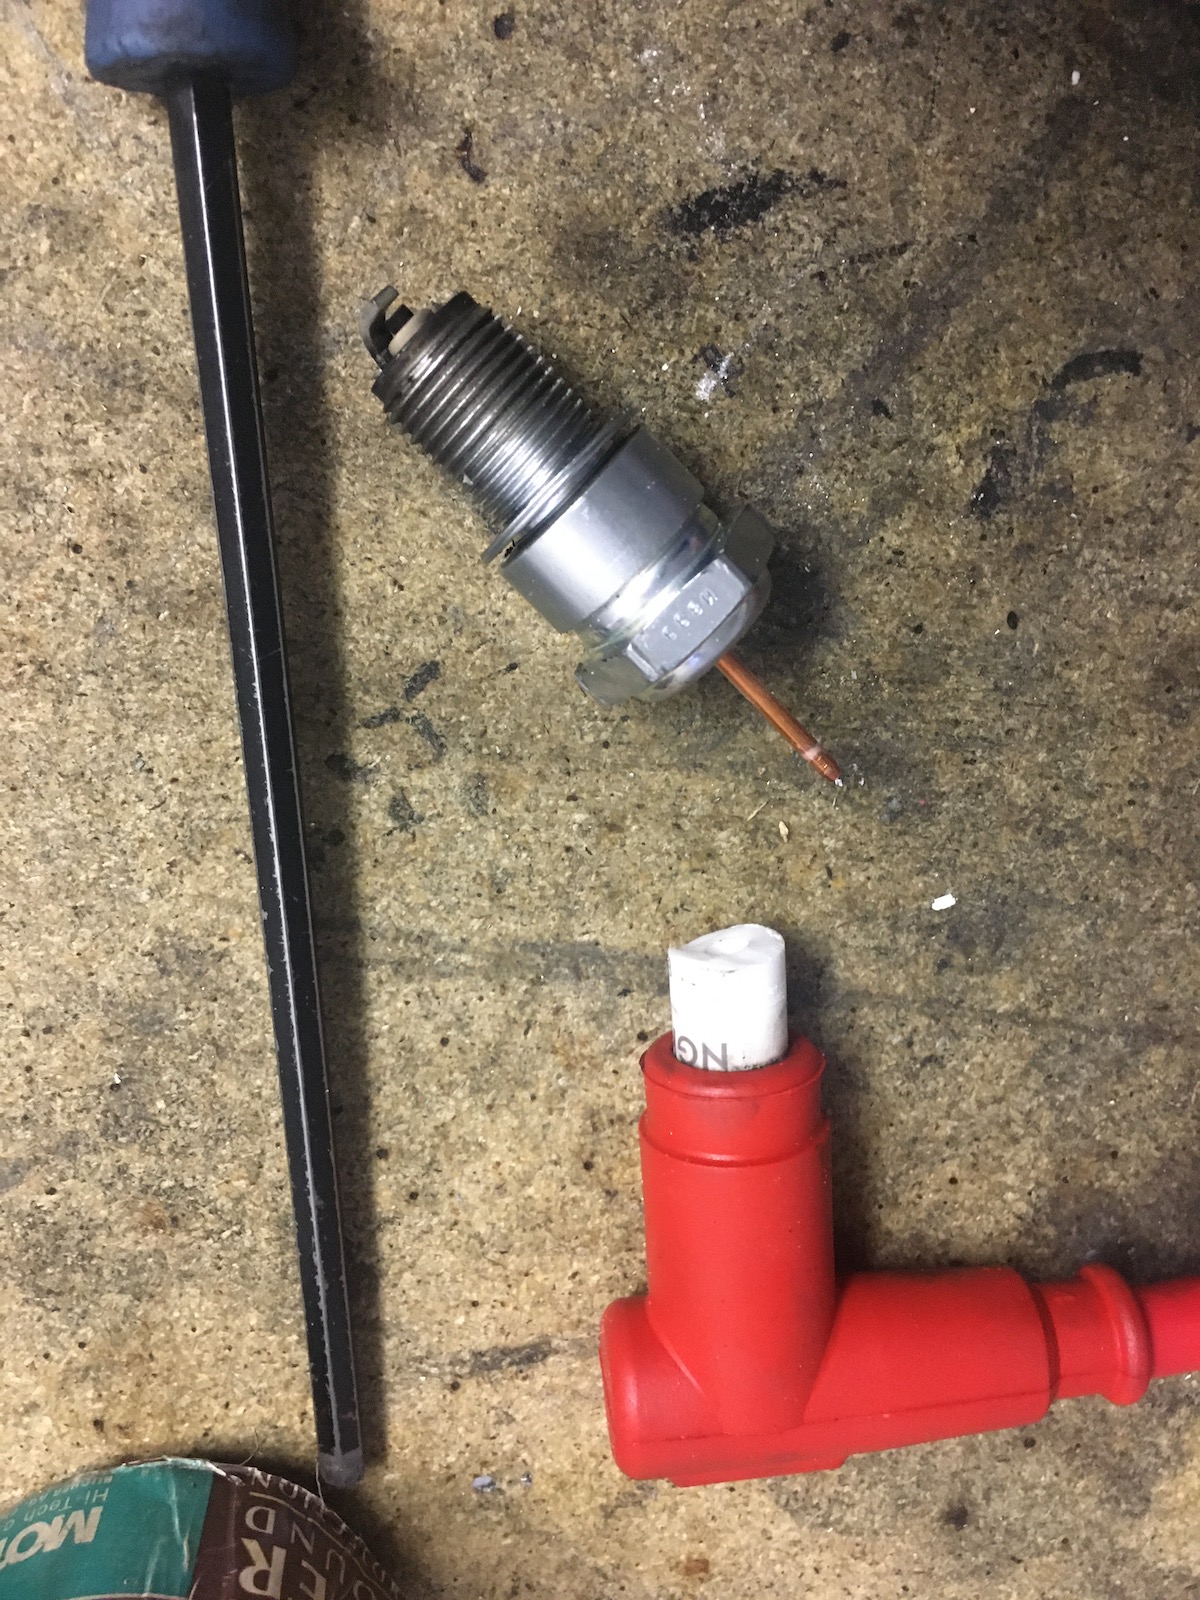
... but the cream of the show was a sparkplug that probably somebody had dropped at the shop (it was brand new) with a completely broken insulator.
The result spoke for itself.
While I was at it I also fitted some fresh pads in the front and back and some fresh disks on the front as the old ones looked more like some pretty awesome vinyls...
Well there you go, one more for the classic category of: "This gonna be a quick un'..." In defense of my slightly under par project-management, I had to move workshop and get lots of other stuff done in the meantime.
If you're only interested in the result, there you go:
In case you actually want to read the whole lot with all the pitfalls, well here you go.
First off, I had to order more parts. When overhauling a Virago 1100 crank last year, I used up the bearing shells I wanted to use for this build and as one of the pistons had a slight ding, two new pistons were thrown in "just for good measure".
And then there was the reason, why this post could also be called "a new approach" - I also bought a new set of cylinders and decided NOT to turn them down but bore the cases to suit.
So I got a set of cylinders with absolutely like new tolerances, masked and painted them.
Since the previous post only a single had passed, but nonetheless the BT1100 crank had spent the night in the freezer. Unlike the new crankshaft roller bearing, which took a really hot bath in some fresh oil.
If you do it right, the bearing and oil-pump-chain sprocket basically slide right on.
The thing is the "doing it right" part. The crankshaft has got some eight or nine kilograms of thermal mass and the bearing maybe five-hundred grams. The bearing went on nicely, but the oilpump sprocket simply cooled down too quickly and had to be asked quite forcefully to take its place. Unfortunately the sprocked I used to drive it on still seated nicely on the crank. With a knife-puller and quite a bit of heat it wasn't too hard to get off though.
Next it was about time to actually get started on the bike, with quite a bit of the prep work being done already.
But first we needed two more special tools. The first being a spacer for pressing out the crank without damaging the bearing cage.
As the tube was close but not big enough, I built up a lip with the welder in order to have some meat to turn it down.
The second was a slice of old TR1 cylinder with the liner removed and bored on the lathe to 105mm.
I am not to take credit for this insanely smart idea on how to bore cylinders, but another member from the German TR1-Forum came up with this seemingly brilliant idea. (And as it seemed so simple, this was the reason for me to switch over from turned-down cylinders to boring the cases.)
Digging into the engine revealed no nasty surprises. I knew it was burning oil like it was going out of style, so there was a lot of carbon buildup but the bright ring on the piston and cylinder head made me very, very happy as it means that even when burning heaps of oil, the squishband works like it should pushing the mixture towards the center of the combustion chamber.
With the engine case mostly gutted, it was finally light enough to be able to lift it onto the workbench alone.
The new crank-tool worked admirably, as it slotted in perfectly.
Next was boring the cases with the holesaw, which undeniably worked, but I had made the clearance between holesaw and my guide slightly to big, which meant that I had to use some masking tape to get the tolerances tighter and still it kicked back violently. After some long thinking, I have to admit, if I were to do it again, I'd rather take the studs out and do it on the mill.
Some old newspaper to protect the gearbox bearings from swarf is absolutely necessary and worked a lot better than anticipated.
The finish I achieved is absolutely abyssmal, but then again in reality all it has to do is clear the outside of the liner, so going about it with a die-grinder would have been a perfectly acceptable way as well. (At least from a technical standpoint.)
The crank still needed fresh bearing shells. Even though strictly speaking wanted is probably the wrong term to use. I wanted to put in fresh shells to make sure I get the conrods towards the tight end of the specs to get as much life (and oilpressure) out of them as possible. I installed them with some assembly lube, which should bite me quite extensibly a little later down the line.
With the crank done it was a case of heating up the bearing seat and install the crank.
On other thing I wanted to do before reassembling the cases was something I did for the "Norway engine" for the first time and that was to mirror polish the gear selector guide rod. (Spoiler alert: worth every second as the shifts are much smoother now)
Before installing the oilpump, I have started to always prime them with some oil simply because it shortens down the time until it builds up oil-pressure significantly.
With that out of the way it was time to button up the engine cases.
And attach it to the rear subframe. (And yes, I think I got my money's worth out of the rear tyre.)
One note to assembling the pistons and rings: On OEM pistons the second ring is the dark one and yes, the R-mark is on the left side of the ring with the text so you can read it from the top.
One of the piston clips can be pre-installed on the bench and with the other one being put on, once the piston is on the conrod, plenty of rags help to stabilize the piston and also make dropping the clip into the engine a lot more difficult.
Another thing I started to do is oil the threads on the cylinder studs and run the nuts up and down a few times. This removes a lot of dirt, rust, etc. from the threads, also in theory the clamping force should be higher as less of the torque used to tighten the nuts is used up in friction. Might all be more or less engineering esoterics, but it gives me the warm fuzzy feeling of doing it right. And a lot of aftermarket stud companies give you special lubricants to put on the threads to achieve more repeatable results, so there's certainly a grain of truth in there. Will it make one hell of a difference? Probably not. But it certainly slows down rust build up, which in its own right is good enough for me.
The following picture is probably classic nightmare-material for most people, but I was very happy to see it actually. As it gave me a good excuse as to why I am always double and triple checking my timing marks. Turns out the right side of the cam-chain hadn't been properly tight and as such the time was off by a tooth.
With an enclosed chain, it's always a bit hard to find the clip-link, so painting it white should make it easier to spot through the little peep-hole. Also as the locking plate for the sprocket isn't available anymore loctited AND safety-wired bolts secure the sprocket. It worked for 6000km the last time so I think the idea is good enough.
And a final "oooops"-moment: On the front cylinder a small chunk has to be taken out or you will not be able to get the oil-filler cap off. (Diegrinder to the rescue!)
Last but not least, the old Tractor almost completed.
So what's the verdict of the rebuild: It's not exactly a straight-forward swap as lots of parts need to be touched to make stuff fit. But the tighter tolerances make for a vastly quieter engine. And the substantial (around 4kg or almost a third compared to the previous Virago 1100 rotating assembly) reduction of rotating mass makes for an explosive character of the engine under 4000rpm. From then onwards it behaves more like the old engine. Interesting as well and once you think about it, not overly surprising: The rock-solid idle it used to have is at least partially gone. In the past, you fired it up on the choke, gave it fifteen to thirty seconds and it would idle, very low, but it would idle. Now it actually cuts out and stalls.