Monday 27 February 2017

XT500 rewiring or why there's no part 2 of the earles fork story today

If you ask people about me, they will most likely tell you that I am a mighty friendly guy, who, if asked politely, will most certainly "have a look at it", which more often than not, leads to fixing stuff. And that's just what happened. My mate Philipp called me and asked me (tongue in cheek), whether I knew a thing or two about rewiring XT 500s as his had literally the worst wiring loom installed I have ever seen.

As he bought everything new, it was a pretty simple and straightforward process to be honest and the pictures will only show you a few spots where you have to have a second look at things.

Space in the headlight shell comes at a premium, so make sure you route everything as snug as possible.


There's two single yellow and green cables, those are high- and low-beam no matter what colour they are on the aftermarket reflector.


Same goes for ground (black on the loom) and blue-red for the pilot light and green is ground for the main bulb. 


Rear is straight forward, green is the left indicator charcoal is the right indicator. 


As we did a 12V-conversion with a Roebi-Regler (google it, this thing's the dog's danglies for XTs and other 6V Yamahas), things came out a bit brighter than stock...


Oh and, no it's very unlikely there'll be much of an update on the earles forks tomorrow either, because my car (trusty old Volvo V70 station wagon) killed on of its driveshaft bearings and I have to do that next...

Saturday 25 February 2017

The XS Triple Sidecar - Earles Fork (part 1)

Let's not fool ourselves: Buying something and then "making it fit" reads fine on paper, but in reality there comes the moment, when you realize that if you had started from scratch, you' d probably be done by now. (This is not meant as some rant, just an observation.)

Why would you want an earles fork? With the pre-dominance of the telescopic fork on motorcycles, all other (possible) front ends sport an aura of esoterical strangeness, except maybe for BMWs copy of the Hossack front end called Tele- or Paralever and a few scooters which run some sort of leading link forks. That said, on sidecars earles forks aren't uncommon as they have a few major advantages:
  1. They are more durable as they can cope better with the sideloads. Unlike telescopic forks there are no fork-bushings to wear out from the sideload.
  2. Due to changed leverage they are a lot easier to steer. 
  3. They can be tuned to suit the weight of the vehicle quite easily.
  4. Changes of brake calipers or disk-sizes are easy as you'll only have to fabricate new brake-carrierplates.
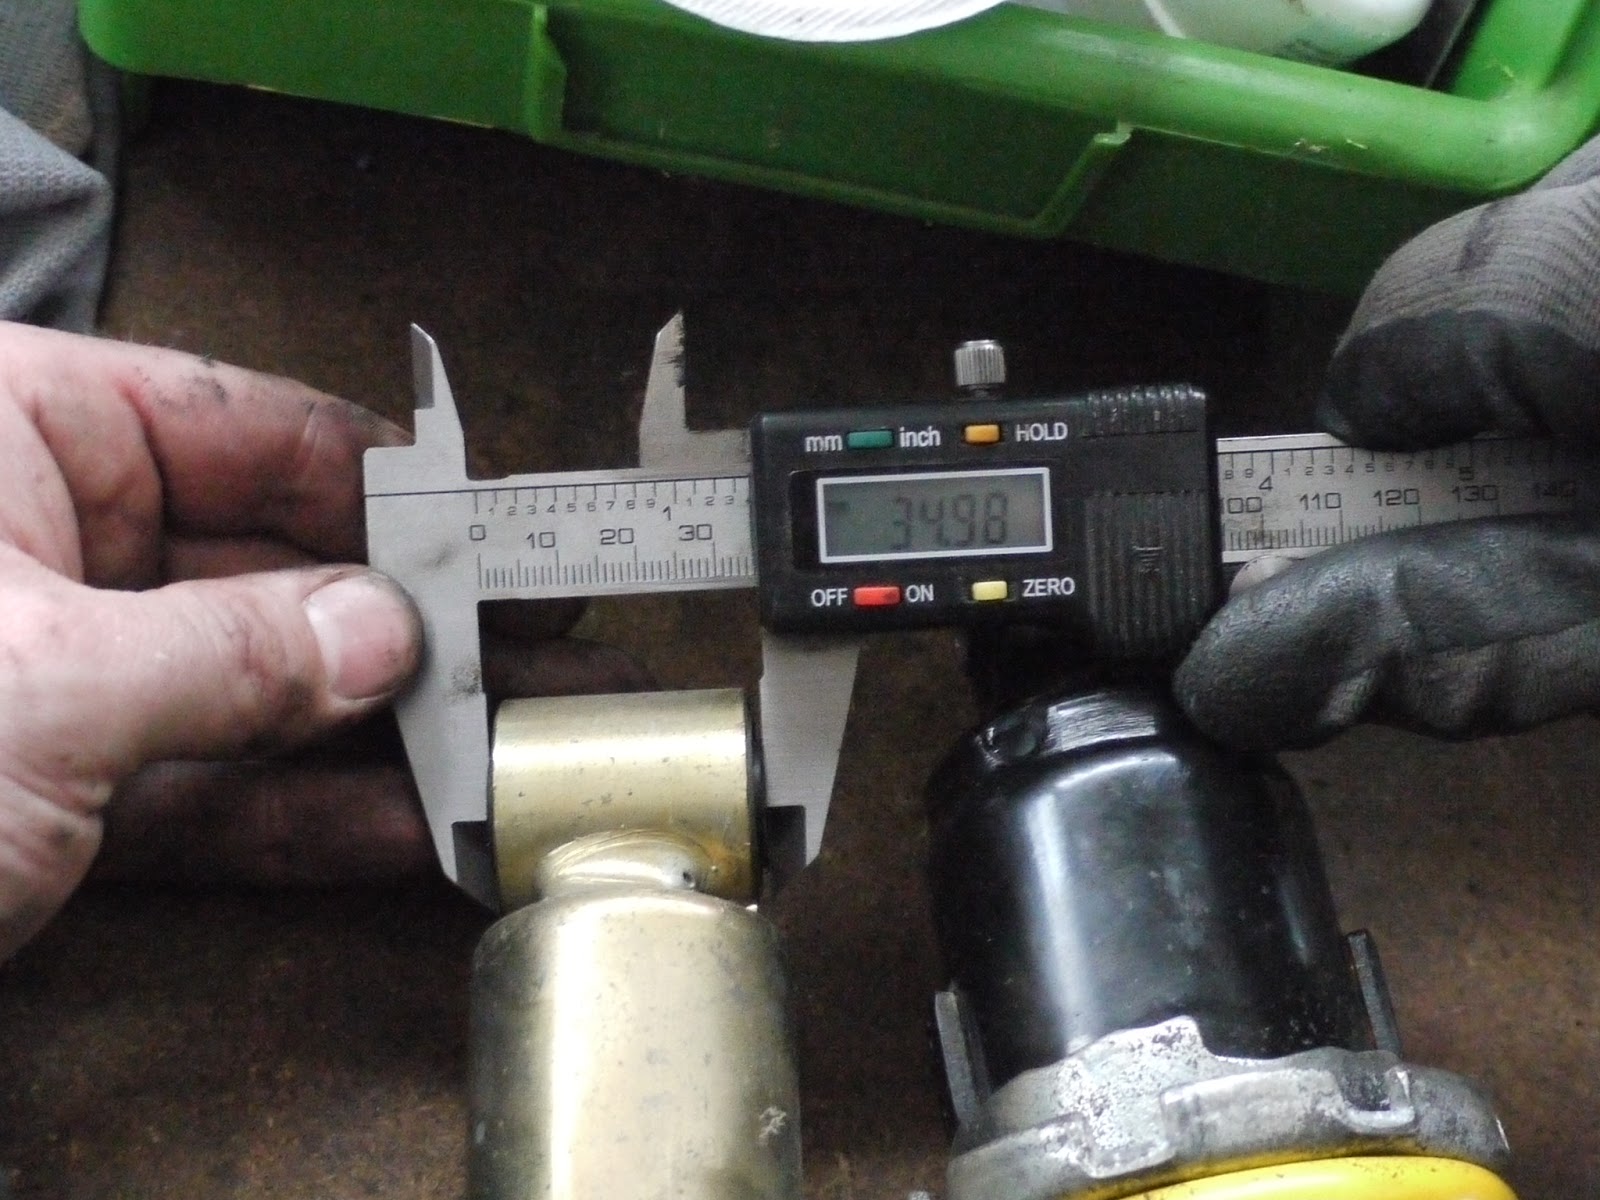
Right, the basis for my own earles forks were a set of domestic market/army green forks for a Dnepr MT11 or MT16. They are pretty much 10mm too wide and come in an "on the piss" shape straight from the factory. But they are pretty cheap, all the rubber bushings are there and the shocks actually worked.


It's hard to see in the picture above, but yes, the two legs are off by about five mm. Oh and also note the tapered ends of the fork legs, they'll guarantee some extra fun towards the end of this post.


As mentioned before, after a bit of cutting it all slots into place (quite) nicely.


Now the Dneprs run on three interchangeable wheels, which is dead-cool in a sidecar, if you ask me. Unfortunately the XS doesn't and so a bushing on the right side is needed. (My first axle didn't have it and it lead to the front wheelbearings rusting solidly onto the axle... and additionally it reinforces the front end dramatically.)


It was meant to be a push fit, but it came out a bit sloppier than I wanted, so a bit of the electric hot glue was due.


That's not looking too bad at all, is it? Guess we'll just weld it up and call it a day then...  (You have the right to a smug grin and a little chuckle as you surely know where this is going!)


All welds of course reinforced with some roundstock on the inside. You wouldn't want to just butt-weld two pieces of tube onto each other in such a high-stress situation.


Remember the tapered ends of the fork legs? Well that taper runs at a five degree angle and now it surely would be more than boring to just cut the ends of, knock up two extensions on the lathe and weld them in. Let's do this a little overcomplicated and challenge ourselves.


Luckily the fork legs are tapped M28x1 on the inside, so the tapered plugs are held in place with some endcaps. Works brilliantly.


Unfortunately, this was when sloppyness reared its ugly head and it became apparent, that I have to cut the forks apart again to have them sit in the triples without being under constant tension.

Sunday 19 February 2017

Aprilia Moto 6.5 - new rearshock

Now the Moto 6.5 is a bit of an acquired taste, without a doubt. It was designed by Philippe stark and even twenty years later it polarises the onlookers. There's pretty much only two opinions: love or hate and not much in between. For apparent reasons my dad falls into the first category. The styling being rather avantgarde, under the hood it was more common hardware taken from the Aprilia Pegaso, with the well known 650cc Rotax single.


Now the technical side of this Moto 6.5 was well taken care of, but still, the rear shock was as dead as one can be. Unfortunately even though a lot of the components were taken from the Pegaso, the standard rear shock wasn't. Luckily after doing a lot of research the stock rear shocks from both a Bandit 600 (Mk. II) or a SV650 should both work, the latter being slightly (15mm) longer with an overall length of 335mm.

Getting to the shock is pretty straight forward, but requires removal of a lot of parts.


As mentioned before, the SV650 shock is 15mm longer than a Bandit 600 shock. Unfortunately that's exactly those 15mm too long.


The other measurements were off, but in a pretty good way: The upper end was five millimetres narrower and the clevis on the lower end five millimetres more wide. Nothing a few washers couldn't sort out.


So how does it feel? Stiff, stiffer than stock even on the second lowest pre-load setting.


The last part of the suspension upgrade is going to be a new rear tyre as the current one might still be the original OEM fitment...


Wednesday 15 February 2017

RatZ brake upgrade - floating disks on Z1000J/GPZ1100 wheels

Now this is a bit of a blast-from-the-past. RatZ used to be my trusty old Kawasaki Z1000J, which in its last incarnation consisted roughly of about as many parts that belonged to a Z1000J as there were parts that were more intended for the proverbial Bulgarian tramway.

That said, there were a couple of mods that may (or may not) actually be interesting to other people as well. This post will deal with how to install OEM 300mm floatin disks onto stock wheels and while we're at it, fit some Nissin twin-pot sliding calipers out of a Bandit 600.

Step one, find the right brakedisks. I am not fully certain, whether some brakedisk manufacturers do this on purpose or not, but both the TRW Lucas and the Metalgear catalogues are pretty good for finding alternative brakedisks for your steed. The ones pictured below for example were originally intended for a '96 model VN1500, but be aware depending on country etc. they may be full floating or solid disks.


Next step, bigger brakes would mean an adapter for the brake caliper, even if you sticked with the stock calipers. The easiest way is to cut some stiff cardboard to size, pinch two through it and mount it to brake caliper mounts on the forks. Then put the brake caliper on the brake disk and put some toothpicks between the outer edge of the brake disk and the caliper, so you space them out a bit as they'd otherwise rub.


If you're as lucky as I was on the old Z1000J, you're pretty much done on this point as the new calipers had thinner mounting brackets than the old stockers, meaning that not exactly a lot of messing around was necessary and a bit of 10mm flat stock was all it took to get the calipers sit nicely on the brake disks.


... and as the adapter plates didn't look exactly as elegant as I had hoped, I took them off once more, bolted them together and radiussed them a bit. It didn't improve things much though... 😆


The next post will be about the earle's forks on the XS-triple sidecar, which are in fact progressing very nicely, but I don't want to go down the road of posting five updates on something, which shouldn't be THAT much work. Most likely, I'll split it in two.

Sunday 12 February 2017

Saturday 11 February 2017

XS250/360/400/500 rearwheel into XS650(SE)

Now one would assume (lightheartedly nonetheless), that if your XS650SE runs on a 16" rear, that the simillar looking 18" from the XS250/360/400/500 should bolt right in ... more or less. Less. The chainrun is about 7mm off and needs to be closer to the wheel.

The idea behind this adapter was two-fold: Space the sprocket out by 7mm and reinforce the sprocket studs with some POM-rings to stiffen up the whole lot. The major dimensions, in case you want to copy it:


Now the fun started, when my mate Alex came round with a 10mm piece of flat aluminium, so the first hour was spent in actually transferring the all the basic dimensions onto the flat stock and then cut it down far enough so I could actually chuck it up in my lathe...


Things are starting to take shape...


Came out nicely and should explain the drawing.


The XS500 wheel and as you can see, the studs have been milled down on two sides, as to align the sprocket. 


It fits!


Four more POM-spacers to stiffen things up.


Et voilá: The finished product. There's six hours between the first and the last picture...