Saturday 26 January 2019

The Norwegian Job - etymology "Zweckoptimismus"

From the same people that brought you words like Bratwurst and Zeitgeist, here comes another example of linguistic craftyness: "Zweckoptimismus", which would literally translate as purpose-led optimism. Ach you gotta love "ze Germans".

Last time we left, when the engine was on the bench and the obvious next step is to put it in a frame and squeeze some happy sounds out of it. But in order to put something in said frame, a bit of taking stuff out of the same was due.


Only a few hours later and my workshop is a proper mess.


The reasosn for this taking so long were plentiful, amongst some others, new starter cables had to be made and some new connectors had to be crimped onto the wiring. (Have ever pointed out, that a nicely crimped connector can be a thing of beauty?)


The starter motor cable was crimped and soldered to ensure the best contact possible. 


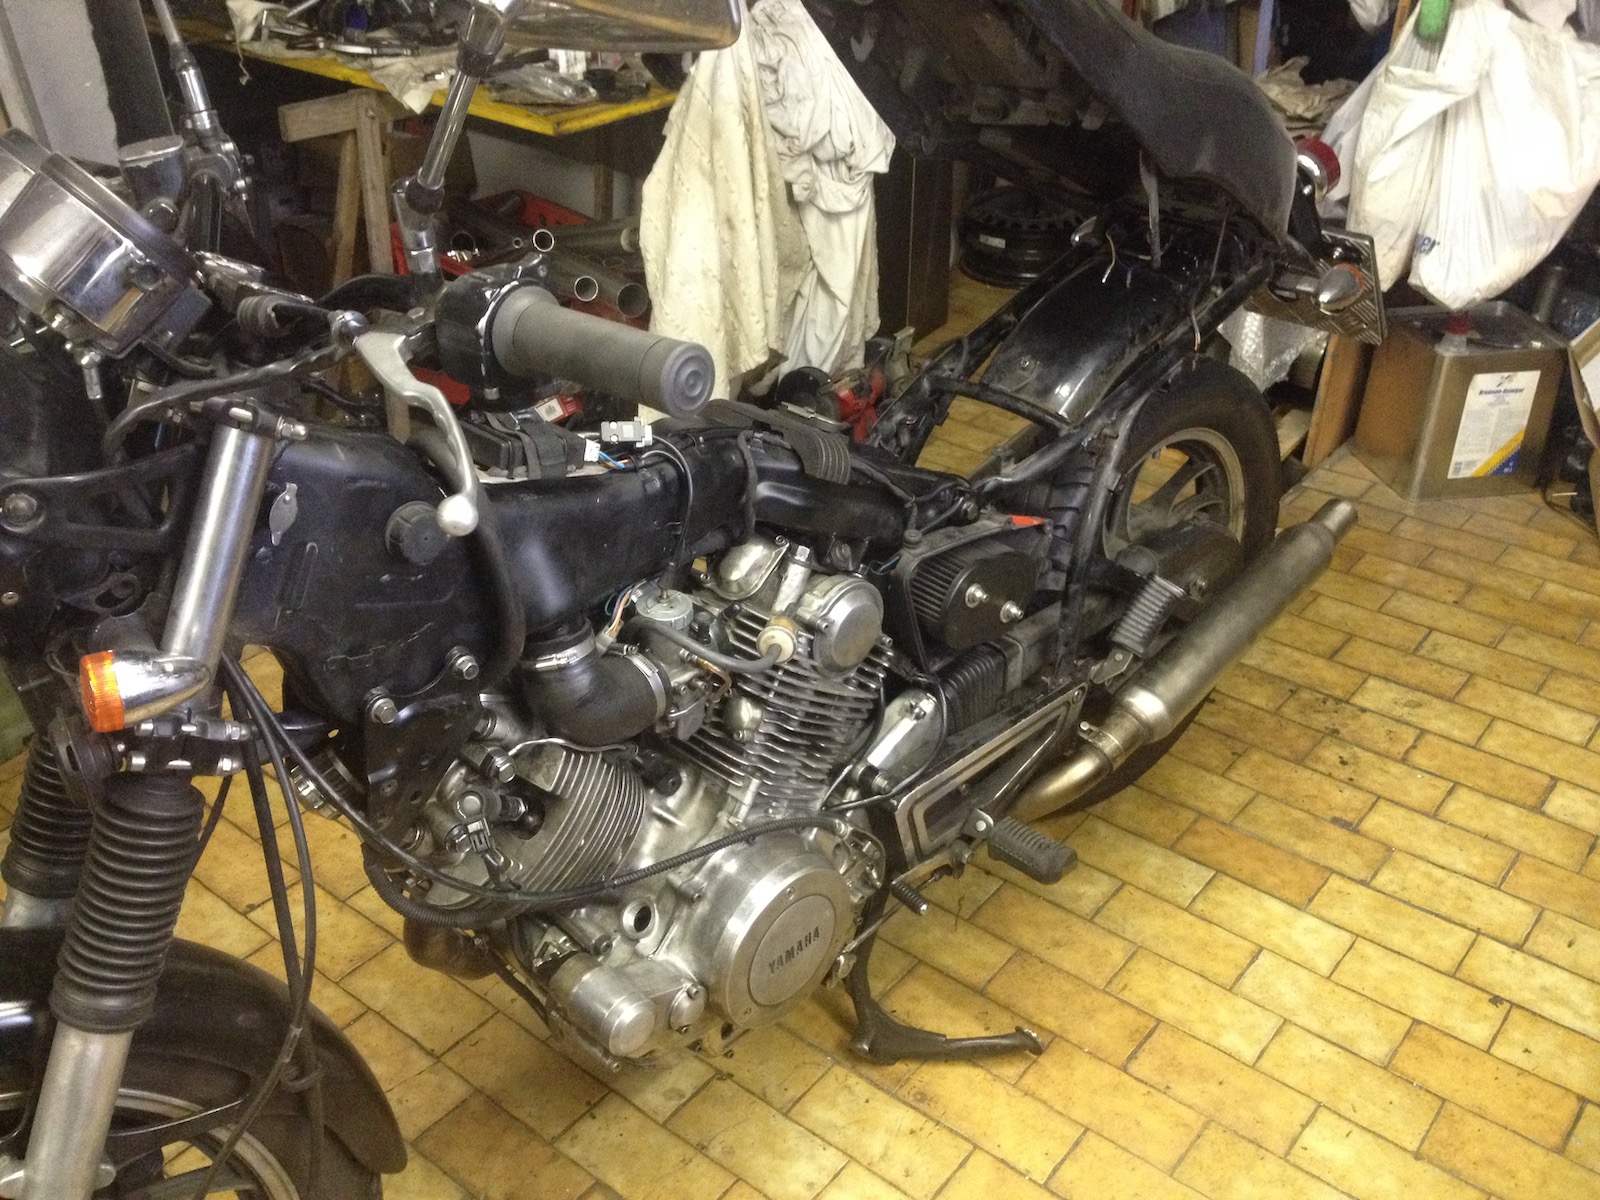
... and as by magic, the new engine is in the frame and filled with oil.


During the course of action, I also finally found out, why there always was a bit of fine rust-powder in one of my carbs: the glue of the filter had decided to call it quits, as can also be seen by the little flake of glue at the end of the filter.


At this point, things went "slightly" sideways, as in the starter, which had worked just fine, before the engine was set aside... well it didn't anymore. Of course you work this out AFTER you fill the engine with oil.


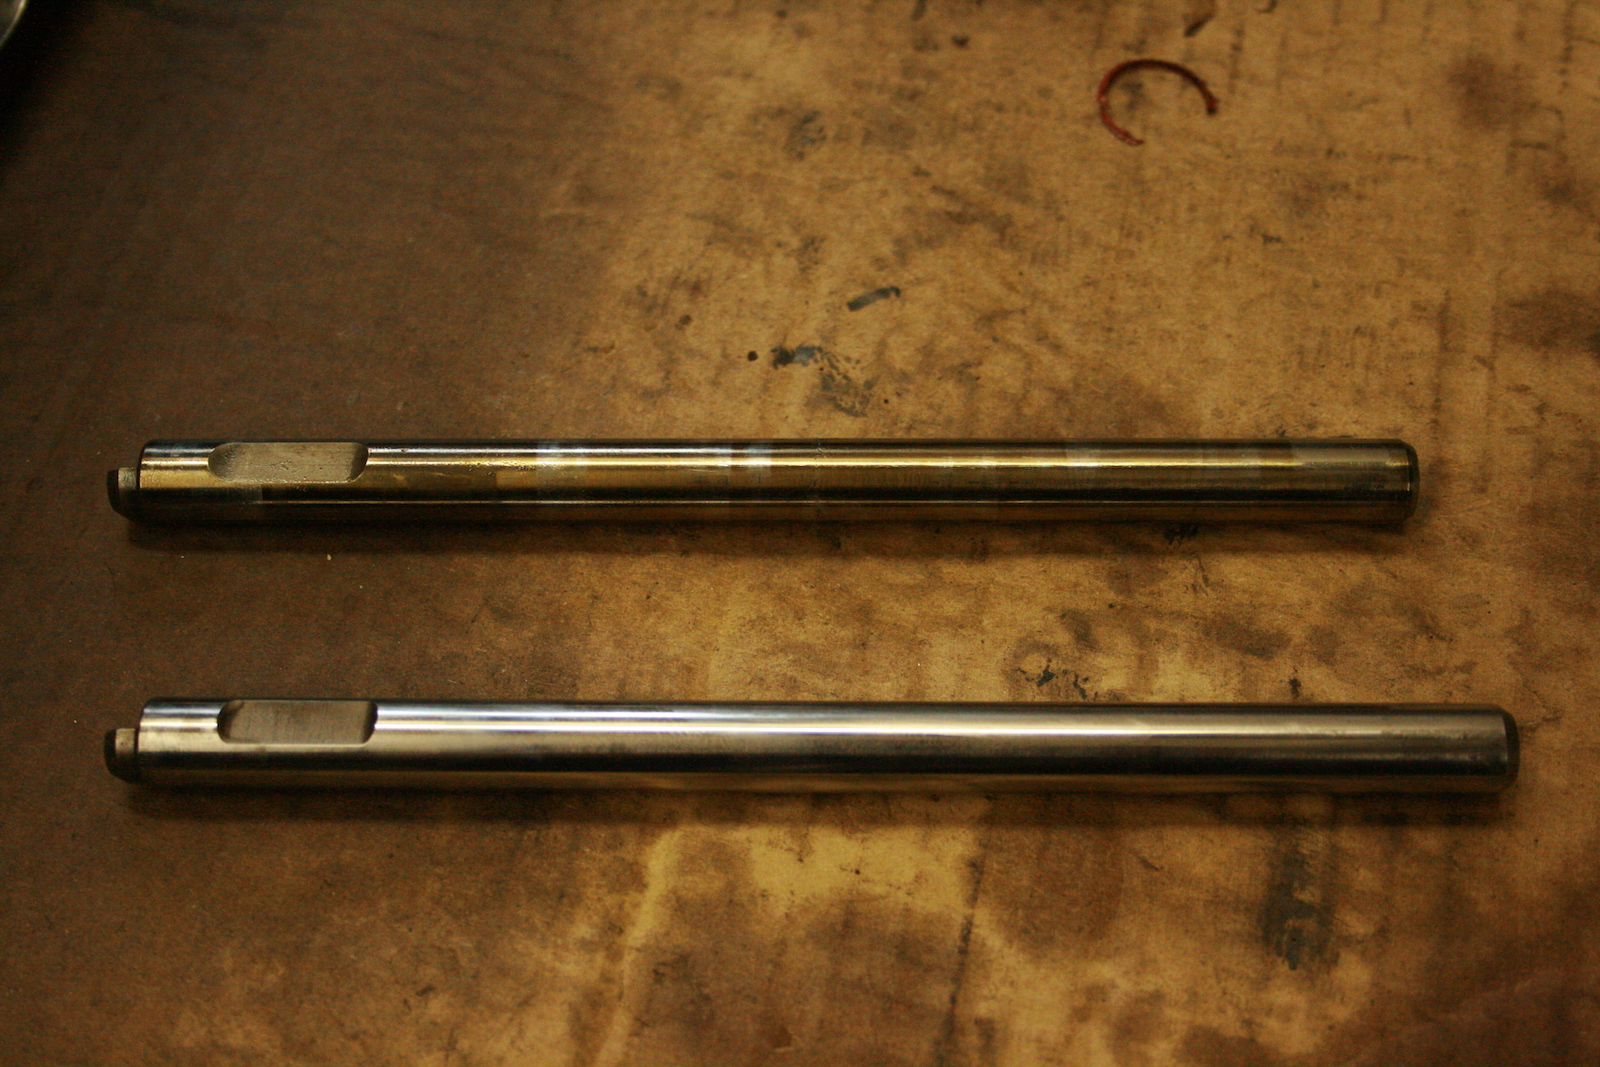
Oh and as it turned out, that new starter had a slightly oversized shaft, which had to be polished with some emery paper to get it down by about 0.15mm to make the starter clutch slide on and off the shaft without force.


And guess what: Press the button and fire the old girl up. Just like that.


But the story doesn't end on the note of "just like that". What you see here is a spark plug that had a very unfortunate first date with bits of piston and valve.


And a bit of valve stem, which sports a slightly dramatic valve clearance setup.


Alright, so we're dealing with a bent valve. No big deal, right?


Uh oh. Bits of piston stuck inside the carburettor.


Now those engine bits in the inlet are less of a surprise already, if I am being honest.


No point in not digging into the engine and taking of the offending head.


The way the valve stem is fractured is interesting. This very coarse grainy structure leads me to belive, that it had broken away? Also the stem is incredibly brittle, so there might have been some heat involved?


Now, I was still looking for two valve-dishes...


Remarkably, the piston held up nicely, regardless of a huge, gaping hole in the middle, the skirt's virtually undamaged. 


Quite a bit of said piston luckily made it out through the exhaust.


And now to a practical example of what "Zweckoptimismus" is: Looks like the conrod and crankshaft survived, unless the other side with the primary drive gears took a hit.


The cylinder (some actual measurements pending) could be good enough for a 3rd oversize, i.e. +1.00mm bore. As it has taken some damage, but all the dings don't seem to be very deep, there might be a chance of getting away with it.

All in all, there's still a lot of investigation due and I suspect, it'll be best to put a blanket over this engine for a few days and then have another (more calm) look over it and assess the damage. Maybe at least some parts of the heads (aside from the covers, etc.) can be re-used.

Sunday 20 January 2019

What the chuck ... and servicing the tail-stock on my Rhino-/Coronet-Lathe

During those quiet days between Christmas and New Years Eve, I stumbled over an ad for a 200mm (8") Emco chuck just like mine, allegedly NOS and with both sets of jaws for a price around the same as a new Chinesium one. Originally I tried to convince the seller to simply sell me the outer jaws, but as he wouldn't, I bought the whole set, thinking that I may use the old Emco chuck on the rotary table of the mill and still have the external jaws to swap in, if I don't need 'em on the lathe.

One of the things you only notice, when you have to carry that chuck around: It is epically heavy. A bit of wood was placed over the bed ways to protect them, in case the chuck would fall off. (It didn't the fit of the chuck and backplate is a lovely ever so slight interference fit, which means it needs a bit of gentle *tappy-tap-tap* with a rubber mallet to come of.)


New one installed. You gotta love vintage engineering, the overall dimensions on the backside are the same to within 1/10mm and the chuck sits on just as nicely as the old one.


The last thing I had to address was the quill-lock on the tail-stock. Lately I ran a live center in the tailstock only to find out, that even though the quill would lock nicely, releasing wasn't exactly in the cards.


As it turned out, the sliding bit was well rusty (as so many parts on this lathe) and simply didn't mean to move at all.


The verdict: Even though not strictly necessary, the new Emco-chuck was definitely a nice investment, it will have to have its innards cleaned out and a regrease. And then there's the elephant in the room: I want and have to get the chuck's backplate off to get the spindle(s) out and replace the drive belt, clean out the old grease from the spindle bearings and ideally also replace the seals. And when I am doing that, I'll also address the runout-issue of the primary drivebelt and install a reversing switch for the motor, so I can run the motor in reverse for thread-cutting. And most likely, when I have all those bits of anyway, I'll treat it to a coat of happy engineering grey, because the flaky and faded green disturbs my workshop Feng-Shui. 😜

A shoutout to all Coronet Lathe users: Should any of you have a user-manual or technical data and/or drawings please let me know as they would come in extremely handy

Sunday 13 January 2019

Swapping petcocks and rerouting fuel lines on the XS-Triple Sidecar

Sometimes you make a modification to a bike to improve on one issue, only to find out that it was some negative side-effects. In this case, fitting these lovely Ducati TT-F1 petcocks with their twin-outlets helped to improve the fuel supply to the middle cylinders, but also meant that I couldn't switch to reserve as the levers would hit the sidecovers. In those two weeks they were installed, I also found out, that the levers themselves are a bit hard to grasp.


The new setup consisted of three T-pieces, creating a horizontal fuel rail, feeding all three carbs and also ensuring that the engine would still run, if there was only fuel left in one side of the tank. 


And that's the old Moto Guzzi petcocks re-installed (not without treating them to a bit of penetrating oil.


... and that's the reality of dealing with modified old bikes as daily rides. Not every job is glamourous, but nevertheless needs to be tackled. With that being said, expect quite a few changes to this bike in the coming months.

Oh and I have a set of TT-F1 petcocks for sale, if you're interested. 

Sunday 6 January 2019

The Norwegian Job - an engine for Faffi (part 2)

One of the added benefits of this engine is the fact, that I rode the snot out of it in the last decade. Claiming to know its ins and outs might, as such, be a bit of an understatement. To be fair it also worked quite amicably. Pretty much the only thing I've never managed to sort out in the past was the fact that it was very notchy to shift, I measured the endplay of all the shafts about 5 or 6 years ago and given the fact that it is the stock gearbox and everything was set up by the book, I expected to find a bent selector fork. I was looking in the right direction, but it turns out, that in only 37 years old oil and some microscopic scratches had made the selector shaft very sticky.

This meant getting a tool out, most people don't even know, I own.


Top is a very good stock part and below the polished original selector shaft. 


After some oiling of all the gears and a careful testrun of the gearbox (I've had some bad experiences in the past), it was time to clean the other side of the engine cases and then put them back together.


Call me old-fashioned, but I've built all my engines with red RTV and the same German brand has released the same sealant in black last year and yet still, I wouldn't feel comfortable to use it. Also, thin lines of sealant go a long way and are much better than thick gobs. 


Cleaning parts is (I think) nobody's favourite, but polished combustion chambers do have their moments in this respect. From crusty bits to almost done in less than 10 minutes (for both heads). There was still some more to do but, that was literally after going over the head once with a rotating nylon brush.


An interesting find was to be made on the front cylinder. I had heard some detonation, which I suspect was down to a combination of: somewhat optimistic ignition advance, lean mixture and oil/carbon deposits on the piston tops in connection with a very large distance to the squish-area.


As the rear cylinder was fine, I started with a quick hone-job just to give the new rings something to bite into and then checked the ring-endgaps to determine, whether they came gapped correctly from the factory.


Fresh set of rings installed...


... and plenty of oil, probably my only genuine sin, I am guilty of, every single time, when building an engine. But I admit, even after doing more than my fine share, I am afraid of seizures.
 

As the other piston needed some replacement, I had to call in some favours to get a good piston in the right size, so would be a good fit to the cylinder. (Well aware, that normally you do this the other way round...)


Of course at this point the bottom end had more or less been completed, so a few precautionary steps had to be taken, to prevent the clip from falling into the engine. 


The gudgeon pin was dimensionally ok and only needed a bit of a cleanup and polish. 


Looking good again – after taking some measurements on both cylinders, I decided to try my own engine without a base gasket as the clearance is well big enough, yet it would get the piston close enough to the head to make the squish work a lot more efficient. 


And lastly there was the question on the condition of cams and rockers, as they tend to suffer from oil-starvation. In short perfect. The roller cam conversion and the modified union bolt both raise the oil-level and the amount of oil-pumped into the head and in short... perfect.


A bit of moly-grease does wonders as an assembly lube and protects cams and rockers during those first revolutions until the first fresh oil reaches the head. 


And that's where we are now. The engine is basically assembled.


By now (after those pictures were taken) both cams are timed, but the sprocket bolts require a drop of loctite and the clutch cover has to go on and then it's gonna be test-run o'clock in my everyday TR1-chassis, while I do the affore mentioned modifications to my own engine. Also I am somewhat itching to try out a few things with the single left-over piston ...