Now if you do a project on a budget, there's inherently going to be some compromises or extra work you have to do. In my case some of the metal stuff was incredibly rusty.
More importantly the lower frame section that came with the bike had the swingarm completely seized on the pivot bolt and the bolt head was already decently rounded off.
Luckily getting the actual final drive off proved to be rather easy with no seized fasteners or the like.
One of the central elements in this project is the usage of XS-Triple wheels. Now I had seen some pictures of one guy fitting a rear wheel into a XV750, but that was it. Turns out the coupling is the same diameter and tooth-count but so far I am not sure if they fully engage.
The only thing necessary to make the splines engage was to remove the dustshield on the XS-rear-wheel, but I think for practical use, I will space the coupling out by a few mm to a) improve engagement and b) allow for a bit more clearance to the shaft.
Next step will be to build as much of the engine as possible to empty out the XV750 engine that came with the bike in order to make it easier to handle. (I already know that I will be waiting a while for some of the parts, but I don't want that to stop me from building the exhaust, subframe, etc...)
There was still a lot to do after the first rideout almost two weeks ago and quite some had yet to go wrong.
Now the freshly rebuilt engine ran... ok-ish, but not even remotely as powerful as I imagined. Quite frankly, it wasn't notably faster than the rather well seasoned stocker that was in there before. So I still had this 1VJ cylinder head, which after some investigation turned out not to be too bad. At least that's what I thought initially. Throw in a bit of bad luck, e.g. a brand new and slightly bent valve, where the dish was ground too deep. (The right one in the picture.)
Plus some properly ruined exhaust studs, which took me the better part of a day to sort out but ultimately fail, when redrilling for new studs.
So at some point, some rather impolite words were uttered, the head "retired" and the following day, I jacked up the old girl and got going on the swingarm chainguard as the original one was only present in the shaped some well bleached bits.
As is apparent by the pictures above, this is a proper "swingarm-out" job and honestly quite a royal pain to get done. While I had the swingarm out already, I also swapped the right grease nipple as the old one was leaky and I couldn't get any grease into the swingarm bearing. (And I mean, this place isn't called GreasyGreg's for nowt...)
After all of this lingering around it was about time to tackle the elephant in the room and find out what actually was amiss with the engine. I had all the valves out as I dreaded that one of them might run stiff in its guide or the like, but the true was a lot more profane. We all make mistakes.
Thanks to the stupidly deep valve dishes in the piston, nothing happened except for the engine being more than just "a tad" lazy.
On the way home the old girl sounded like a big thumper should and was a lot more lively. 😎
Special thanks to my dad for lending me a hand more than once and getting the swingarm in and out in no time and lots of other good stuff. The old girl made it home from the workshop without a single hickup, except for the speedo illumination failing, so I can't really say how quick she actually is. Which in hindsight might have been a rather good thing...
It's not like I am not pretty happy with my XS Triple, but for a while I have felt like I was missing something. I couldn't quite put my finger on it until I very recently had a go on Andy's Ural.
Torque. Low down grunt. The absolutely relaxing feeling of knowing that whatever you do, there will always be a bit of torque round the corner to get you out of trouble.
So I bought this.
What you're looking at are most of the parts, I'll need to build myself an XV750-based sidecar. To be precise that's what I'll need from a XV750 at least. It will the biggest bitsa I've ever built. Ever.
The plan:
XV750 frame, XS850 forks, wheels and brakes, engine will be of the bumblebee type (1063cc heavy crank with BT or XVS cylinders and XV700 heads), VM38 carbs and a 2in1in2 exhaust just like on ol' Tractor. Tank, rear subframe/seat will be off a TR1 and same goes for the headlight and clocks - so in essence the old girl will look like a TR1 but with shaft drive and straight-spoke wheels. The sidecar will be (once more) a classic Dnepr and if my sources are right, I once more might have a lead on an Ukrainian ex-military K750 sidecar. This time, there will be none of this sidecar-brake madness as I want to keep the whole setup as simple as possible. Which, incidentally brings me to the last (and most challenging) point: The subframe. I have pretty much worked it out in principle how I will build a front downtube that will go from the top engine mount to the center-stand mount and include the eyelet on the front of the engine. The rear mounting points are still open, as I am not entirely sure, where the rear lower and upper mounts want to go, but I am pretty confident that once I have the bike parked next to the sidecar this will sort itself out, i.e. become apparent where and how the subframe is supposed to go.
I guess the next step was pretty obvious - grease up the alternator gasket and put the cover back on and call it a day. Pretty much what I've done to be honest.
Pretty much, because actually the chain guard on the swingarm is more than due for replacement as well. As a matter of fact only the yellow bit, which is visible in this picture still exists. The thing I didn't know: it's swingarm (or engine) out to do the job.
... quite frankly, I was having none of that this time.
As a matter of fact, there's a few things in the cards for this engine and bike - consider it a bit of an outlook over the Winter months:
the engine or the swingarm will come out once more and the chain slider will be fitted
the 1VJ head will be overhauled and (most likely) be installed on this engine
I already have all the materials for a pannier rack.
But mostly the old girl will be used as intended: as a lovely commuter and once the situation allows, she'll be put to good use to take me those far-away places. Because legally she's a Tenere 55W now and you know, there's this one grocery store that sells frozen peas like no other...
Now this one is going to be a long one, best buckle up and get ready for the ride - as some might remember, this was meant as a quick and simple engine overhaul. Among those, who have forgotten about it, was me, I guess.
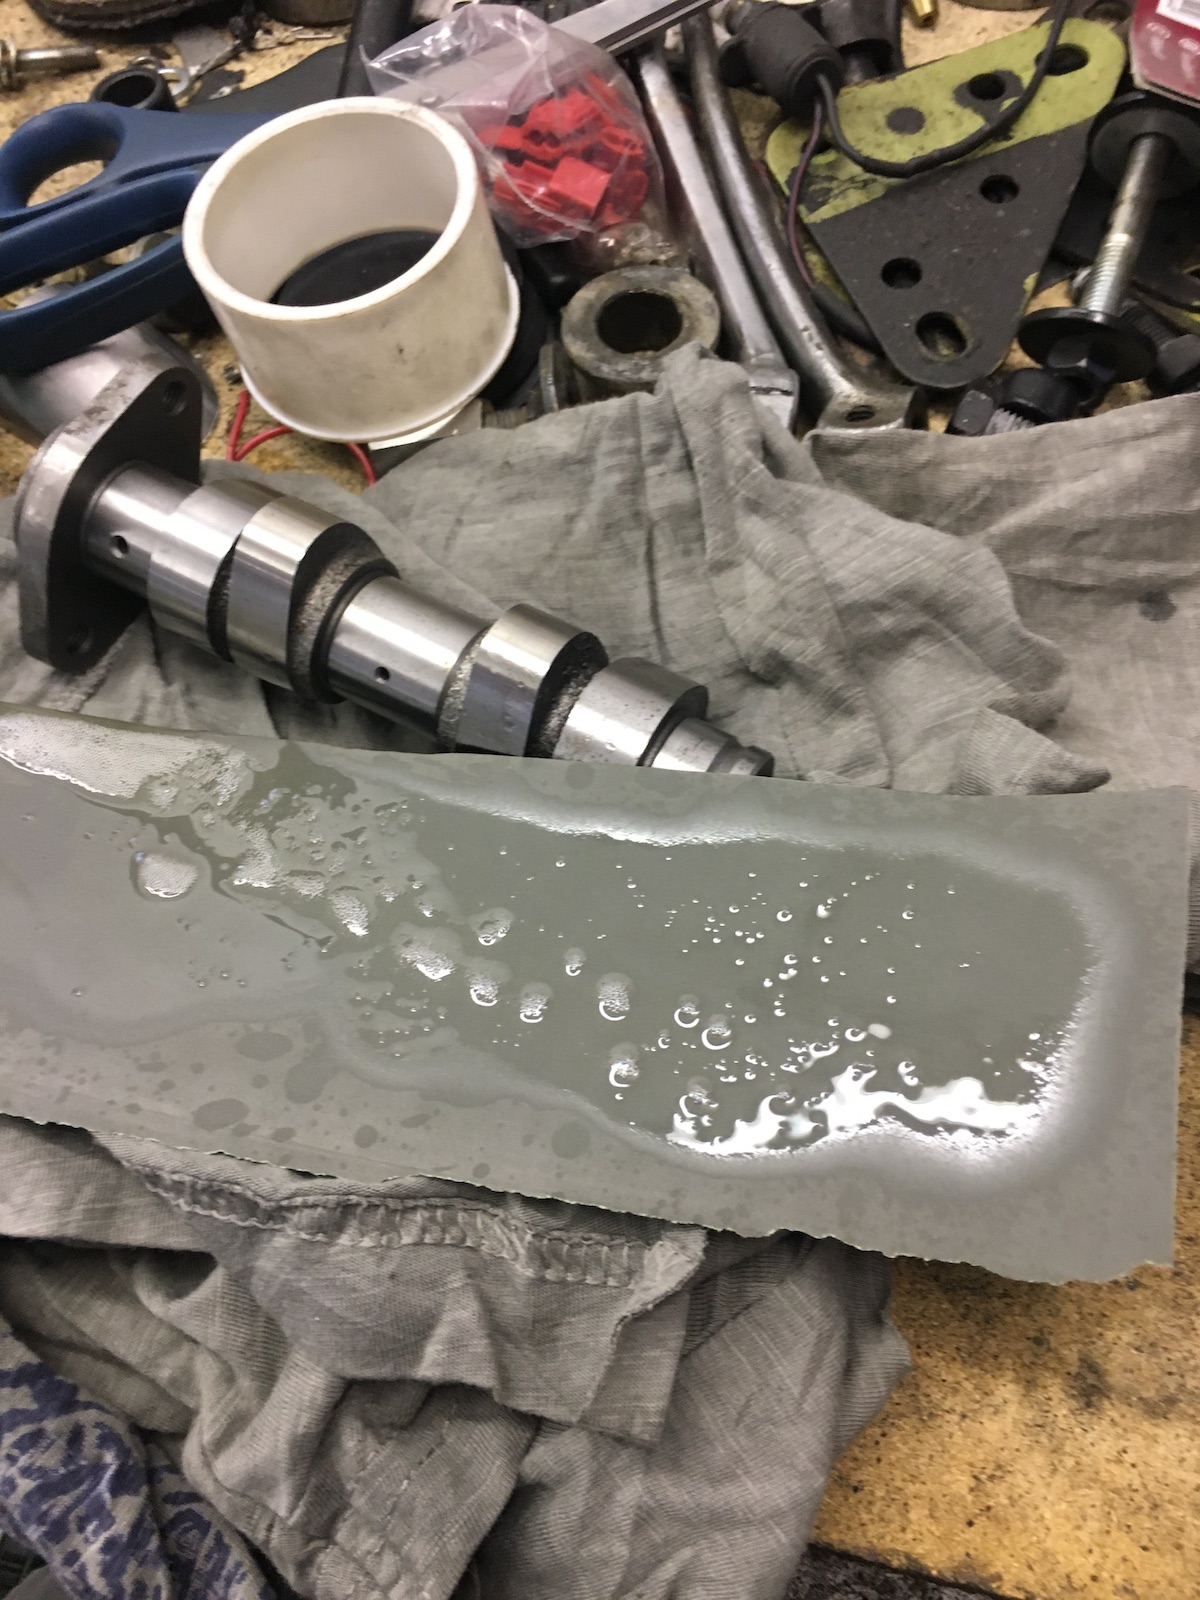
Let's kick it off with a lovely spicy cam for a bit more mid- and toprange fun. In order to use it had to be polished with some 2000grit sandpaper to smooth the nitrate-layer or otherwise the camshaft would eat my rockers for breakfast. A bit of WD40 does wonders to make that 2000grit sandpaper go longer.
The upper plug is needed to time the engine and admittedly the old one was properly mangled and almost impossible to open.
Then I dug out another cylinder head out of my stash and found out it was actually a 1VJ-head in acceptable condition. Even though I decided against using this one, I cleaned it up and went through it. It will be overhauled and if I am not happy with the performance from the 34L-head this will be the head I'll swap in.
Once more the new camshaft and a bit of plastigauge proves the bearing clearance to be well within spec, meaning that I might not have had to get a new head after all.
Rinse and repeat, I bought a 34L head, might as well use it - after some cleanup.
Touched up the ports a little around the seats as they were truly horrible there. Rough casting, edges, ridges the whole lot.
The second picture should show it a little better. Nothing fancy really, just some correctional work as overall the port design is pretty good for the era. (Heaps better than what can be found on a TR1 for example and the 700 heads on mine are from the same year...)
Spark plug thread got a little clean up with an M12x1.25 tap, not because it was strictly needed it, but its not going to be any easier than now.
The camshaft was missing an additional oil-supply hole, so as per manufacturer's recommendation a 2mm hole was drilled.
As usual, all the threads were chased with a tap, just to make sure there aren't any nasty surprises, when assembling.
Lapped a bunch of valves in and discovered that my aftermarket valves obviously are a bit smaller than OEM ones and thus the valves sit a bit deeper in the head. Still acceptable, but well you know... not textbook standard.
Viton valve stem seals are a must for me.
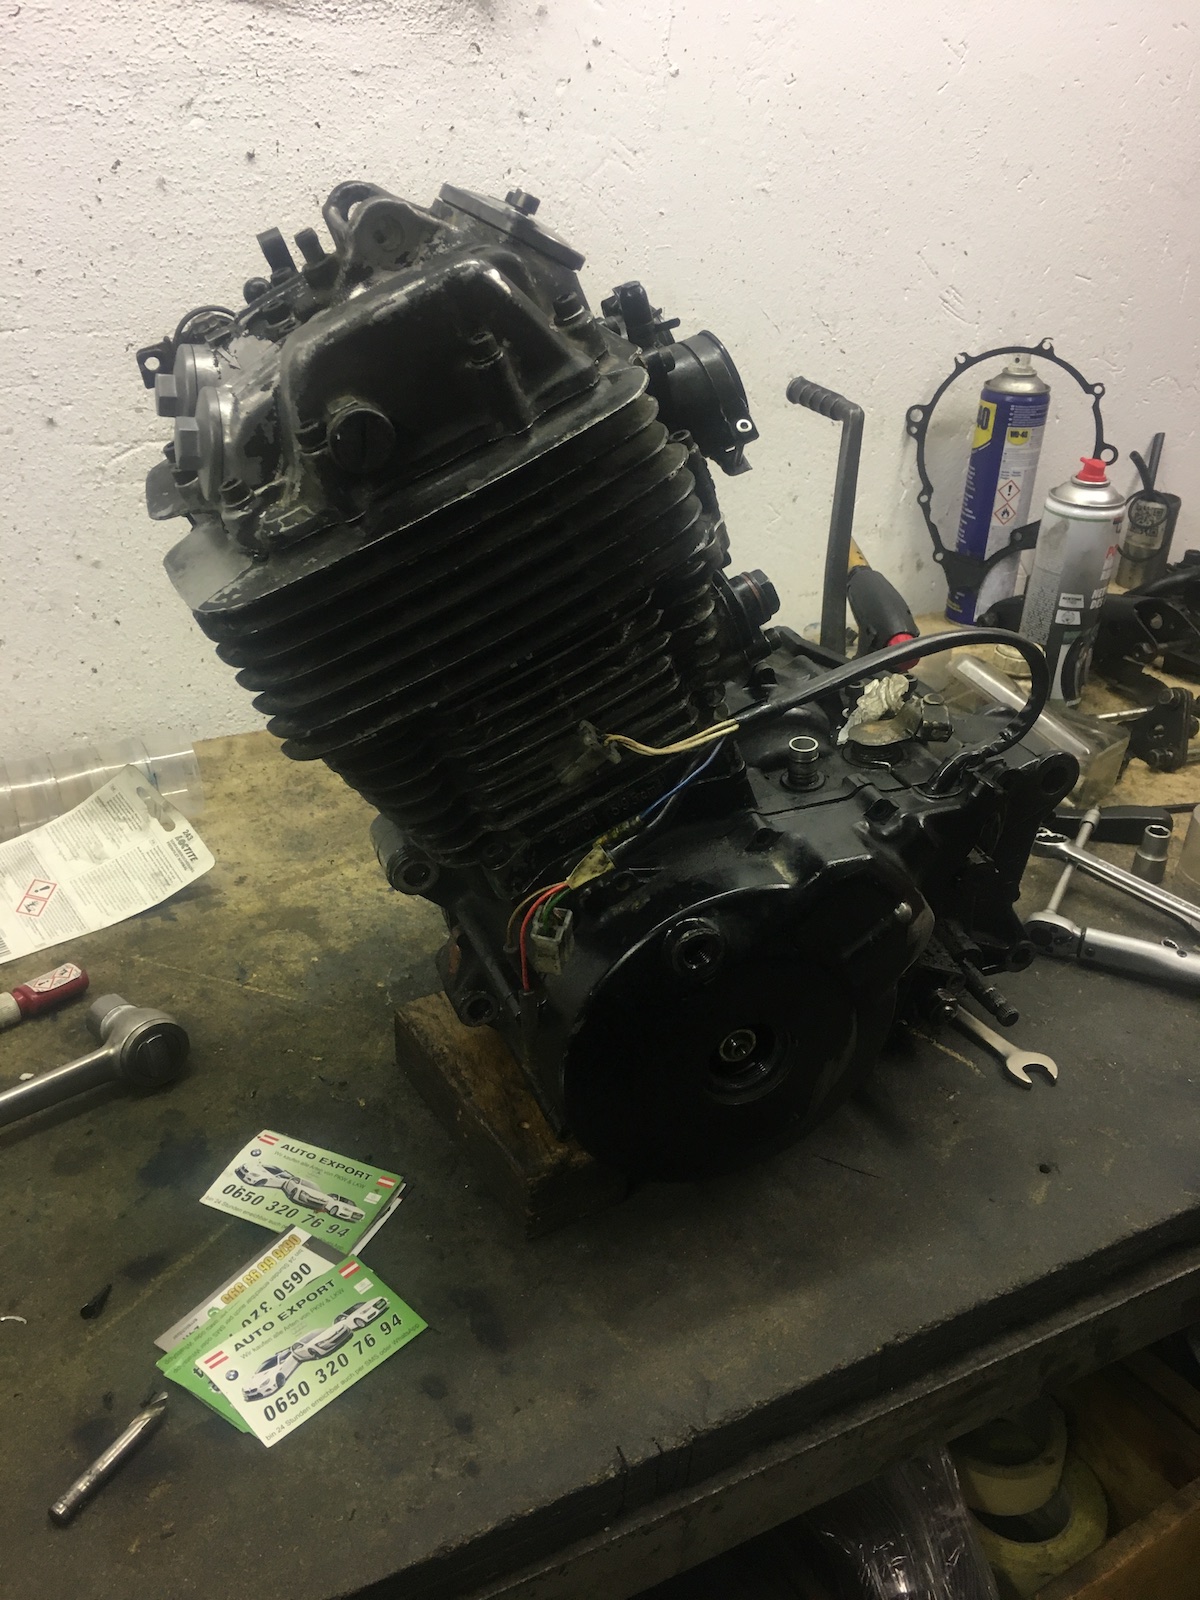
And finally the finished head - looking like new. (At least where it matters to me.)
Before getting into the engine itself I cleaned up the M8-thread of the drainplug on the oiltank as that felt very raspy.
When I took this picture, I didn't know that this gasket would be the one that would really bite me in the arse. Interesting to see those unused posts on the stator. Goes to show that Yamaha planned for an electric start version of this engine
One of the things a lot of people warned me was that the rotor might be stuck properly on the crank - mine was no exception, but with a hard-soldering torch and the sort of experience you get from taking XV rotors off... It did make a proper *plopp* when it came off. (The last sentence may contain traces from mild understatement!)
And yes the picture is a bit blurry, because I was quite shaky from excitement. Oh and always leave the nut on to prevent mushrooming the crank's end.
Getting the engine out (once you know how it is done) is dead simple: take out all the bolts push the swingarm bolt out of the crank case, insert a bolt from the other side to prevent the swingarm from flopping around.
Lift the engine out of the swingarm, turn it by 90 degrees and put it on the floor. Grin smugly. Takes about 30 seconds. Lifting the engine onto the workbench was actually the tougher task...
Now I only took the rotor off, because I wanted to swap the camchain. Guess the stretched chain wasn't the only reason, why it didn't sound as healthy as other XTs.
Top end looks respectable. (Made little unduly noises, so I didn't expect much mayhem anyway.)
Guess XTs really aren't interference engines.
Piston looked pretty good on the top, but the skirt shows some battle scars.
Enough of the old engine... better get started with the new bits. And well, I might have thrown the original plan out of the window as well, when it comes to the piston. A 96mm 11.5:1 forged piston will now be put into service. But as is the case with race-parts, first the rings had to be gapped. As the bore is approx. 3.78" the resulting ring gaps were 3.78" x 0.0045" and 3.78" x 0.0050" or in other words, get the file out, as both rings in stock form were only at a fraction of that.
Now that piston is (admittedly) one sexy beast. Really curious to see how it'll perform once it has bedded in.
As the stock ally longnuts were neither very functional anymore nor very pleasing to the eye, I treated myself to this set of stainless ones... They do look a bit posh, if I am honest. 😏
A while ago, I started to become a huge fan of engine assembly lube. Compared to MoS2-grease it doesn't compromise the clutch and still builds up a protective layer until oilpressure reaches the head on first startup.
Ready for install.
Put the engine back in (thanks David for lending a hand)...
... and check the oil-level.
And then onto the most uneventful first start ever. Three kicks later, the old girl ran and idled nicely.
If this were a fairy tale, this is where I'd ride happily into the sunset. Well I rode it and it sounded good and pulled nicely. It even has built-in waterproofing for my motorcycling pants and boots.
So why didn't I do that alternator gasket then? Simply put, I only bought a top-end kit and had completely forgotten about the left over gaskets from previous builds.
Swap this fella out, replace the two o-rings sealing the oil-galleries and then see what she can do. Sounds like a good plan to me. (I might have already had some issues with restraining myself regarding run-in-procedures anyway...)