Showing posts with label Dre-XT-Stueck. Show all posts

Tuesday, 4 March 2025

Dre-XT-Stück - Cylinderheadboltthreadsshouldhavedonethemrightthefirsttime

It started like those stories always seem to start - when things are actually going well. Or to put a date on it, on May 24th, 2024 after enjoying a lovely little rideout on the old girl, the front left of the cylinder was covered in oil. 

So I did what any sensible person would do: clean it off, do nothing, hope for the best and get the inspection out of the way and then as the problem didn't magically solve itself, mumble something and park the old girl in the shed and ignore it for about half a year. Which is roughly when I realized that the old girl would come in a bit handy right about now.


Apparently stripping down the engine never goes quite without a bit of extra hassle, so the opportunity arose to fix all the remaining camshaft journal threads as well to improve my chances of making it through a full season without a rebuild of the engine. 


The piston has sucked in quite a bit of oil through the engine breather and was covered with a nice crust of burnt in oil.

... and this is from right after I rebuilt the engine and it felt a bit doughy.

 What looks like a fairly usable headbolt thread actually isn't and is the reason we're having all this fun now.


The solution will be the same as used on the my dad's XT500 4-valve engine - stainless steel M12-to-M8 adapters with an overall length of 27mm. Why not 30, you ask? Well because the stock threads are only 26mm long and with the steel inserts they should be very much strong enough. Also 25Nm on M12 is so far away from the maximum torque that is permissable in aluminium, I was actually going to use threadlock just to make sure they won't rattle loose. The other, quite valid point is: why not use a commercially available insert? In short: I tried Helicoil and they failed as they are too short and thus too weak and the top most is a commercial product, but again only 15mm long AND about half of it is slotted for installation, meaning it will most likely not be able to carry the full load.


 Installation is very straight forward, center on the old thread with a 6.5mm drill lock the table on the mill and clamp the cylinder down tight and go at it with a 10.5mm drill. 

That's not quite looking right, is it? It is not indeed. For some reason the guy in charge of tightening up the drill chuck didn't do his job very well and the drill came loose, wandering about and making a very interesting tapered 11.2 to 11.8mm hole. Not good. 

After some thinking, I decided to make an oversize insert as luckily I had started in the one corner that had plenty of meat around the hole and settled for M14x1.0.

Now the cheap thread die left a remarkably bad finish, which in hindsight was a good thing as it was rather unpleasant to thread in, which in turn most likely meant it would be rather unlikely to come out as well. (Or as someone else said: cross-threading is a kind of thread locker.)


Measured the thread depth and decided where to part it off, so it would end up flush or slightly below the headgasket surface.


Then it was just a matter of doing the other three WITHOUT cocking it up again. 


Basically do this until you're done and test it with a headbolt.


 Because the department of fun and games hinted at the fact that on more M6 thread was stripped and at least another one was feeling a bit dubious, I decided to install timeserts on all of them.


Obviously not without making another mistake: I didn't quite countersink the first one deep enough as I thought the chamfering tool had already bottomed out.
 

Having gotten this far and not being sure just how well that insert was seated, I decided AGAINST any attempt of getting it back out. Instead, I decided to work around the issue. 

First I put the cover back on, centered it with two additional bolts and tightened it down.

This left an imprint (hardly visible in the picture) on the boss.


 Which was then chamfered to provide the necessary clearance so the cover could be tightened all the way down. 


Gave the cylinder a quick hone and then wondered whether installing it without a base-gasket would improve the squish gap. For those interested: Nope, stuff gets too tight (again), between 0.45 and 0.55mm of the piston sitting low in the bore. With an admittedly very pliable base gasket I ended up with 0.70 to 0.80mm, which has to be added to the 1.00mm of the cometic head gasket. 

To quote a certain repair manual: Assembly is the reverse of disassembly, with the two most important things to bear in mind being that the cylinder base nuts need to be tightened to 40Nm (42 in the manual) and the headbolts to 25Nm. (29 in the manual which is just too high and the cause for many a stripped thread!)


First start was rather anti-climactic - not much smoke just a two or three kicks, pretty much standard procedure as if the old girl would have just been parked over the Winter.  


Friday, 8 November 2024

Project Status Update Winter 2024

It's been a while, but in my defense a lot got done and I promise in the coming weeks, I plan to do quite a bit of catching up on the blog as the Suzuki is getting close to the finish line. So here's a bit of an overview, what's planned for the Winter season/the coming weeks. 


Everyday TR1:

Only a bit of maintenance is due really.

  • Oil- and filter change at (1)35,000km
  • clean and grease the starter motor
  • a good cleaning and greasing
  • throttle cable incl. splitter needs to be changed, because this will create problems rather sooner than later
  • the sub-frame mount of the rear mudguard needs to be addressed as the bolt touches the tire ever so slightly when the rear shock bottoms out (and I already have a solution with a P-clamp that basically only needs to be installed and then that'll solve the issue)

 XT600 - Dre-XT-Stück:

I got a lot more use out of the old girl this year than several of the last few years combined, still to call the old girl "trouble free" is a bit of a stretch.

  • Headbolt threads in the cylinder need to be upgraded with M12-to-M8 adapters like I did it on the pretty one as the left front one is starting to fail and thus leaking oil
  • a road-legal pannier rack is due
  • I still have this KTM Adventure 790 rearshock, which needs an adapter to get it to the right length
  • oil the throttle and clutch cables
  • other than that, a good clean and a bit of TLC should do the trick

SR500 sidecar:

As this one will be used the most, the main thing will be to get it ready for Winter-use.

  • Spray it down with wax to protect the metal parts from the omni-present salt
  • install hand muffs
  • Check which bolts have come loose lately
  • modify the summer wheel to work with the modified sprocket carrier and get a bigger rear sprocket

Suzuki SJ410 - the Pickle:

Not sure, if I'll have this ready at the start of Winter, but we're getting there as the little cube is already painted and mostly there to get inspected. The big things still missing to get it on the road are:

  • fix up the front and rear bumpers
  • repair the wiring and remove most of the rather dodgy fixes
  • make the heater work
  • replace the rear brake drums for the later model ones I have already overhauled (they are self-adjusting and more common, so e.g. the drums are still available as aftermarket parts)
  • get the handbrake working
  • change the various oils and check for leaks and fix those
  • fit the winter tyres (which can mean either fit the tyres with the Winter tyres on them or fit the second set of NEW Winter tyres to the wheels which are currently on there - might in the end by a matter of the available time)

Other vehicles that need fixing:

VX800:

This was probably the let down of the season, because it got new tyres and the started to not run right, which resulted in pulling the fuel petcock (because we assumed it was blocked by rust and also leaking slightly) and that was perfectly alright...

  • convert to electric fuel pump out of a VS750 (chopper version of the same bike) as the diaphragm pump is as dead as nails
  • Repair the petcock threads in the tank because one of the metal-look-a-like bolts stripped part of its threads

Goldwing GL1200 - Volkskrad:

This really "just" needs finishing. We got stuck at the point, when I had to get a repair-kit for the rear brakepump. This has to be installed and then the rest needs to be assembled etc. The future on this one might be rather open really. 

Aprilia Moto 6.5:

Somewhat as predicted the broken regulator/rectifier fried another battery, so this has to be addressed and in an ideal world, I am not going to do that with a stock Ducati-elettronica unit, but something out of Japan. I just have to dig out the necessary specs to find a suitable replacement.

Bandit 1200:

Unless I am mistaken, this one might want (again) a replacement of the clutch slave seal and a good cleanup of the rear brake caliper.

As the avid reader might have noticed, there's quite a few vehicles missing from this list - that's intentional, because this is the stuff that HAS to be done. Everything beyond that is probably a case of how cold (or not) it will be during the Winter and the amount of extra time available for tinkering.


Sunday, 18 February 2024

Dre-XT-Stück - sidestand

I have to admit, that lately it seemed as if the old girl had a bit more of a "sporty" lean to her and knowing fair well that those sidestands are known to bend (and eventually break) I thought a bit of bending it back and maybe bracing it was all it would take. But the sidestand's not the main culprit. 

 With the old girl leaned onto the little pickle...


I wanted to unbolt the sidestand, which was substantially easier than planned. 

So the assumption that something had given in, wasn't fundamentally wrong, it was just that it was the clevis that had bent because the pivot bolt snapped. The shank is 12mm and there was a sufficiently long M12-bolt in stock.

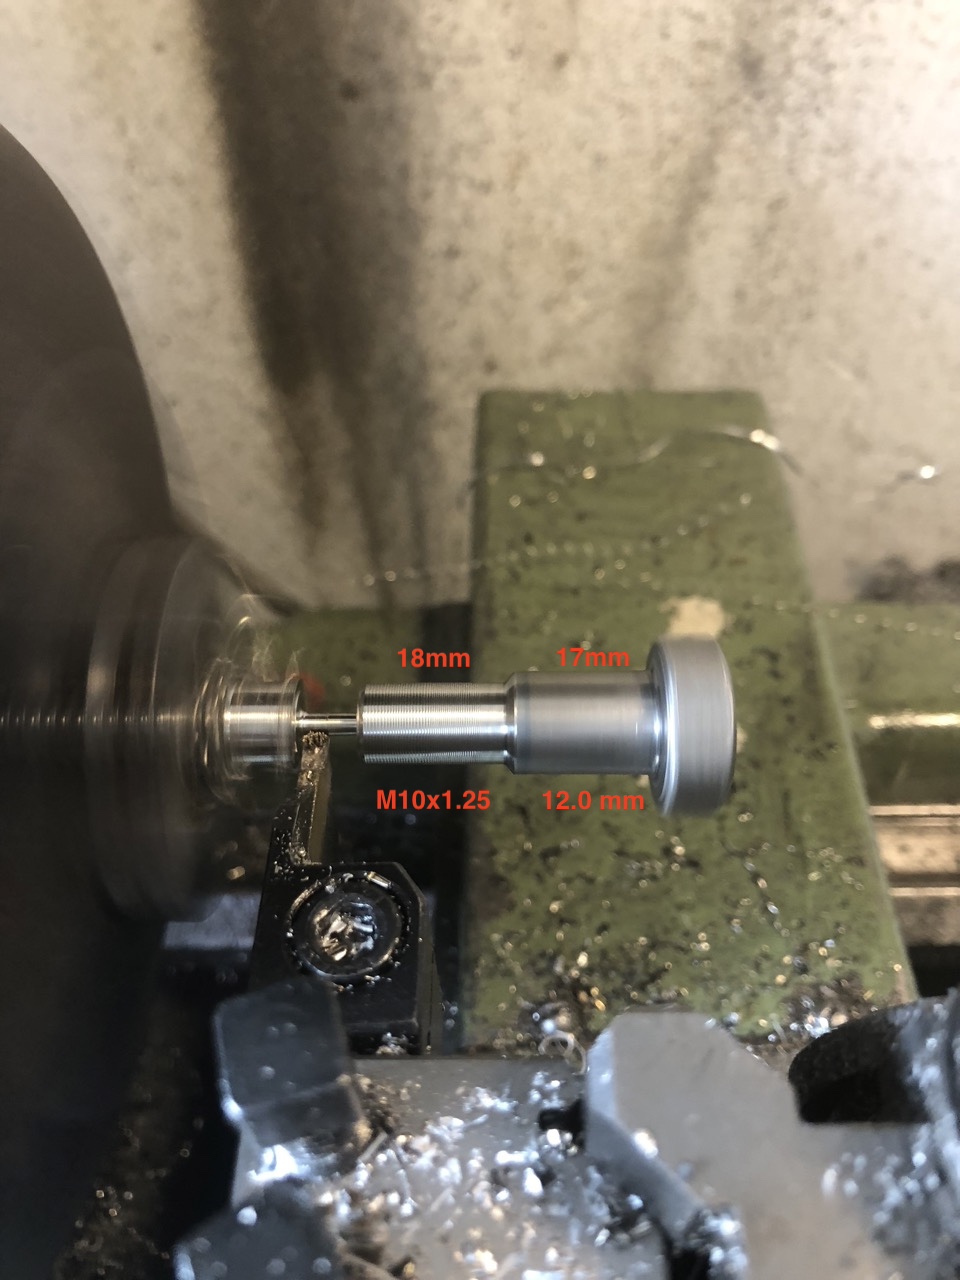
These bolts are widely available (even new from Yamaha), but should you find yourself in a pickle and have to machine one yourself and maybe lost some of the fragments, these are measurements mine had.

Depending on how worn the hole in your frame is, the 12.0mm might range from T-I-G-H-T to rather sloppy. I repaired that one, when painting the frame, so I had to take a bit off as things got very sticky.

Saturday, 13 January 2024

Dre-XT-Stück - brakepump upgrade

Let's agree that even when new XT600s weren't exactly known to be the absolute wonder-weapons when it comes to braking and admittedly the addition of a later model (still single piston though) brake caliper, steel braided brakehose and a freshly rebuilt brake master only got it to a level, where I am willing to call it a very early version of ABS. Or in other words: that front brake sucks. 

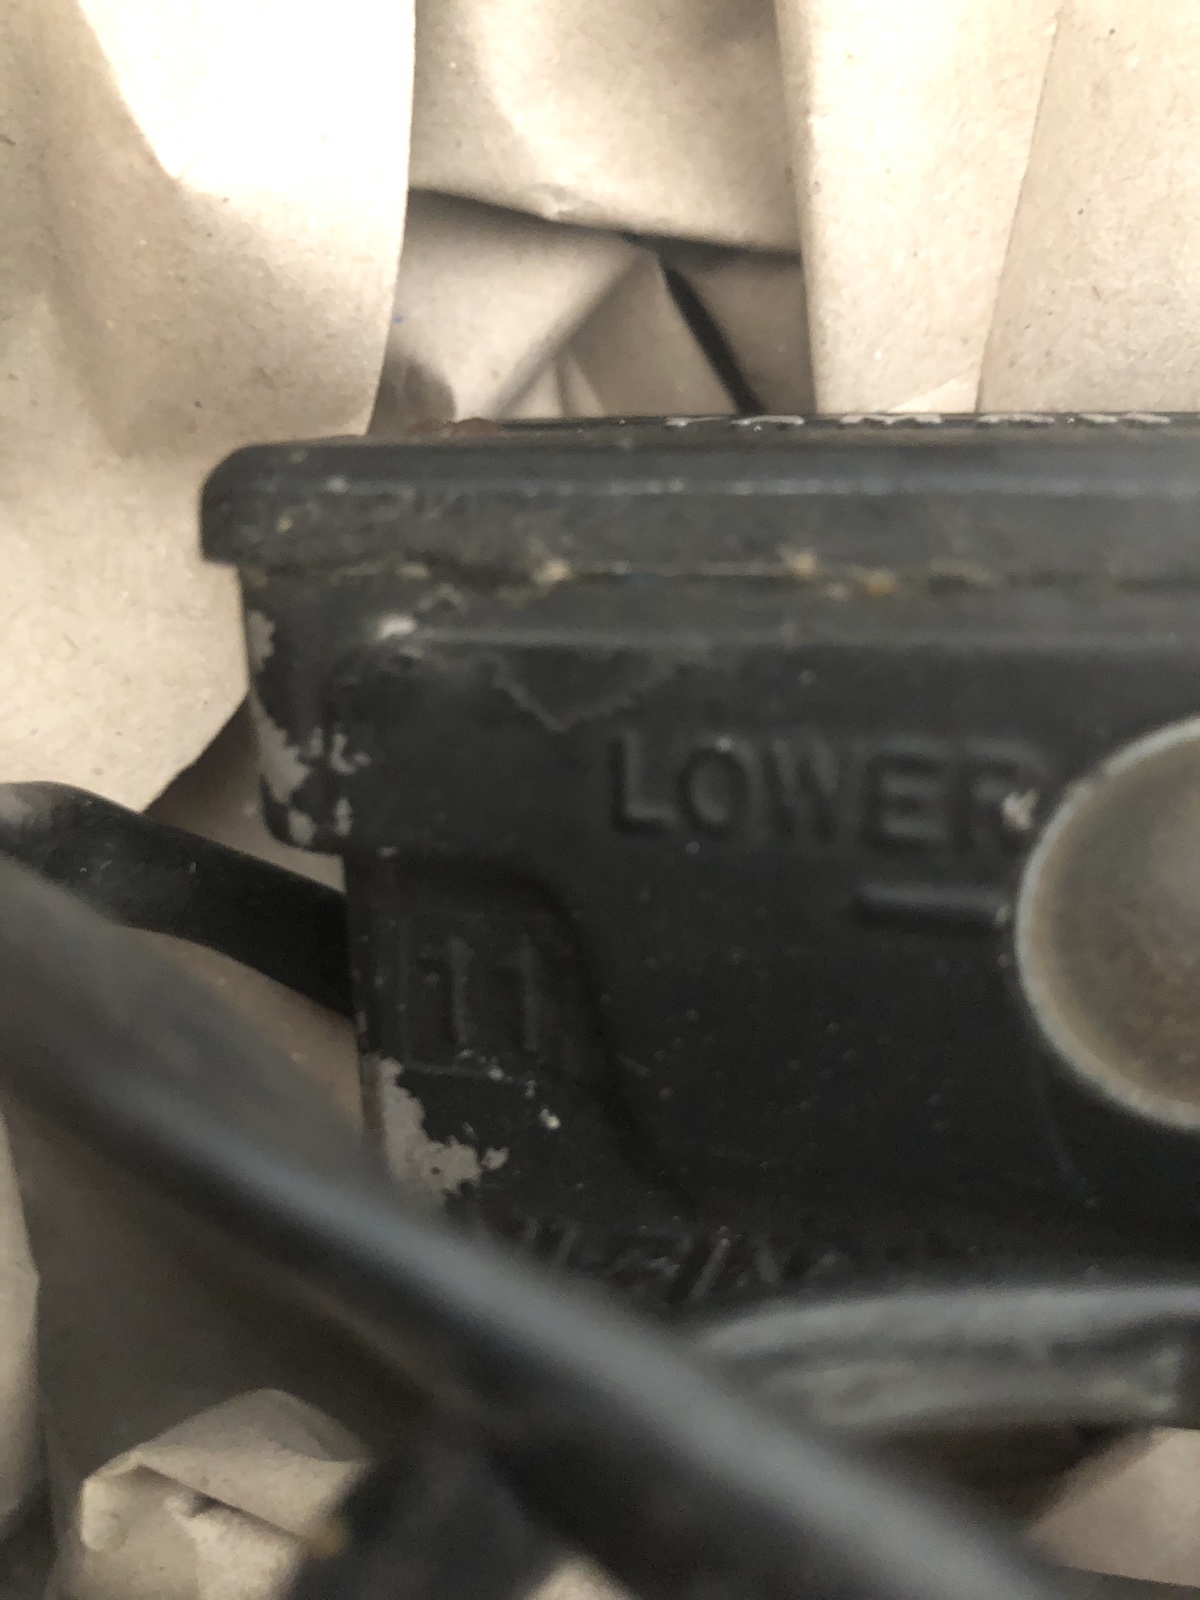
And here it is, the answer to the question: what else can you do? What we have here is a 1980ies vintage XT350, 55V brake pump. Looks pretty similar to the one fitted at the moment, except for this little "11" marking.

Which stands for 11mm brake piston diameter instead of 1/2" (12.5mm) and those 12 percent less diameter result in 12 percent more travel on the lever, but also 12 percent more clamping force on those brake pads. 

Unfortunately this isn't a genuinely new idea or in other words, these pumps are pricey. So much so that at the current rates, four pumps would cost the same as the bike. Which in turn means, I went for a rather affordable example. It wasn't affordable without a reason, the lid has got some road rash, the bolts holding on the lid are hopelessly rusted and obviously the original brake lever pivot bolt was replaced with the "box-o-random-nuts'n'bolts" finest. 

Not that this ever stopped me from anything really. A bit of heat and a bit of penetrant got both the old mirror mount and the bolts off the lid open. The latter admittedly with the help of a bit of Newtonian persuasion.

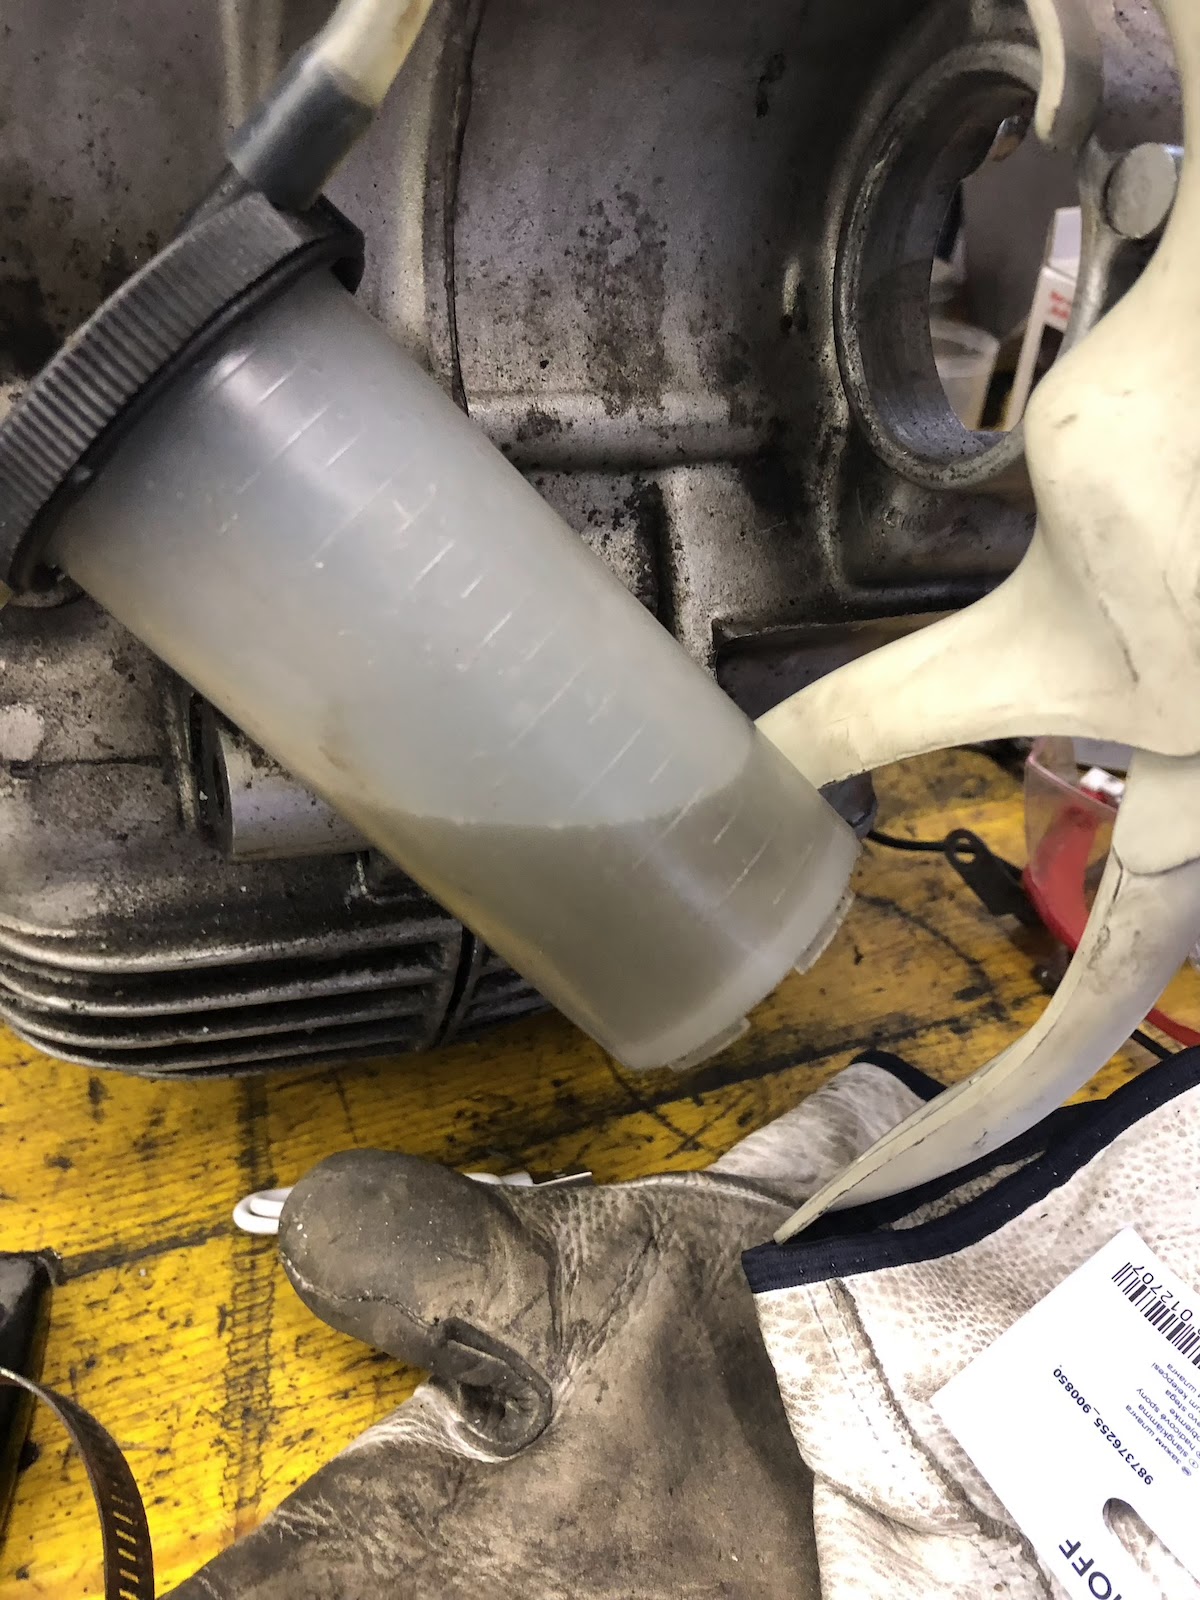
The brakefluid in the reservoir had turned into something rather nasty.

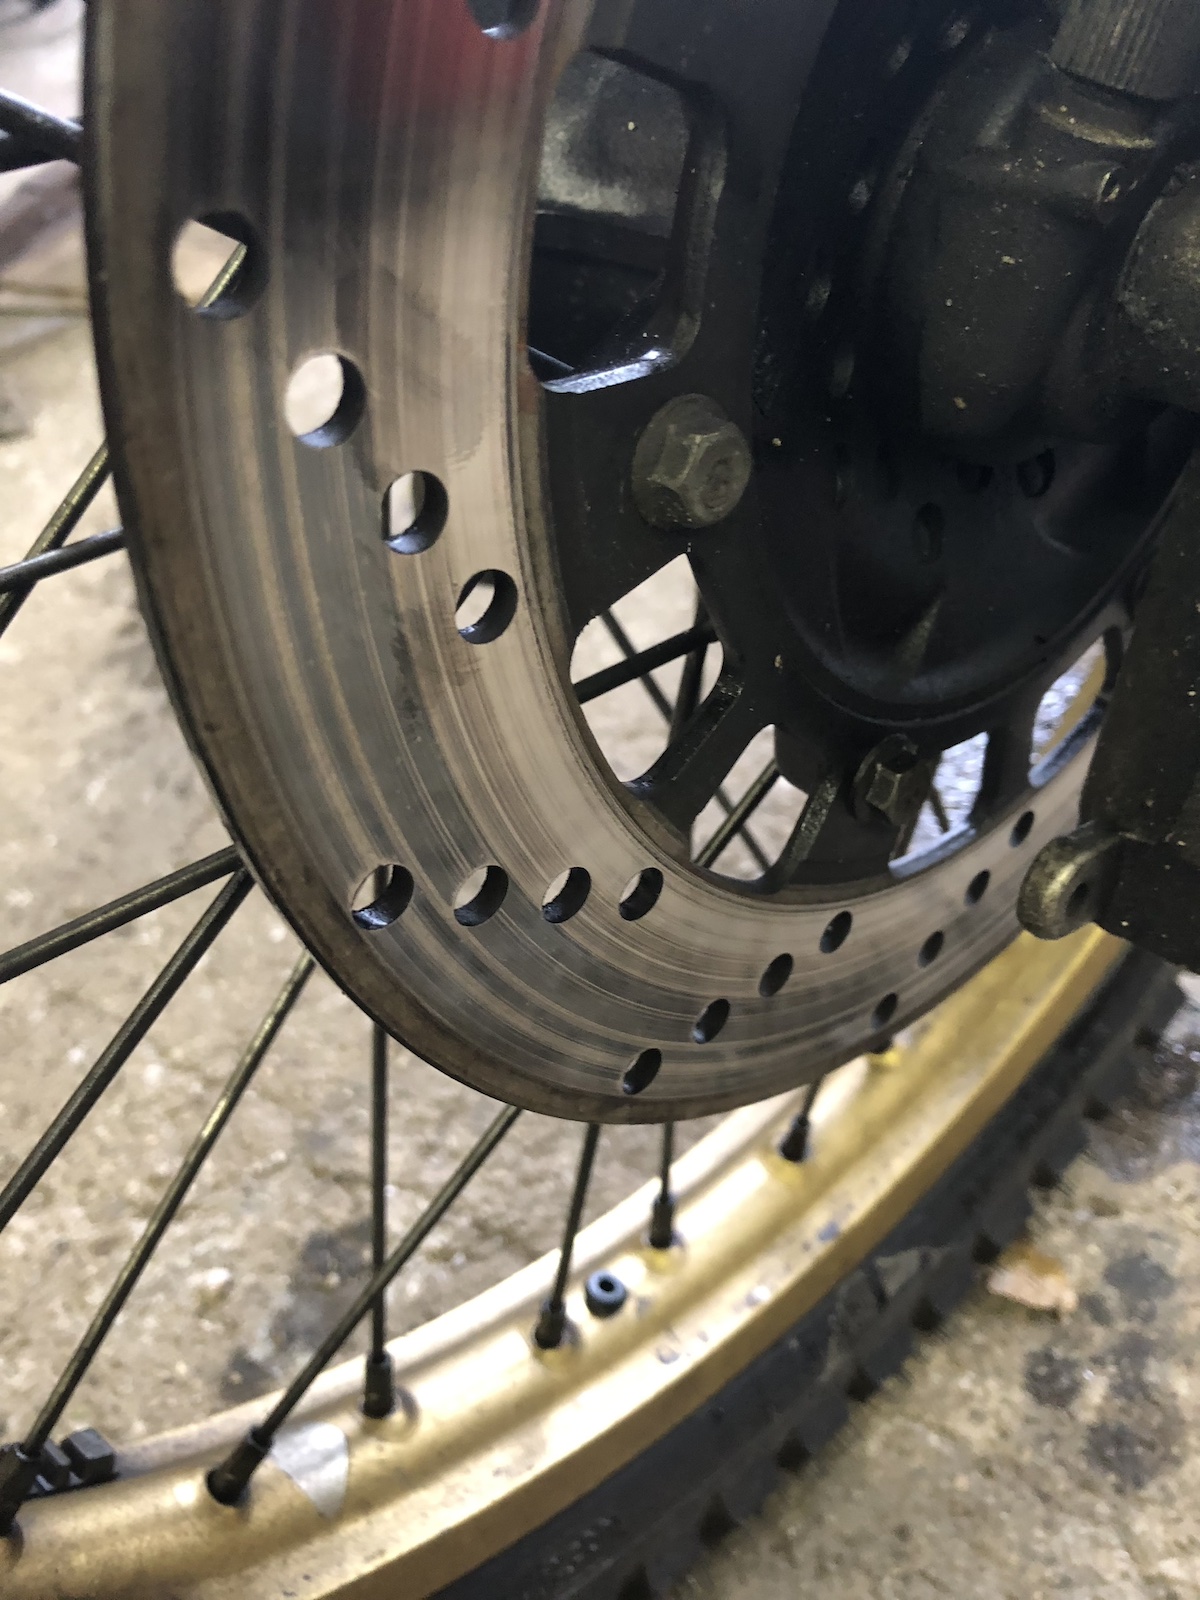
Some decent bolts and a new(-ish) brakeline later, brake performance was at bluing the disk levels and that was still with a set of glazed pads. 


As is already somewhat custom, the sightglass wasn't just a bit dull, but completely blind. So I drilled an 8mm hole into the plastic, well I tried as the "glass" crumbled away and then levered out the backside metal shield and knocked the remnants of the glass out with a drift. This also meant that the outer metal ring was pretty much unsupported and I could easily pry it out with a flat blade screwdriver.

As there's a very convenient hump on the inside, the new glass was pressed in with a set of parallel-jaw pliers in absolutely no time.

And with the mirror and the handguard reinstalled it looks pretty much as it did before. 

Verdict: can't recommend enough to do this mod. In fact 1984 and 85 models would have come with a variant of exactly this brake master cylinder, so strictly speaking on the very first Teneré model (34L) and perhaps the very first XT600 (43F) models, it would actually be the right tool for the job. Unfortunately it was too cold and icy to really test out what the new setup can do, but with a set of half decent (i.e. not glazed) pads I bet it can work wonders. 

ADDENDUM: With the temperature being in the double digits above zero in the last few days, I had a go on the Dre-XT-Stück, really just running some otherwise rather bland errands, but boy oh boy does the old girl brake now. She even did her first (little) stoppie at a traffic light today.

Sunday, 8 October 2023

Dre-XT-Stück - head(er)s or tails

Let's assume you have a bike that is working (moderately) fine and it even has a stainless steel aftermarket header installed. What would you do? Obviously you would leave it the hell alone, especially as there are plenty of other issues that have to be tackled in other areas. But as the TT600 header will not bend the headstuds (as much) and is generally a lot nicer... Also I put the port for the wideband AFR probe at a very vertical angle, which is good for the wideband sensor, but bad for my right leg as the plug will touch my leg ever so slightly. 

With all that in mind I marked a good/better location for the port.


What followed next is probably best described with it being the equivalent of a frontal assault on the castle gate, but with step drills and a die grinder. In short, on large diameter tubing this would quite literally just be a job of poking a relatively round hole and call it a day, but on this comparatively small diameter, it's more of an oval than anything else. Then again, if the hole is somewhat neat, welding is an absolute breeze. 

Admittedly cheating a bit, with pulsed TIG welding here to limit heat input and using the plug as an additional heat sink, but that came out lovely.

With the exhaust back in place, I reinstalled the plug with PLENTY of copper grease, just to be sure it wouldn't seize in the bung. 

... and with the wideband installed just to check fitment. Bit difficult to get it started, but once it is in, it's in. 

With the sensor installed, it would be kind of rude to not put it through its paces and check the AFR-values with the current setup (stock exhaust). Yes, compared to a modern EFI bike the XT is running a tad on the rich side, but this is also in part to help with internal cooling. (One can jet it leaner, but will then have to face the thermal consequences.)

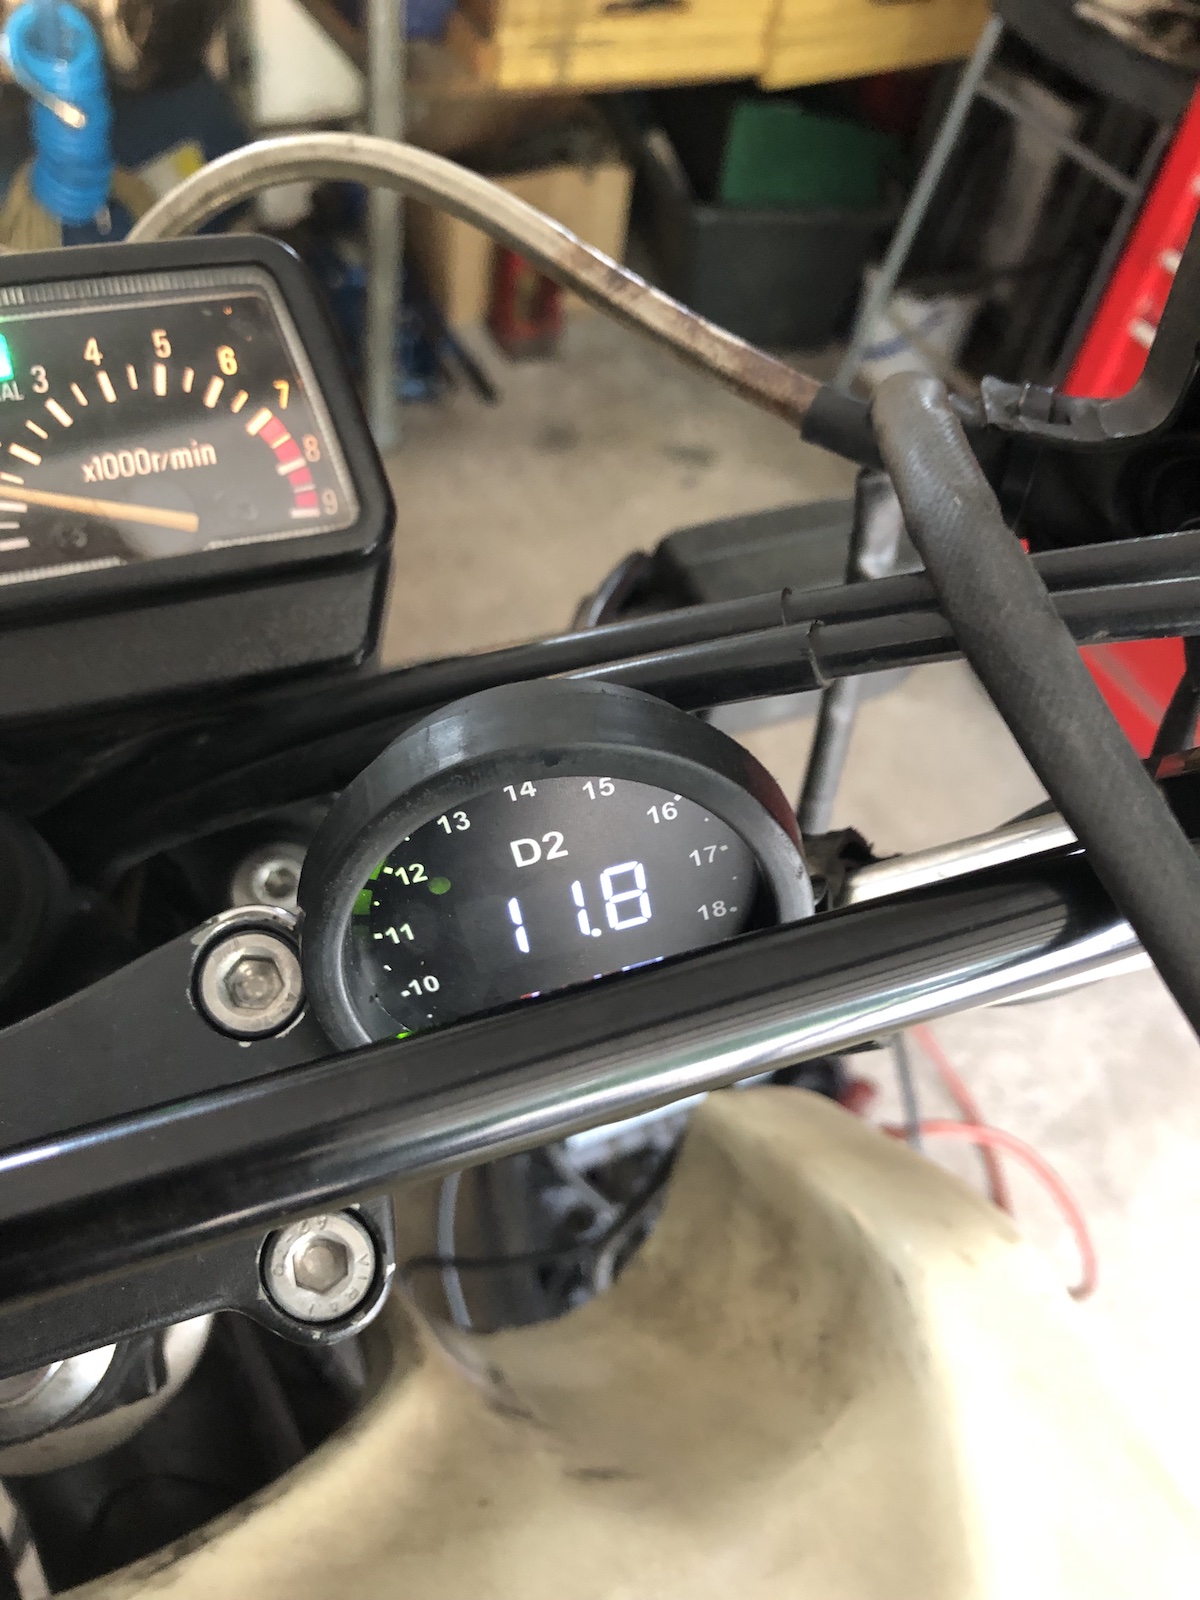
Idle - starts great with it being slightly on the rich side, after rejetting lately, high 11s appears to be the sweet spot for brilliant hot and cold starting.

Approx. 1/4 turn on the throttle "running on the needle" as the old-timers would say - going lean here helps with fuel economy as this is actually where you end up most of the time when riding on the road.

Probably 1/3 to 1/2 throttle - the dip towards lean is a bit of an oddity that is necessary on XT600s, because up to roughly this point you only run on the left (slider) carb. If you jet it richer, you will have one hell of a time once the second carb opens.

Wide open throttle - aiming for 12:1, which is on the rich side, but again the Dre-XT-Stück is based on a 43F and thus has no oil-cooler, so jetting it on the rich side is mandatory to avoid big problems, when I have my moments and want to see how much she can do.

 In the not too distant future a very similar post will come up, as the AFR values shown here were photographed, when the ignition was playing up REALLY bad and thus the last four paragraphs you just read are technically worthless, as I jetted a bike with an ignition that was running without any ignition advance. 😛