
... or got head?
There is an inherent risk of burning out the right exhaust valve due to the way auto-decompression system is operated on XT600s. If the auto-decompressor-cable is maladjusted (too tight) the exhaust valve won't be able to fully close again. If you're lucky this only burns out the valve, if not... well see below.
But first a bit of an overview - in general there's two big families of cylinder heads on 4 valve XTs. The ones with one bolt on the camchain tunnel and those with two, generally being referred to as earlier and later models. As I mostly only care about the earlier heads (and there's more variants of those), these are the ones I will go into more detail.
If you live in Austria or any other country (mostly in Europe) that during the 1980ies taxed bikes over 500cc heavily, you will encounter this first head, marked 5Y6 and was originally meant for the japanese XT400-version of the XT550. These sport the smallest inlet and exhaust valves of all XT heads and are actually too small even for 500s to make reasonable power.There's a 5Y1 version, which is the one originally found on XT550ies these should have slightly bigger ports and valves and I honestly wonder, whether they are the same casting or not.

The next group are the early XT600 and TT600 (up to 1987) heads, marked as 34L (if coming from a XT600) or 34K (if coming from a TT600). These sport 36mm inlet-valves and 31mm exhaust-valves. Allegedly the TT600 heads are slightly different in terms of port shape and as they come from TT600s, they are quite a bit more rare. These are considered to be the weapon of choice if you aim for a more midrange-oriented build in your engine.

And lastly the full blown max. power version is the head marked as 1VJ, coming from the very first Tenere models. Yamaha increased the valves by another mm, which allowed the old engines to breathe a lot better at the top end. If you want to have that one fastest XT600 in your local pub, this is the head for you. It doesn't come without some downsides, especially at low rpm the bigger valve size can be felt adversely, even when compared to a XT500 4-valve. But on the top... let's just say I properly broke the ton on an otherwise completely stock 1VJ with a freshly rebuilt engine.

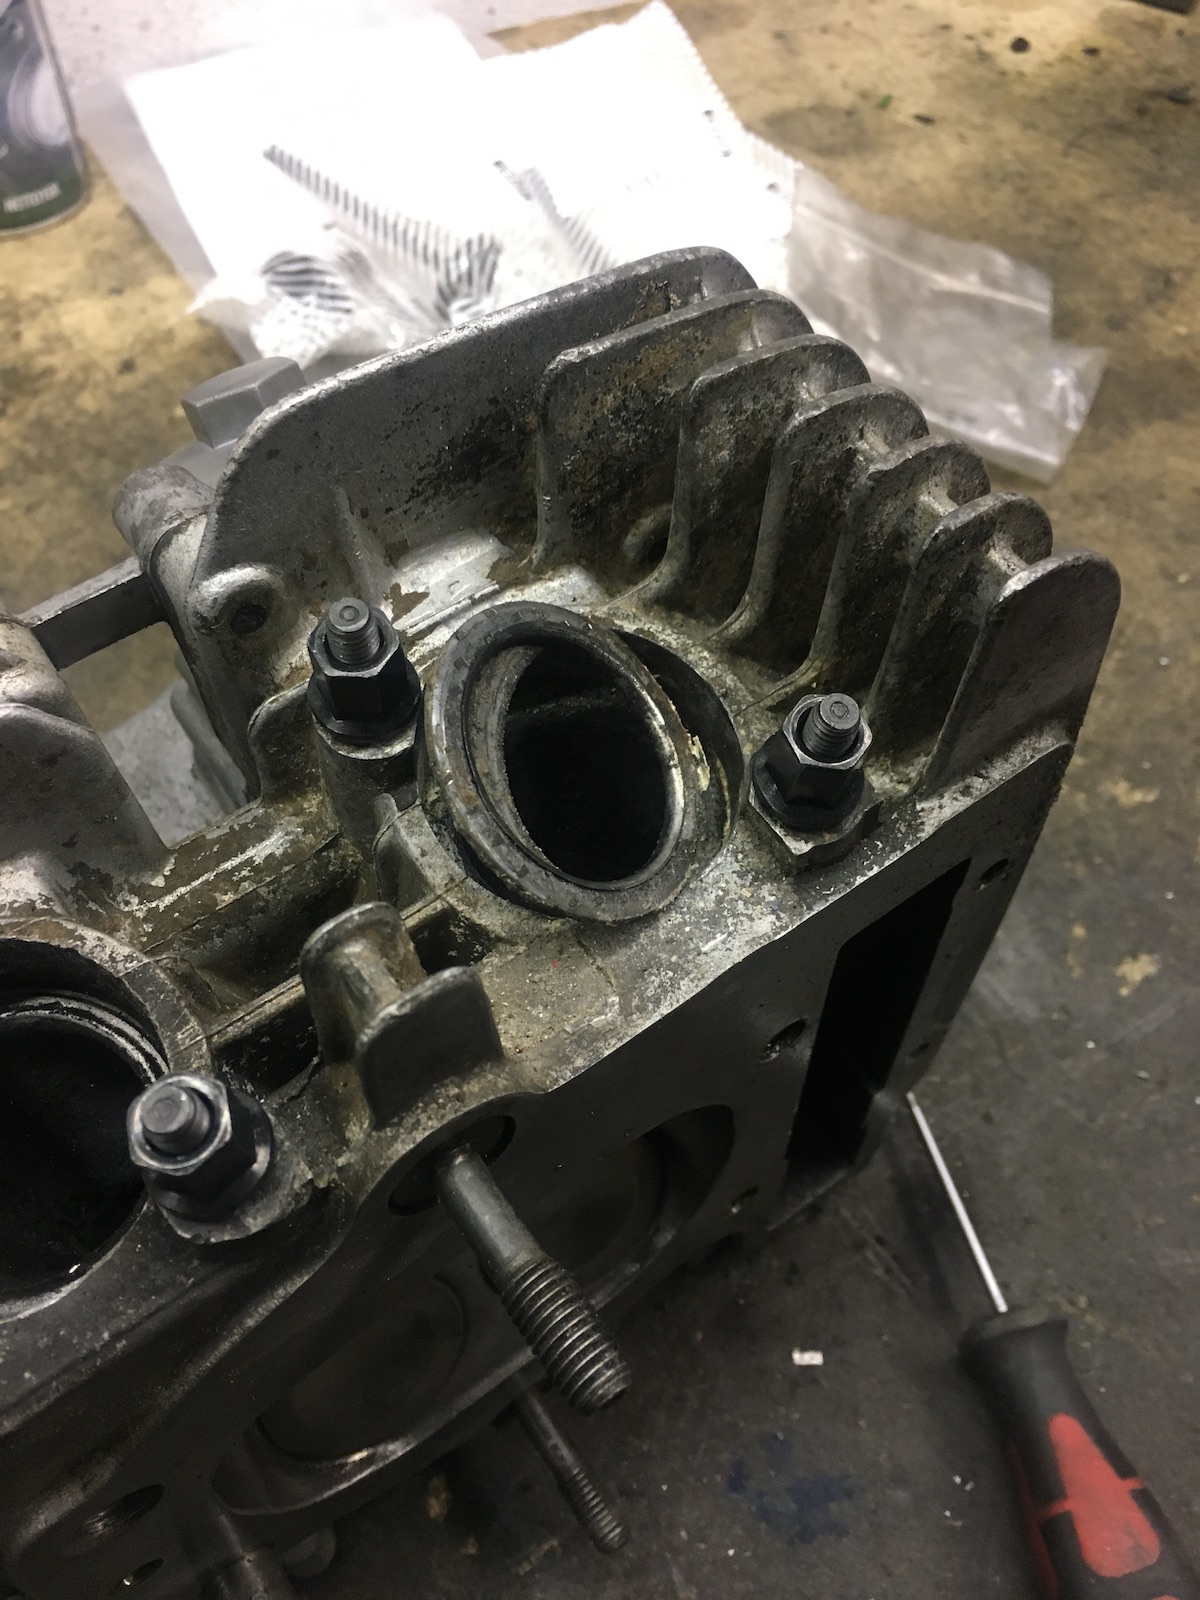
A while ago in preparation for this engine rebuild, I went ahead and bought the 34K-head you already saw above. It looked fairly decent - cam and cam-bearing surfaces were good, rockers were good and the outer appearance was a bit weathered but nothing cracked or broken off. In such a case the first step to properly assess the situation is to clean up the combustion chamber to see if there's any visible damage like cracks from one valve seat to the other or towards the spark plug.

Gasket remover spray and a nylon wirebrush work wonders, if you're a bit patient and let the gasket remover soak in for the odd hour or two.

So the head didn't show any cracks (the carbon deposits will remain in those after a normal cleaning, making them very easy to spot) and as such the next task was to clean up all the mating surfaces. Again a bit of gasket remover and a nylon wire brush make it a nicer (yet still not very pleasant) job. Then again, it pays off in the long run, when the engine is properly oiltight.


If needs must, a bit of scotch-brite (or the like) can go a very long way to clean up the last remaining bits stuck to the surfaces.

With the cosmetical side tackled, one of the most often overlooked bits in an overhaul like this is the valve adjusters. Originally they are ground to a spherical shape on the tip, but usage will over time create flat spots or actual flat traces, making a lot more difficult to adjust the valve play correctly and if you're unlucky and you now run an adjust 90 degrees to it's previous wear pattern, you will actually encounter premature wear on the adjusters. Additionally they're cheap as chips really and it's one less thing to worry about.

One of the cool things with old (and abused) hardware is always the kind of stuff you find, when cleaning them up. I guess someone was following the age-old principle: when one gasket doesn't seal, two probably won't either.
With all of this lovely cleanup being done, it was time to turn my attention to the valves and their respective valve seats... If you ever dropped a valve in an engine, you worked out that, if you hit a valve spring hard enough so that it binds up, there's a good chance that the collets can come unstuck. With a gentle hand (i.e. a big hammer) and a sparkplug socket that's one hell of a quick way to get the valves out.

Now the secret of the oily ports has been discovered rather quickly - valve stem seals shouldn't just loosely sit on top of the valve guides.
And then it was nasty-discovery o'clock.

The valve seat was completely cracked from overheating due to the auto-decompressor cable not letting the valve close fully. Most likely once heated up it would also come loose and the valve hammered it back into it's seat and breaking off bits in the process.
As a result I have ordered a spare (used) head, another 34L just as the one, which is currently installed on my engine - wish me luck that it won't come with the same fault. Whilst waiting for it, I'll quickly take a spare 1VJ head apart and have a look inside. It shows some slight signs of oil-starvation in the past, but it could still be salvageable - a bit of micrometer-measuring work will (hopefully) reveal the truth.
No comments:
Post a Comment